General Settings
The General Settings page is where you connect 3 Clicks Cloud to Xero and set the defaults that drive how purchase order bills are created and updated. Use it to authorise the OAuth connection, choose account and payment defaults for new bills, turn automation on or off for shipment completion and order cancellation, and run Supplier Sync to link suppliers to Xero Contacts.
These settings apply across the tenant once the Xero integration is enabled. Configure them before pushing orders or enabling bulk sync so finance teams review consistent bill behaviour from the first sync.
Quick Check - Before You Start
- Confirm Site Settings > Integration > Xero access and that Enable Xero Integration is turned on.
- Sign in to a Xero account that can authorise the correct organisation.
- Note the Default Account Code you will use from your Xero chart of accounts (for example,
310). - Agree with finance whether bills should auto-submit on shipment completion or remain in DRAFT for review.
- Review supplier records in Site Settings > Company > Suppliers before running Supplier Sync.
- Review Account & Tax Mappings and Payment Terms Mapping before production sync.
Site Settings > Integrations > Xero 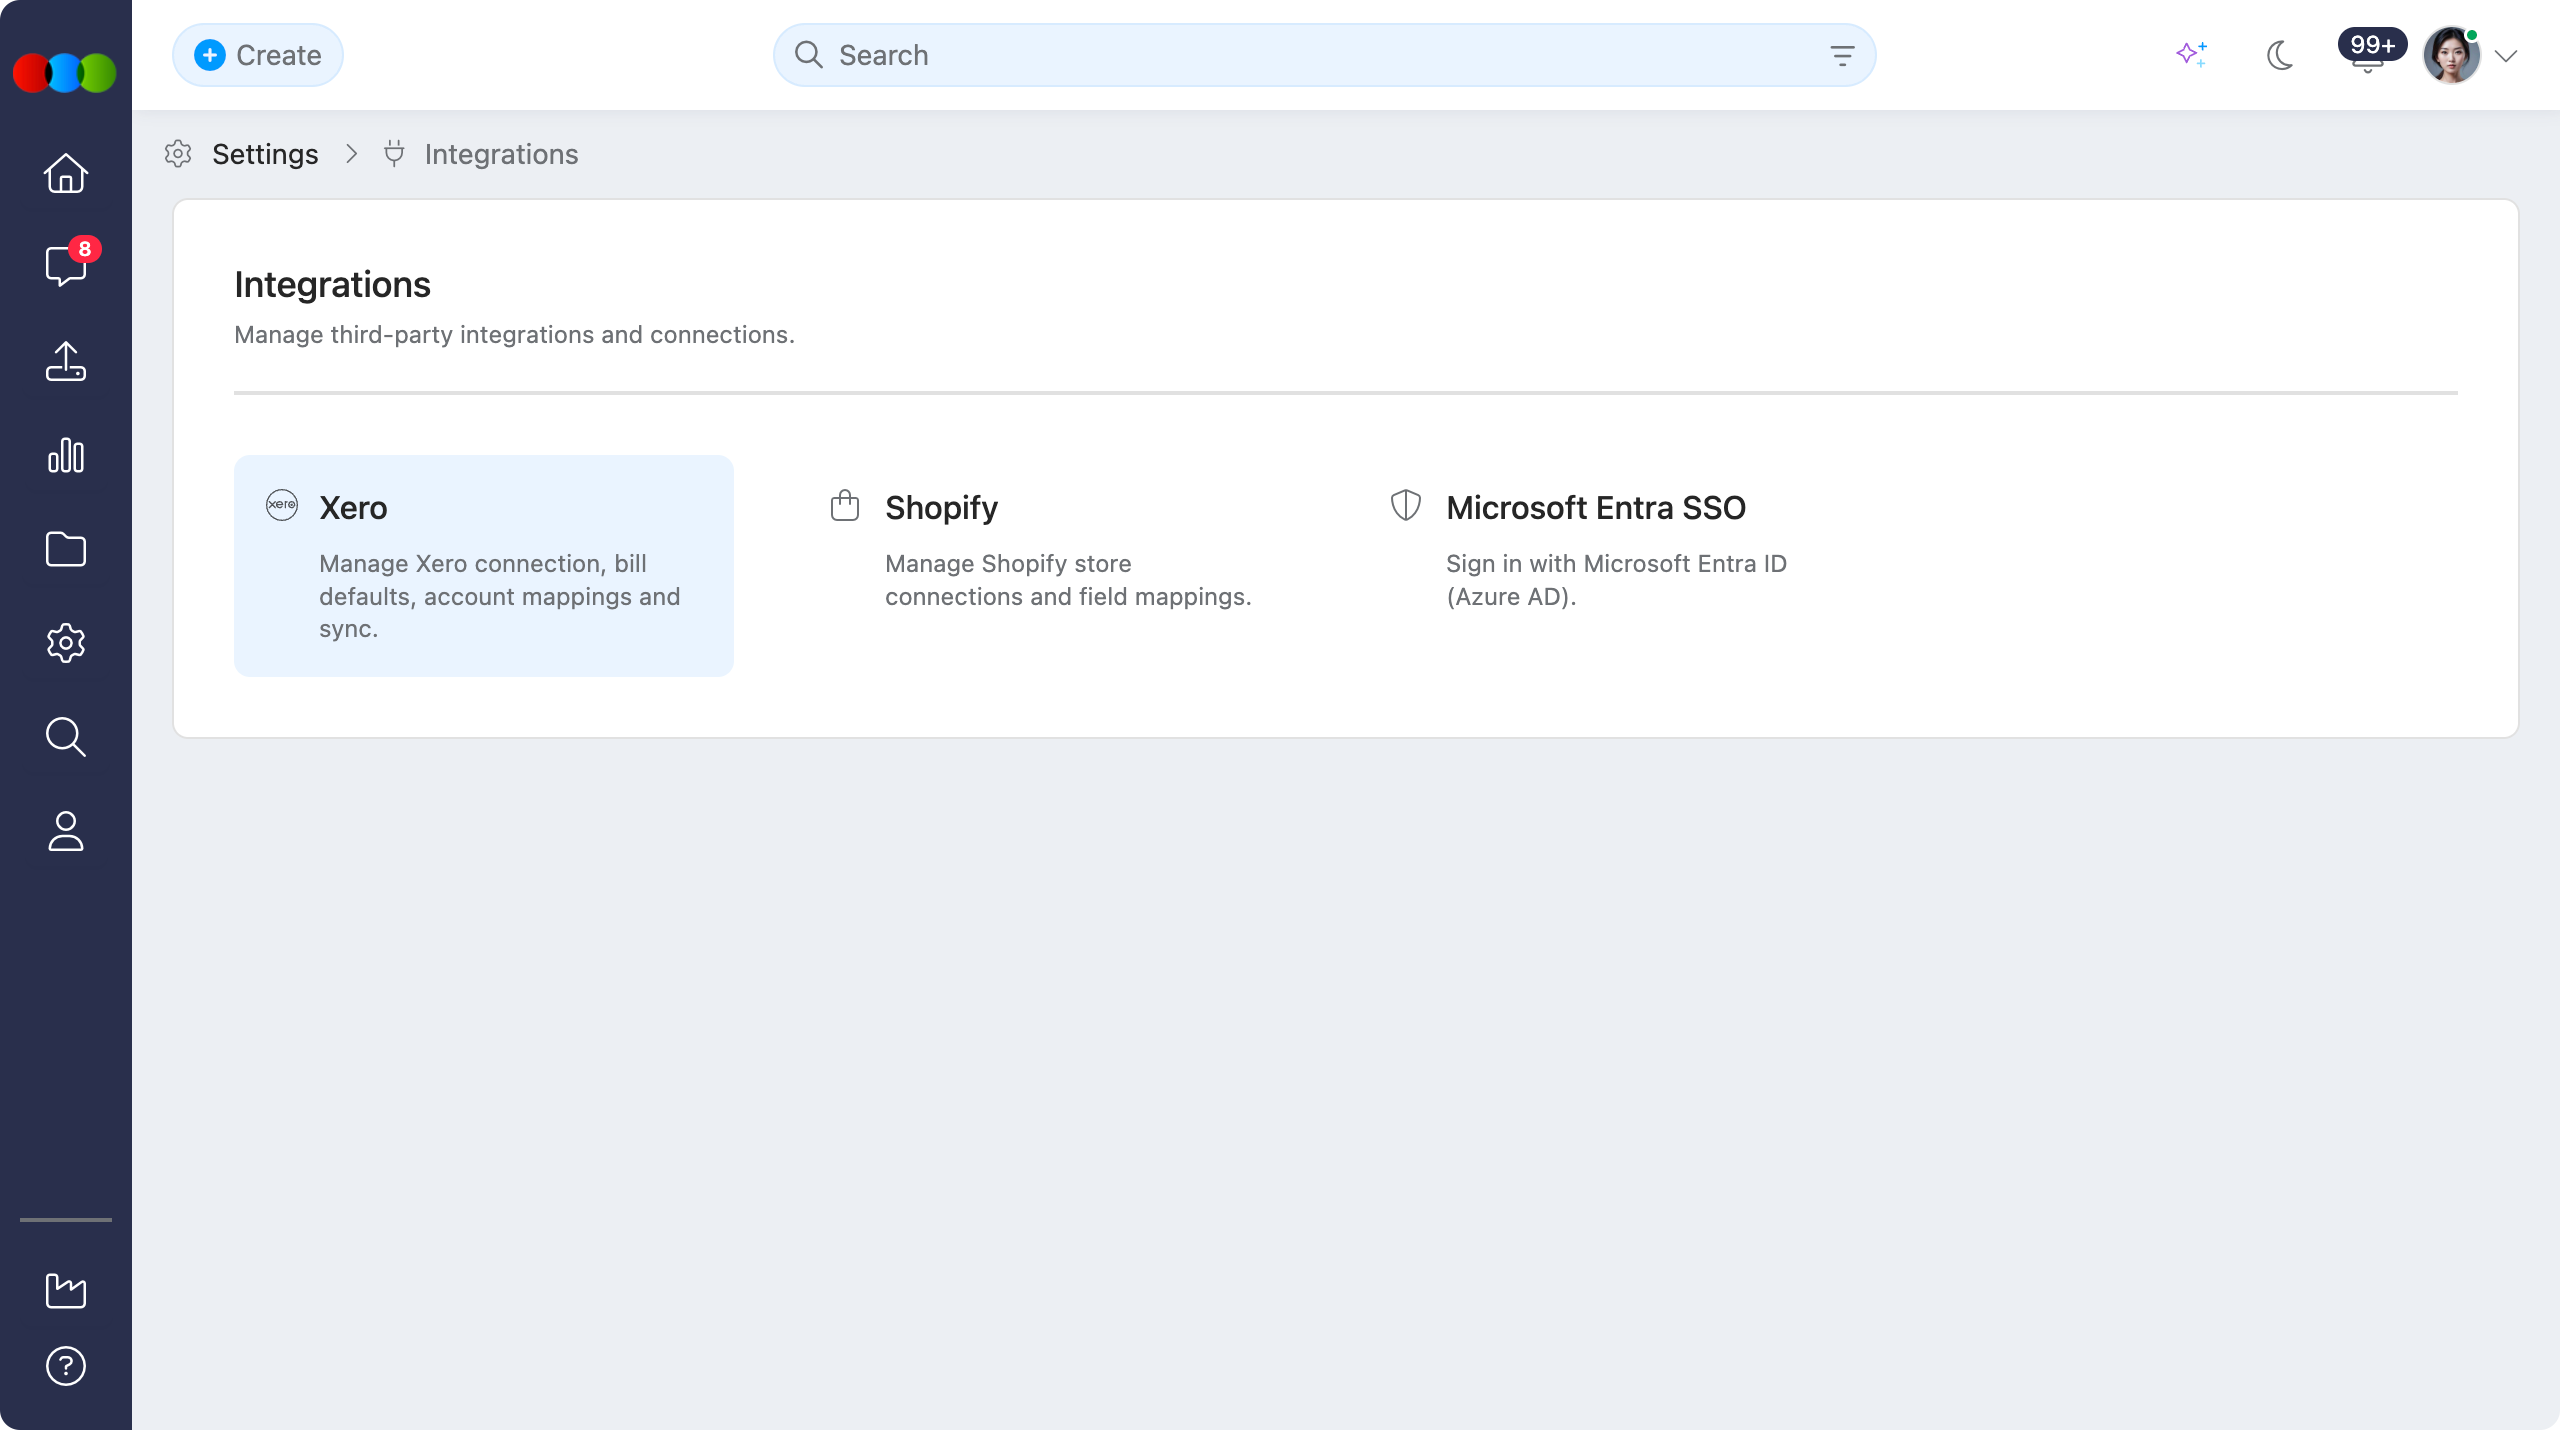
Open General Settings from the Xero integration page:
Integrations > Xero > General Settings 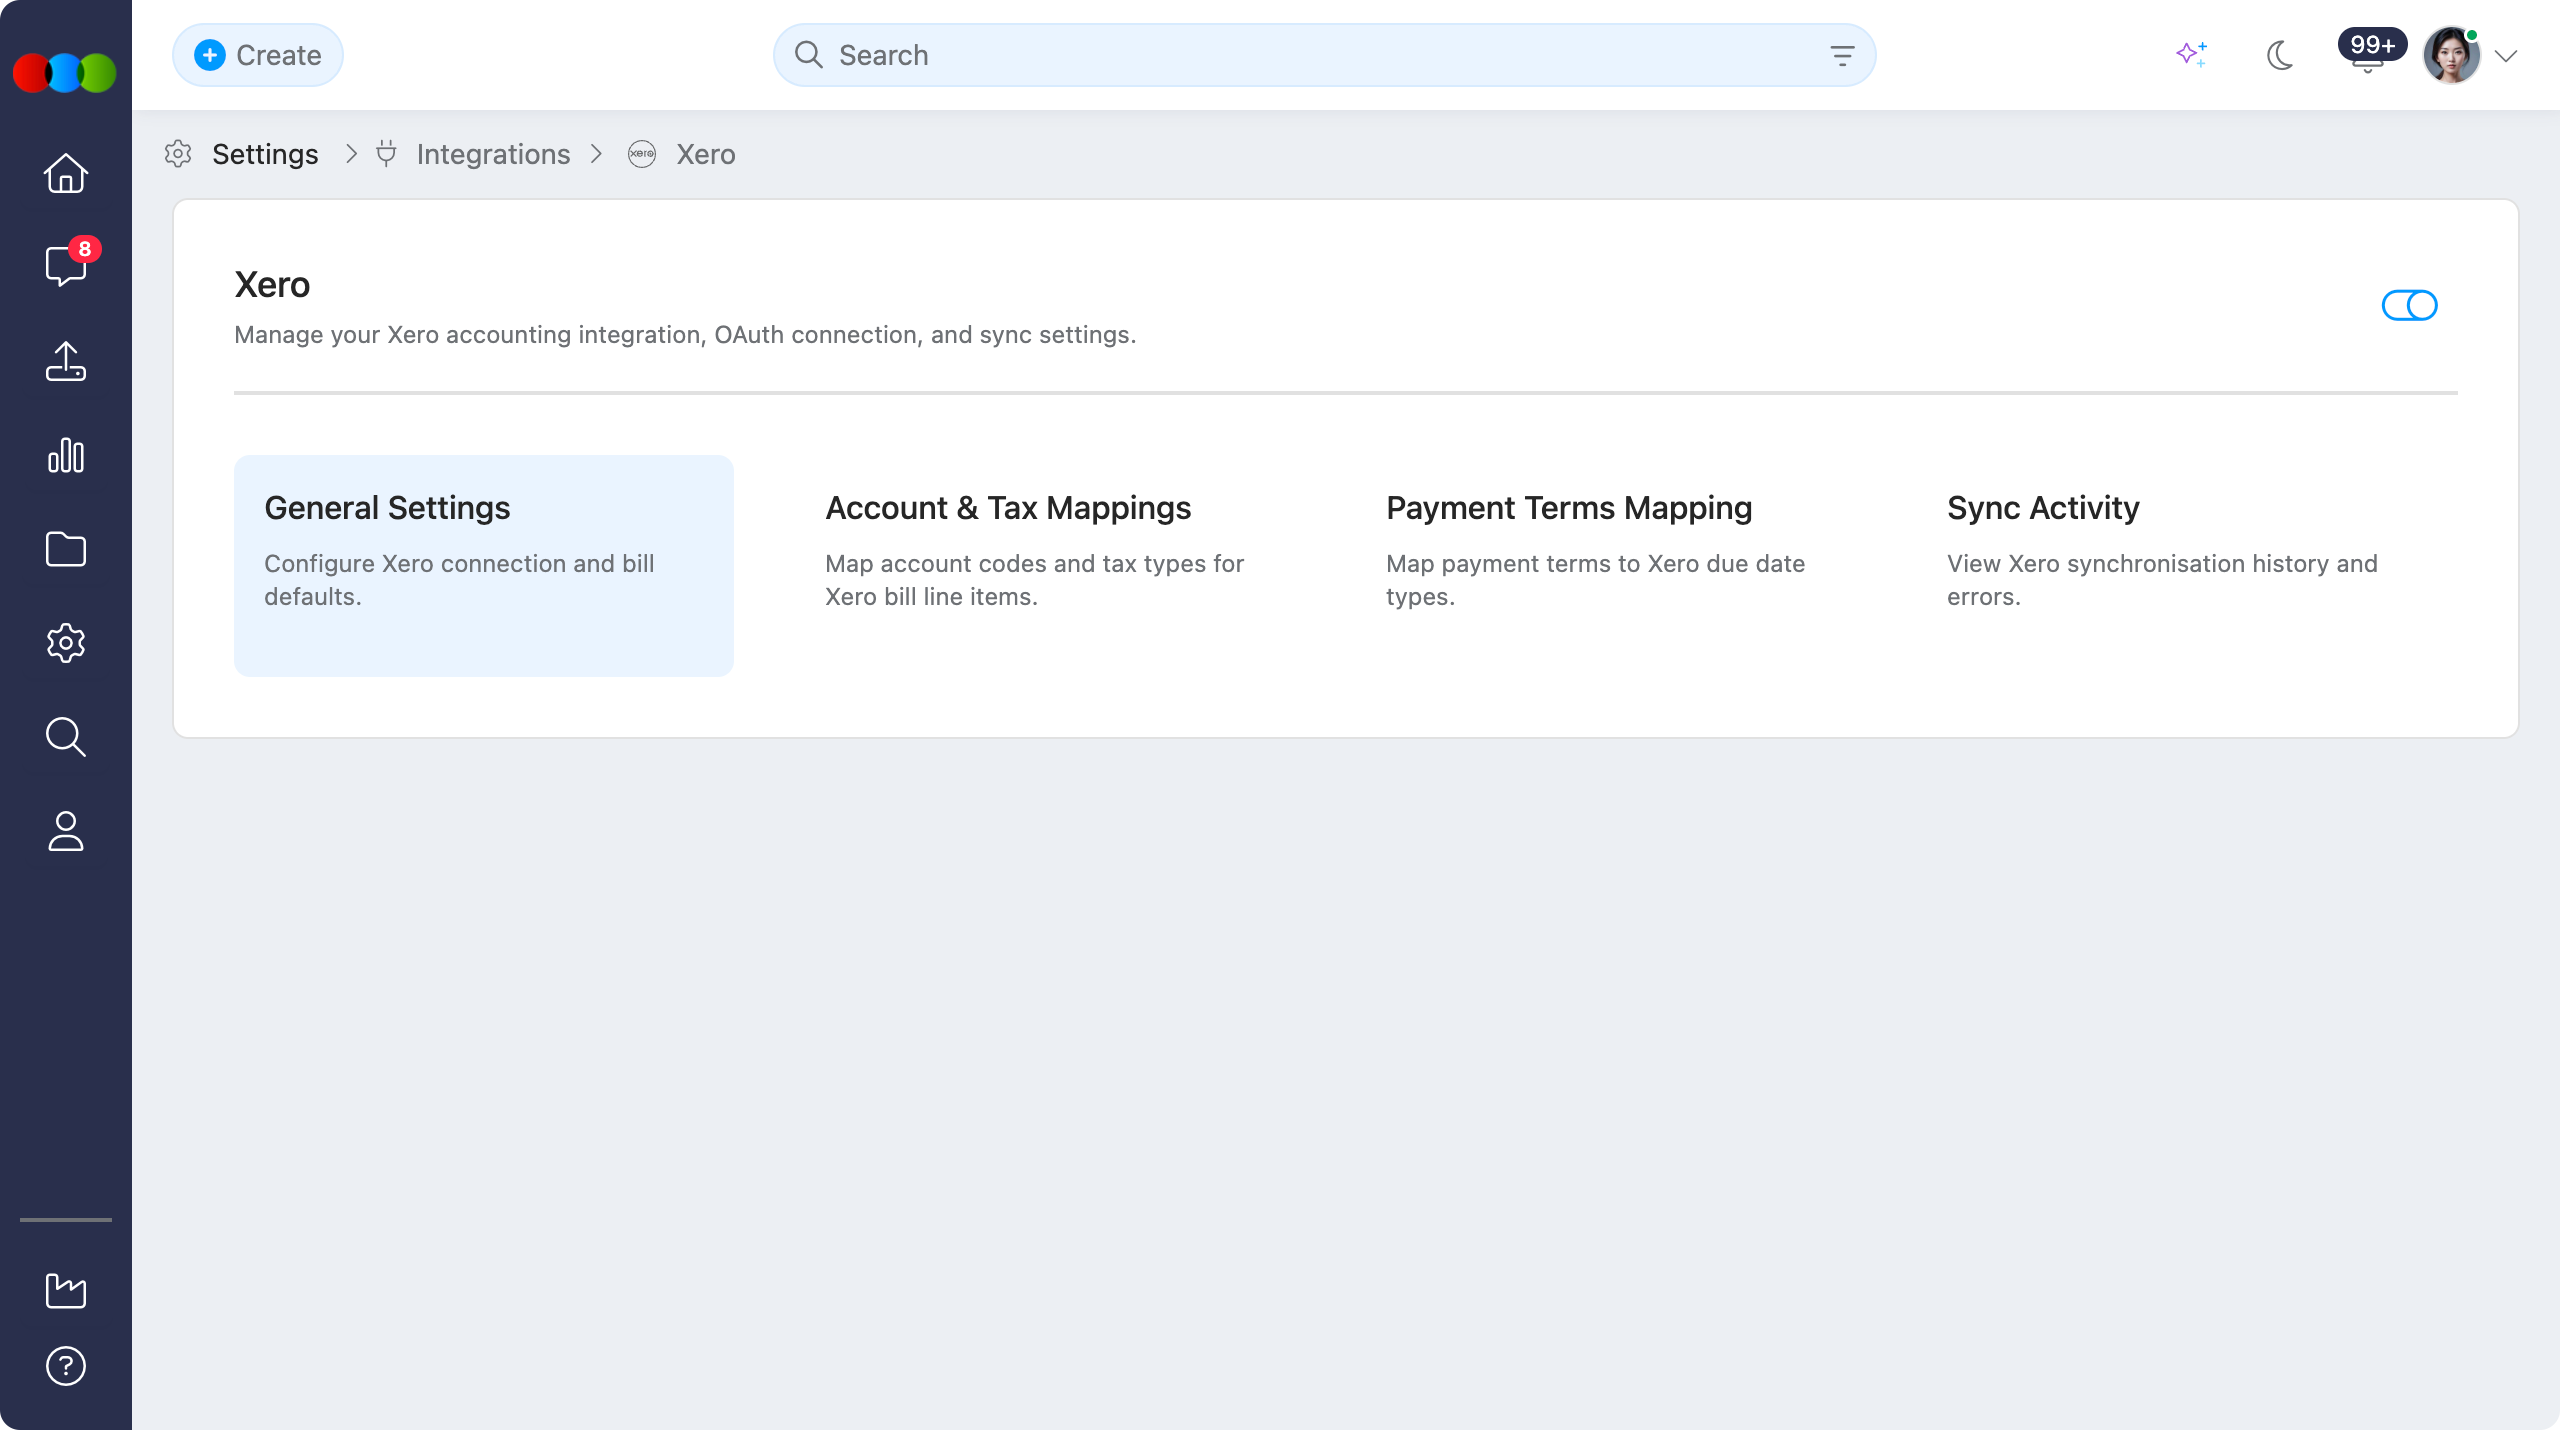
Connection Status
Connect or disconnect your Xero organisation from this section. The connection status shows whether 3 Clicks can access Xero, which organisation is linked, and when the connection was established.
Connect to Xero
| Step | Action |
|---|---|
| 1 | Go to Site Settings > Integration > Xero > General Settings. |
| 2 | Click Connect to Xero. You are redirected to the Xero authorisation screen. |
| 3 | Sign in to Xero (if required) and select the correct organisation. |
| 4 | Review the requested permissions, then click Allow access. |
| 5 | Return to 3 Clicks and confirm the status shows as connected, including the Xero organisation name and the connection date. |
Connect to Xero
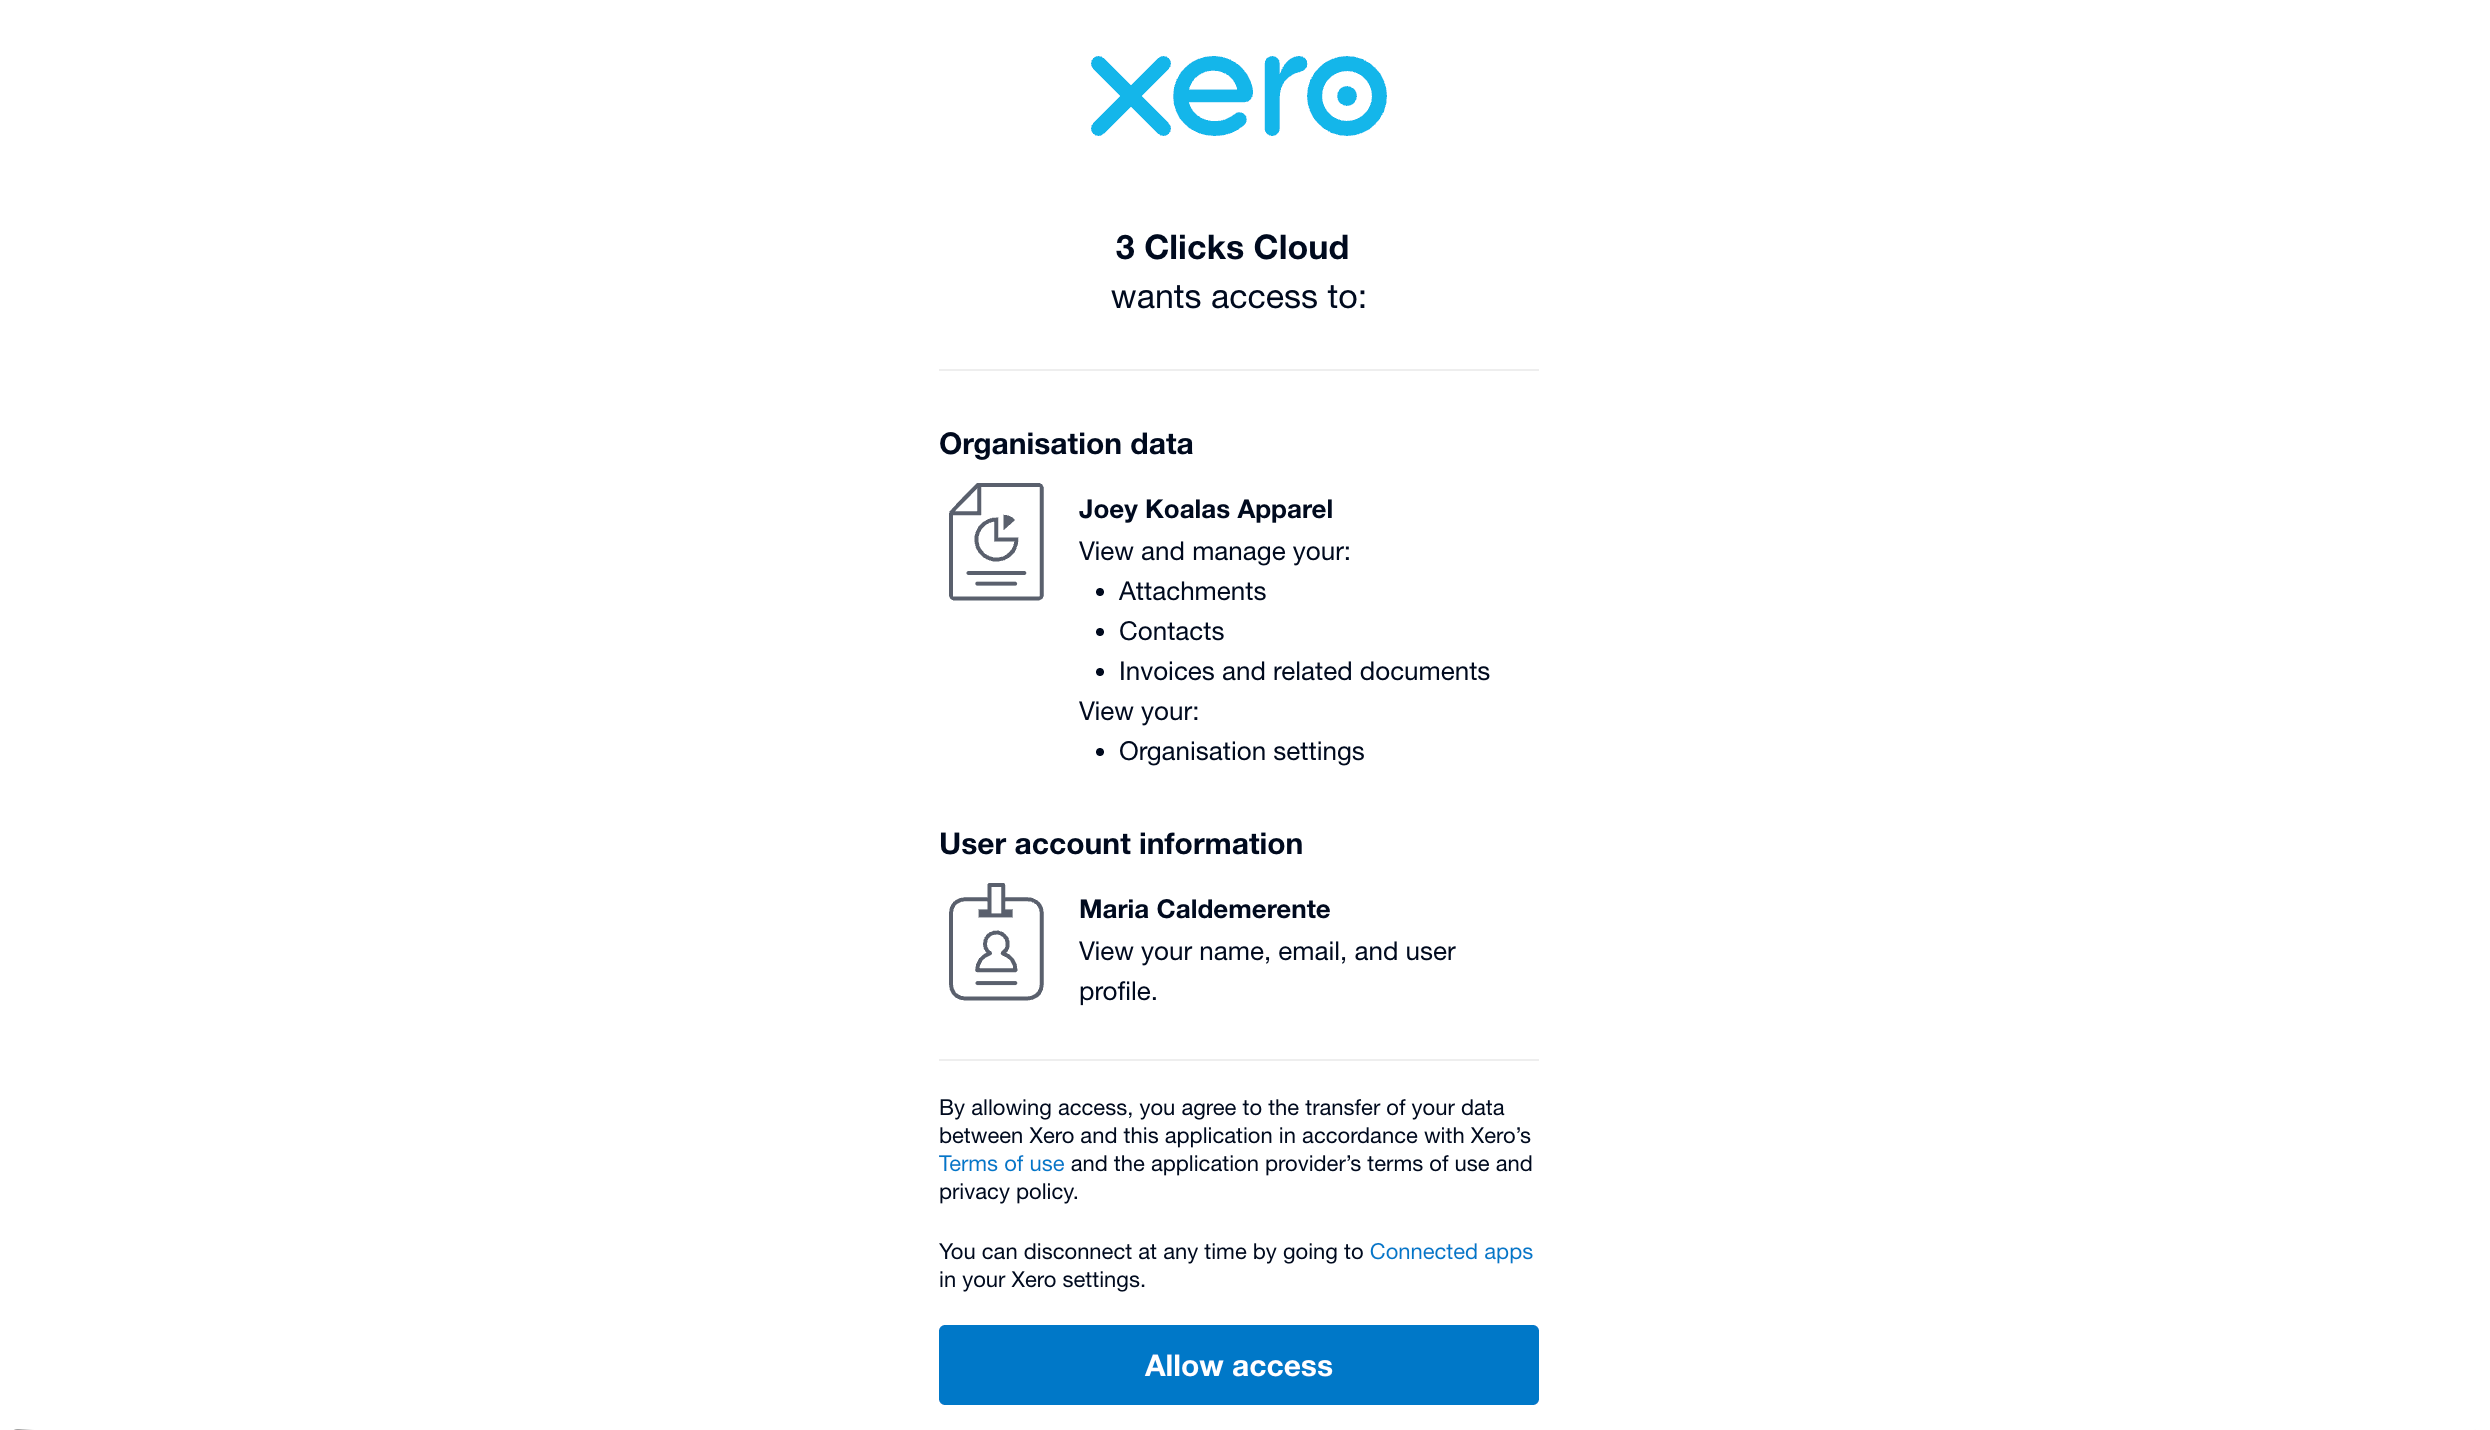
Permissions requested
3 Clicks Cloud requests access to view and manage Attachments, Contacts, and Invoices and related documents, and to view organisation settings and your Xero user profile. You can revoke access later from Connected apps in Xero settings.
Disconnect from Xero
| Step | Action |
|---|---|
| 1 | In Connection Status, click Disconnect. |
| 2 | In the confirmation dialog (Are you sure you want to disconnect from Xero?), click Disconnect to confirm, or Cancel to keep the connection. |
Xero > General Settings > Disconnect 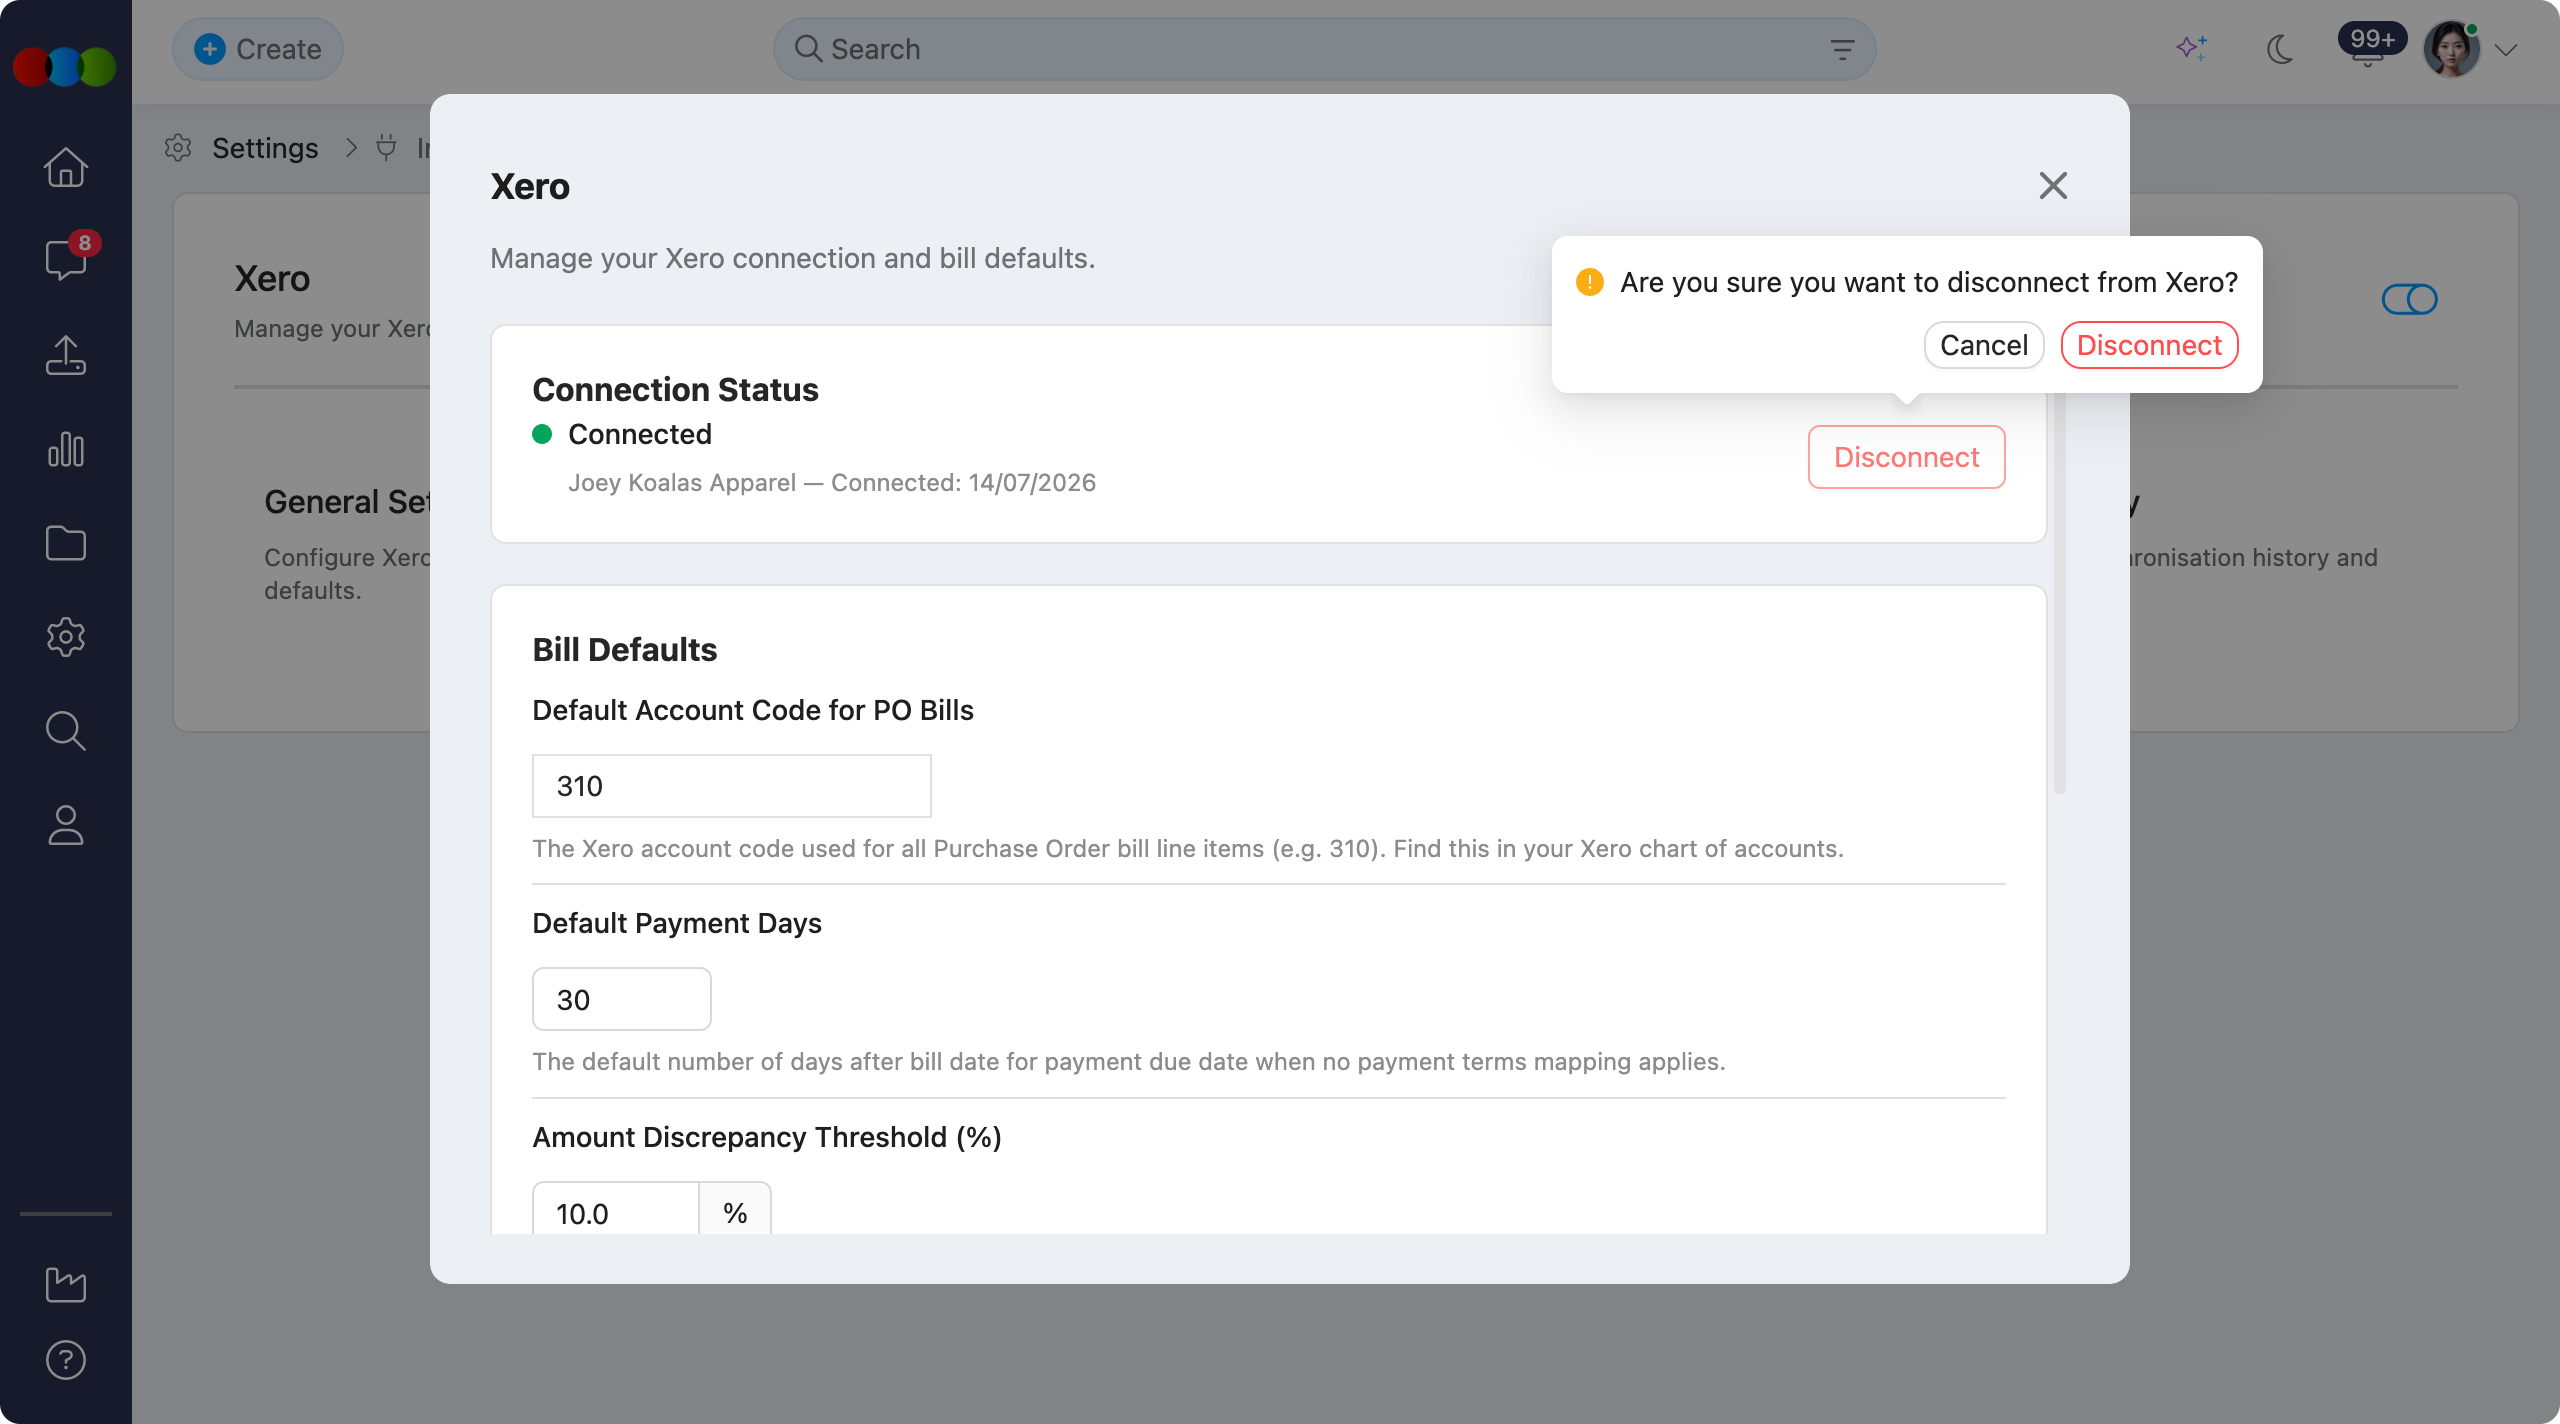
Common Pitfall
Disconnecting stops new sync activity. Existing linked contact and bill identifiers are typically retained so you can reconnect later without remapping every record. Confirm with your administrator before disconnecting a live organisation.
Bill Defaults
Configure the default values applied when purchase order bills are created in Xero. These defaults fill gaps when a more specific mapping is not available.
| Field | Description |
|---|---|
| Default Account Code for PO Bills | The Xero account code used for all purchase order bill line items (for example, 310). Find this code in your Xero chart of accounts. Override per line type through Account & Tax Mappings when configured. |
| Default Payment Days | The default number of days after the bill date used to calculate the payment due date when no payment terms mapping applies. Prefer setting Payment Terms Mapping for suppliers with known terms. |
| Amount Discrepancy Threshold (%) | Invoice amounts that differ from the purchase order total by more than this percentage are flagged as discrepancies. The default threshold is 1%. |
Xero > General Settings > Bill Defaults 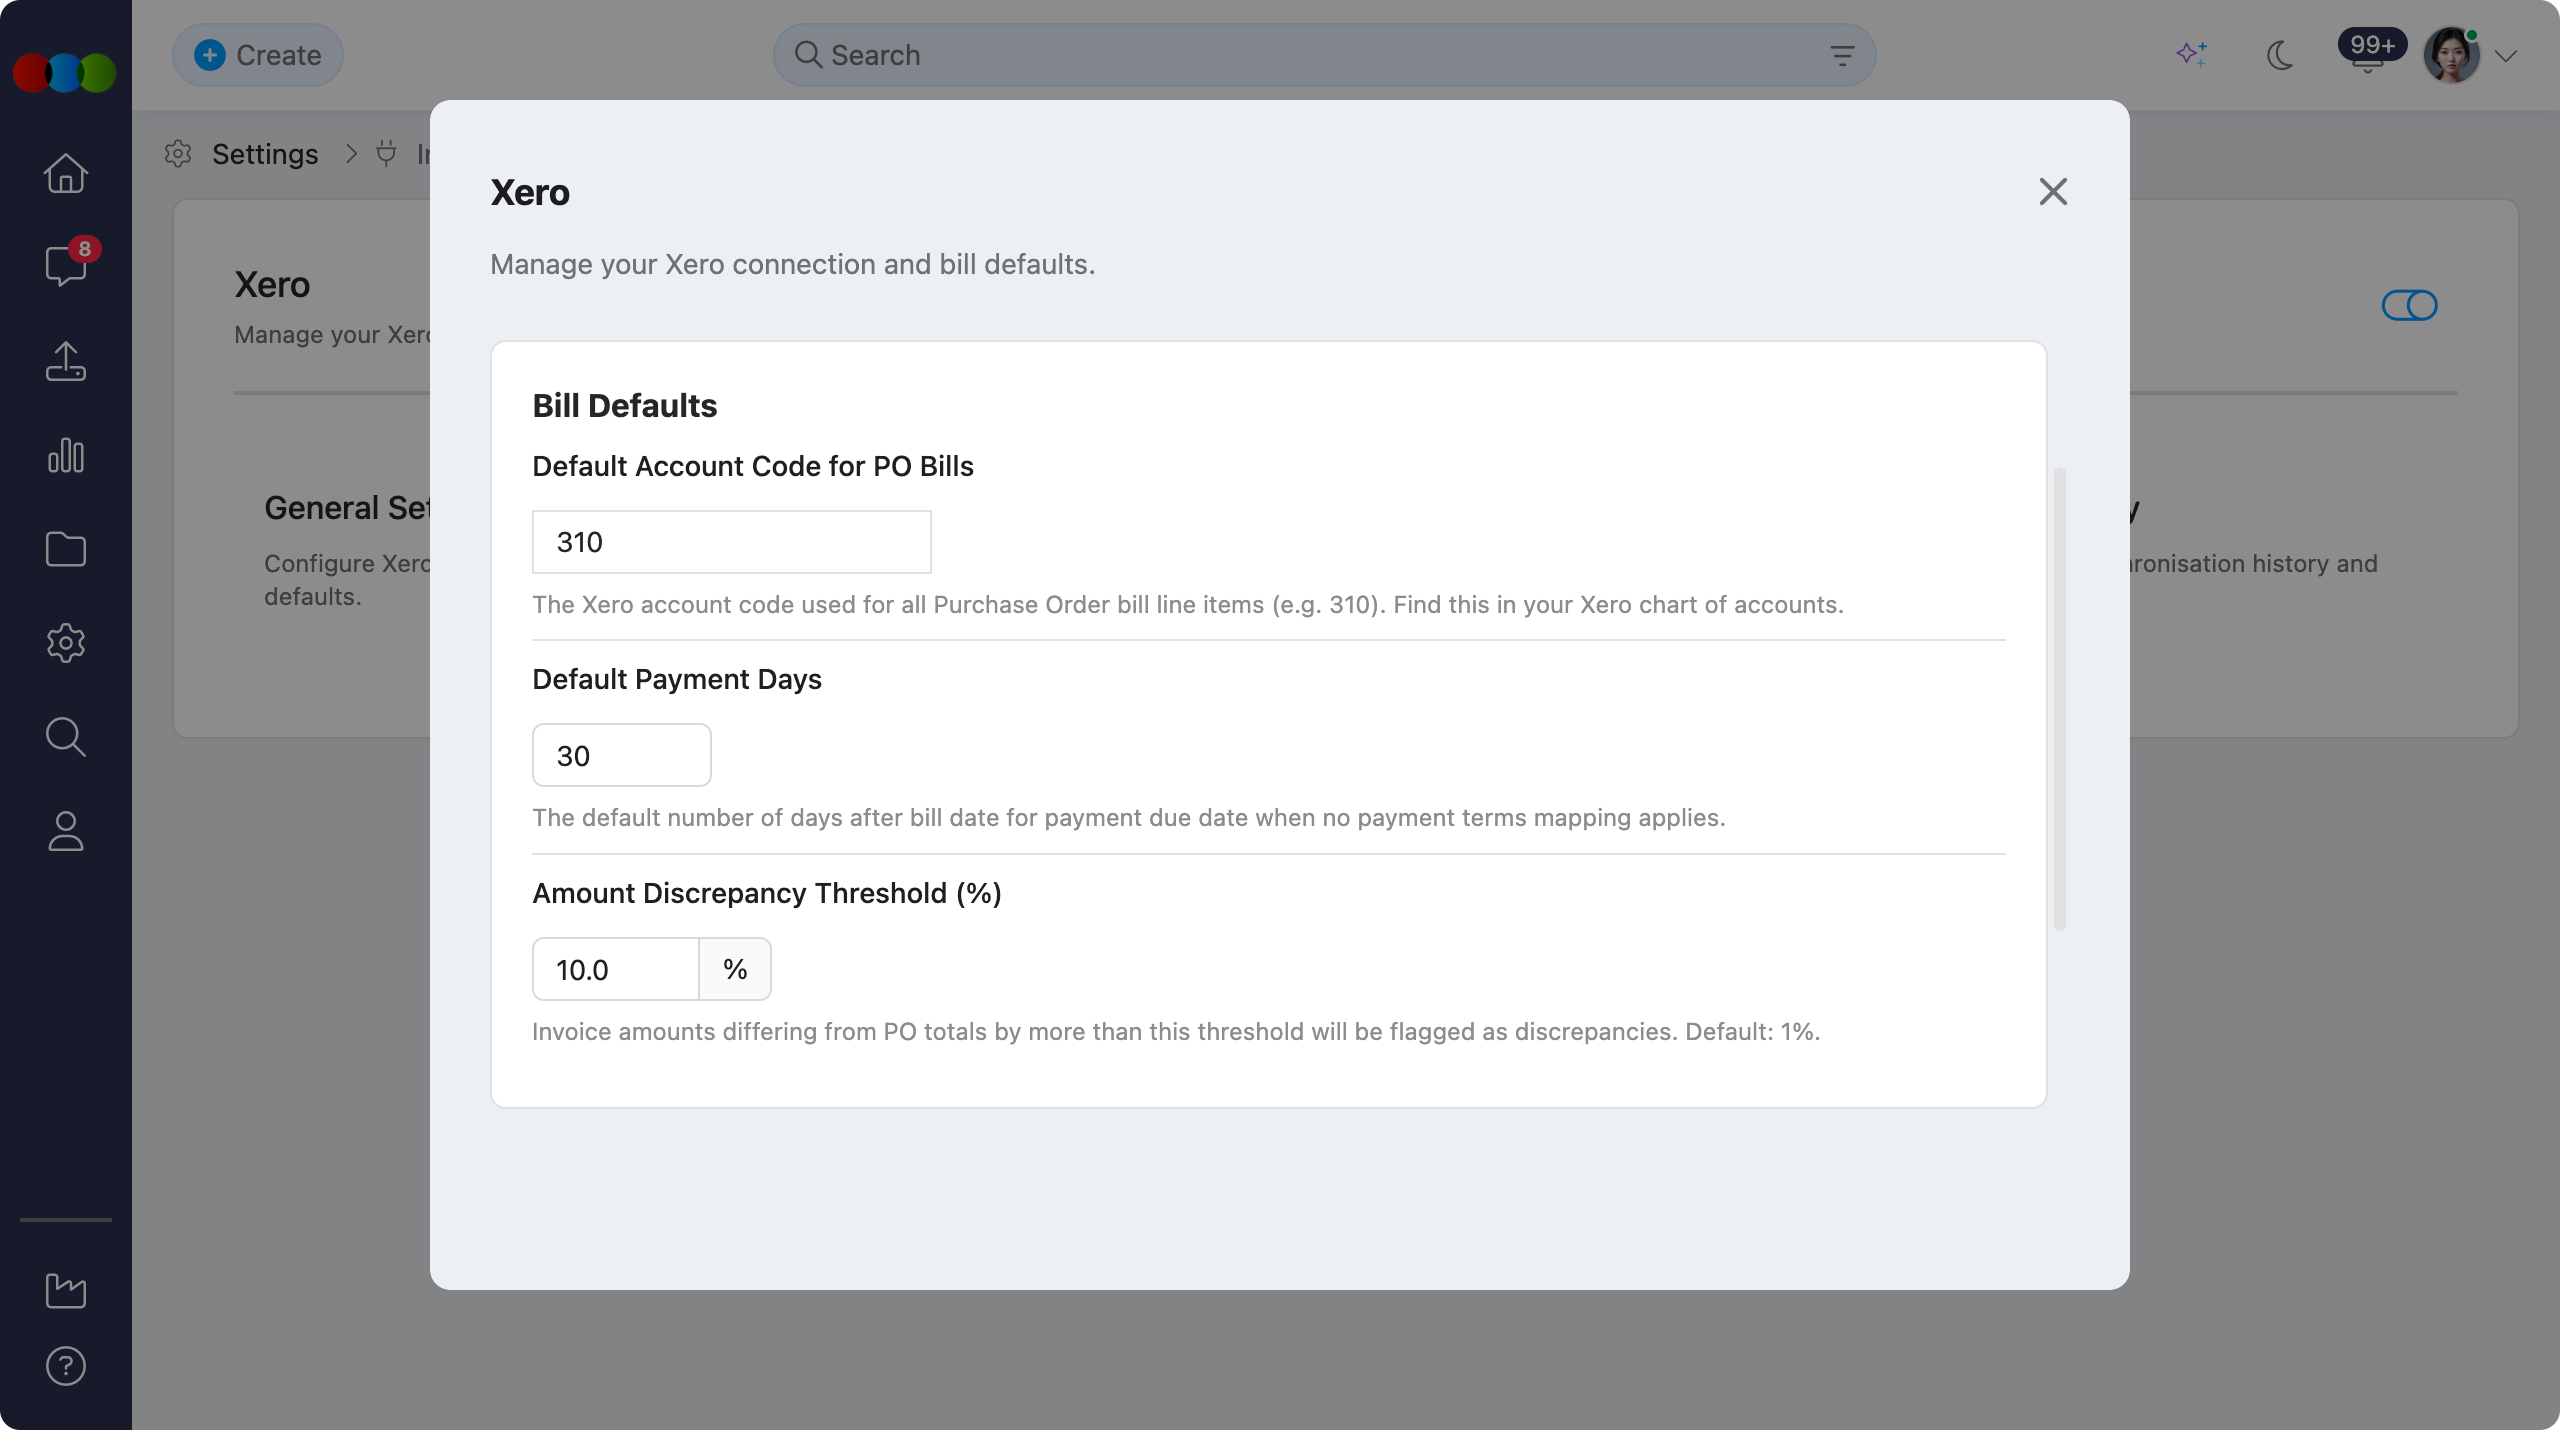
Pilot with a known account code
Enter a real account code from Xero before the first order sync. An invalid or blank default account code is a common cause of repeated bill creation failures.
Automation
Control whether linked Xero bills update automatically when shipments complete or orders are cancelled. Both options can be toggled on or off.
| Setting | Description |
|---|---|
| Auto-submit on Shipment Completion | When enabled, automatically transitions linked Xero bills from DRAFT to SUBMITTED when a shipment is completed. Leave this off if finance must review every bill before submission. |
| Void Bill on Order Cancellation | When enabled, automatically voids the linked Xero bill when an order is cancelled, but only if the bill is still in DRAFT or SUBMITTED. Authorised or paid bills are not voided automatically. |
Xero > General Settings > Automation 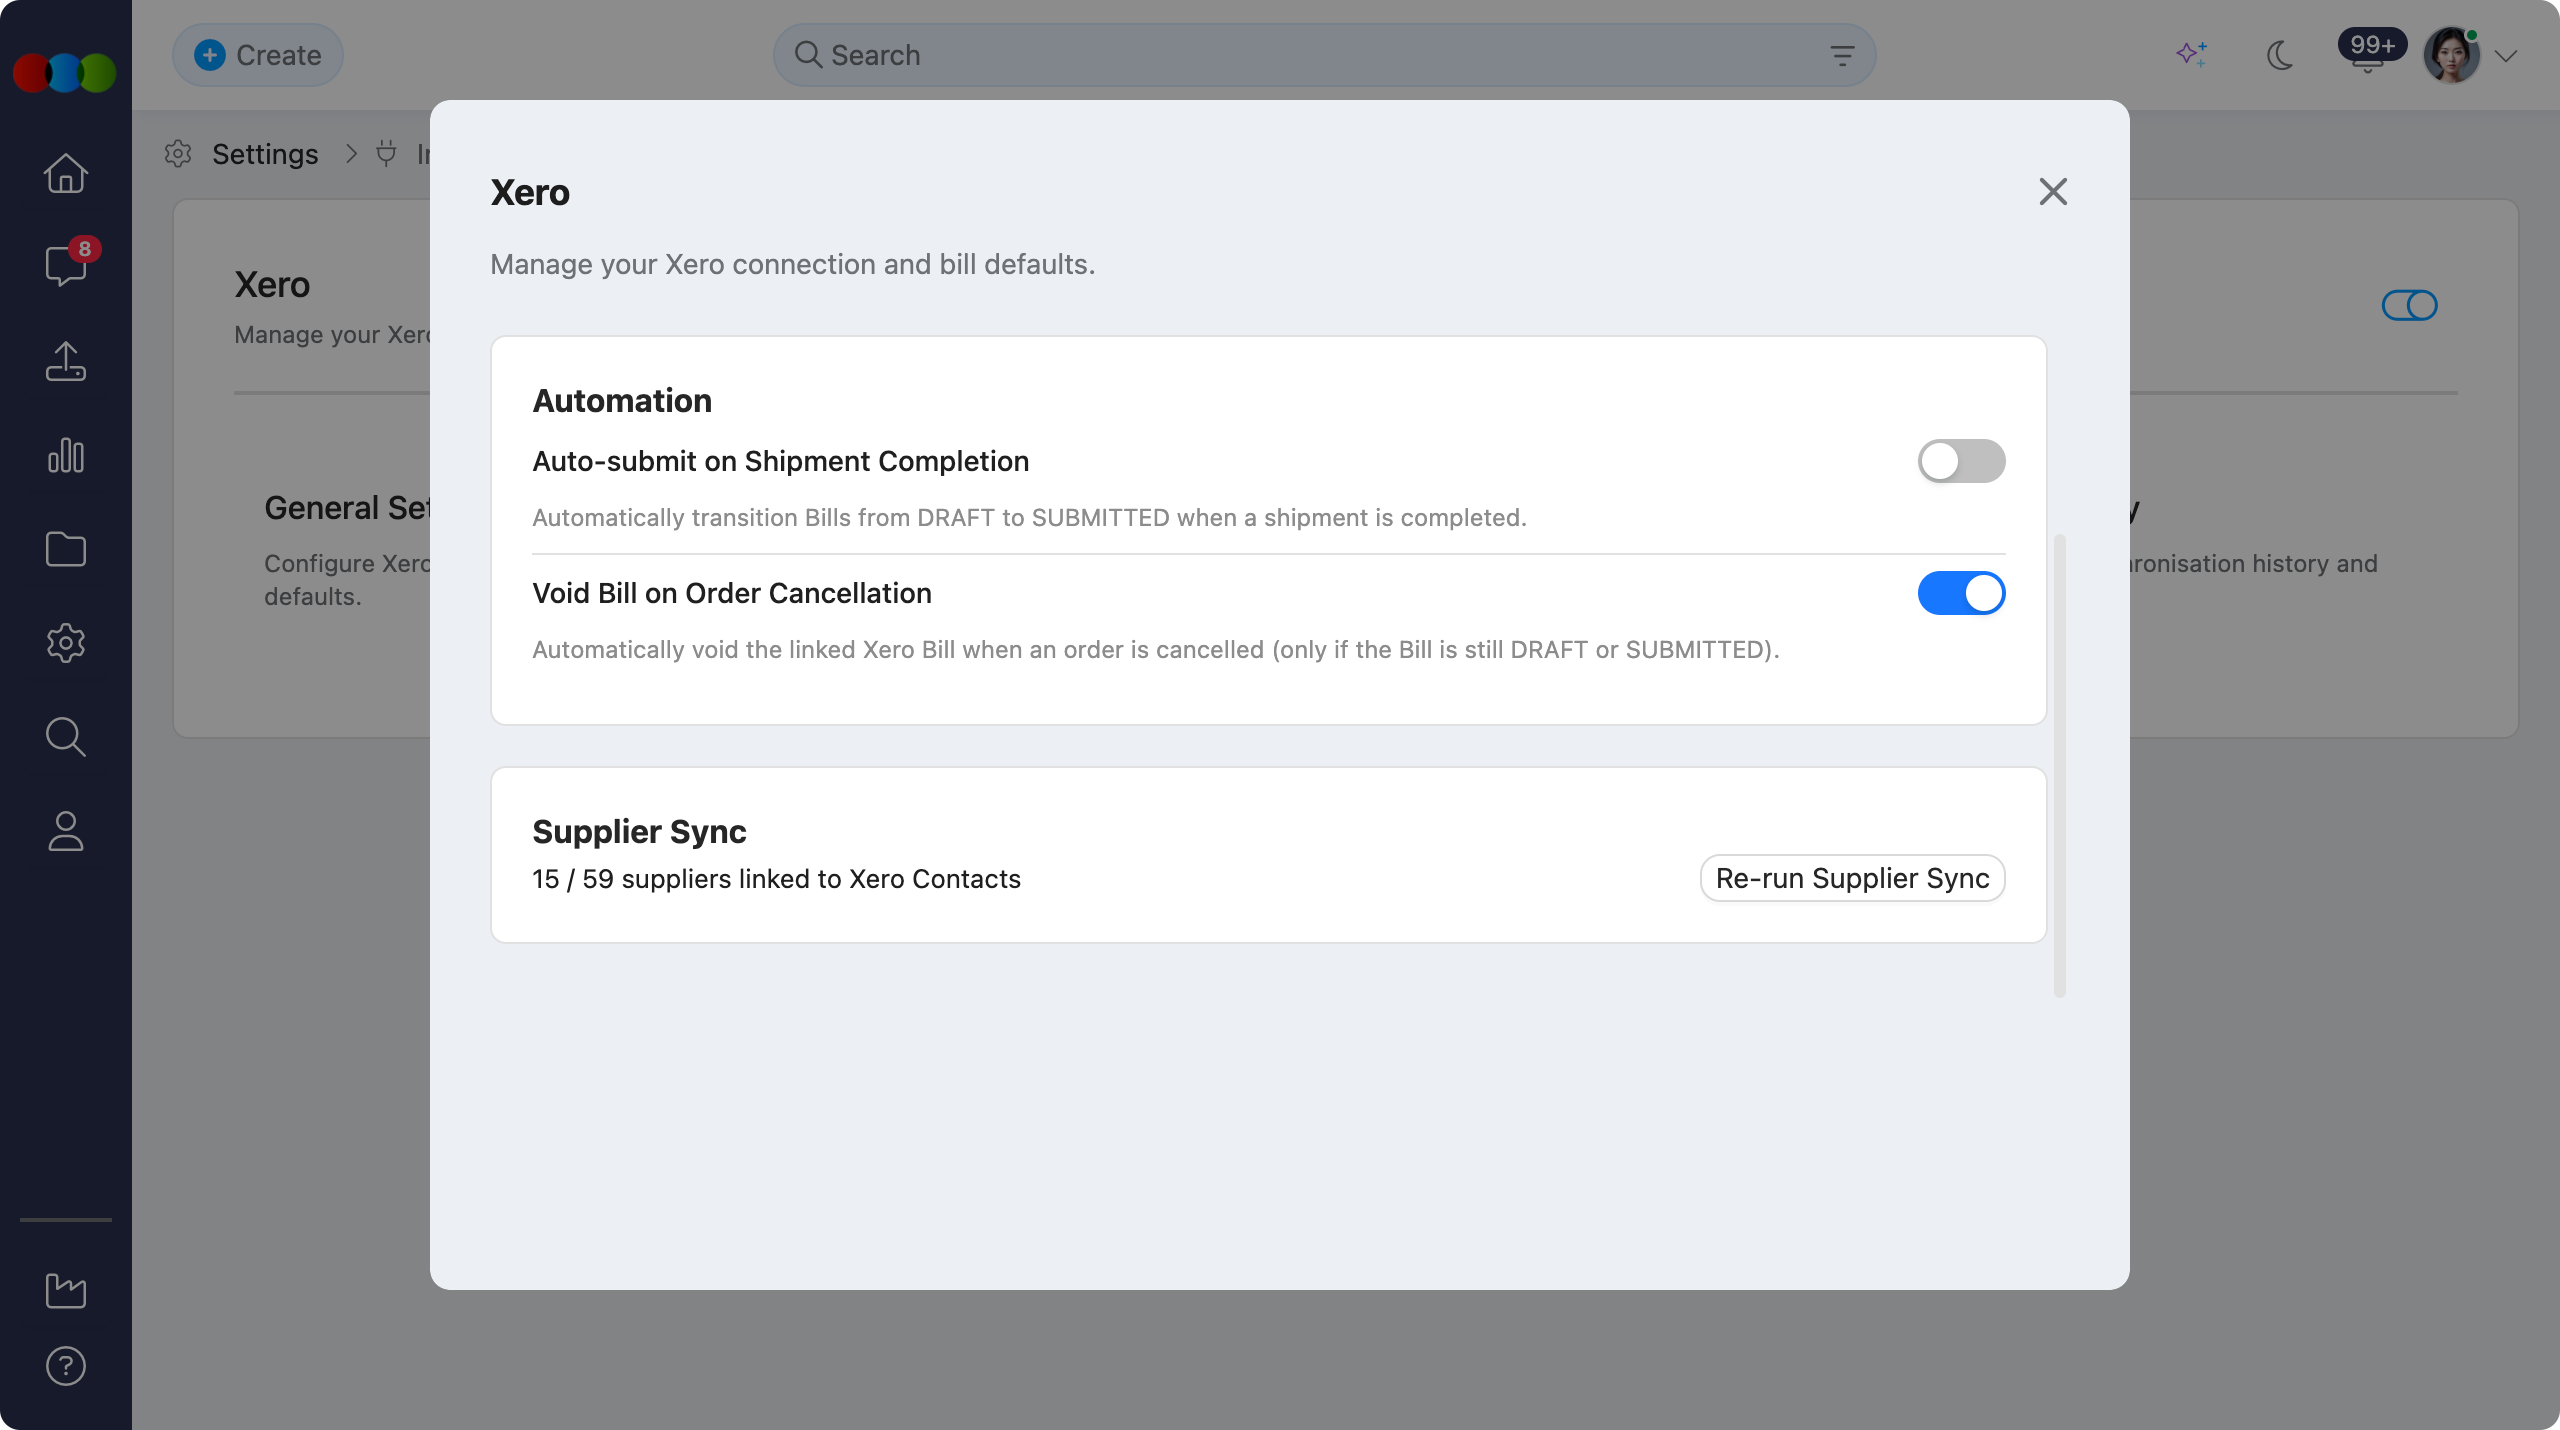
Common Pitfall
Enabling Auto-submit on Shipment Completion before mappings and bill defaults are validated can submit incomplete or incorrectly coded bills to Xero. Run a small pilot set first, then turn automation on with finance approval.
Supplier Sync
Supplier Sync links your 3 Clicks suppliers to Xero Contacts so purchase order bills can resolve the correct contact in Xero. The section shows how many suppliers are already linked (for example, 16 / 59 suppliers linked to Xero Contacts) and provides Re-run Supplier Sync to start or refresh the matching workflow.
| Control | Description |
|---|---|
| Linked count | Displays how many suppliers are linked to Xero Contacts out of the total supplier count (for example, 16 / 59). |
| Re-run Supplier Sync | Opens the supplier sync pop-up so you can match, review, confirm, and apply link or create actions. |
Run Supplier Sync
Click Re-run Supplier Sync to open the pop-up. The flow has four stages:
| Stage | What happens |
|---|---|
| 1. Matching | 3 Clicks compares suppliers against existing Xero Contacts and prepares results for review. |
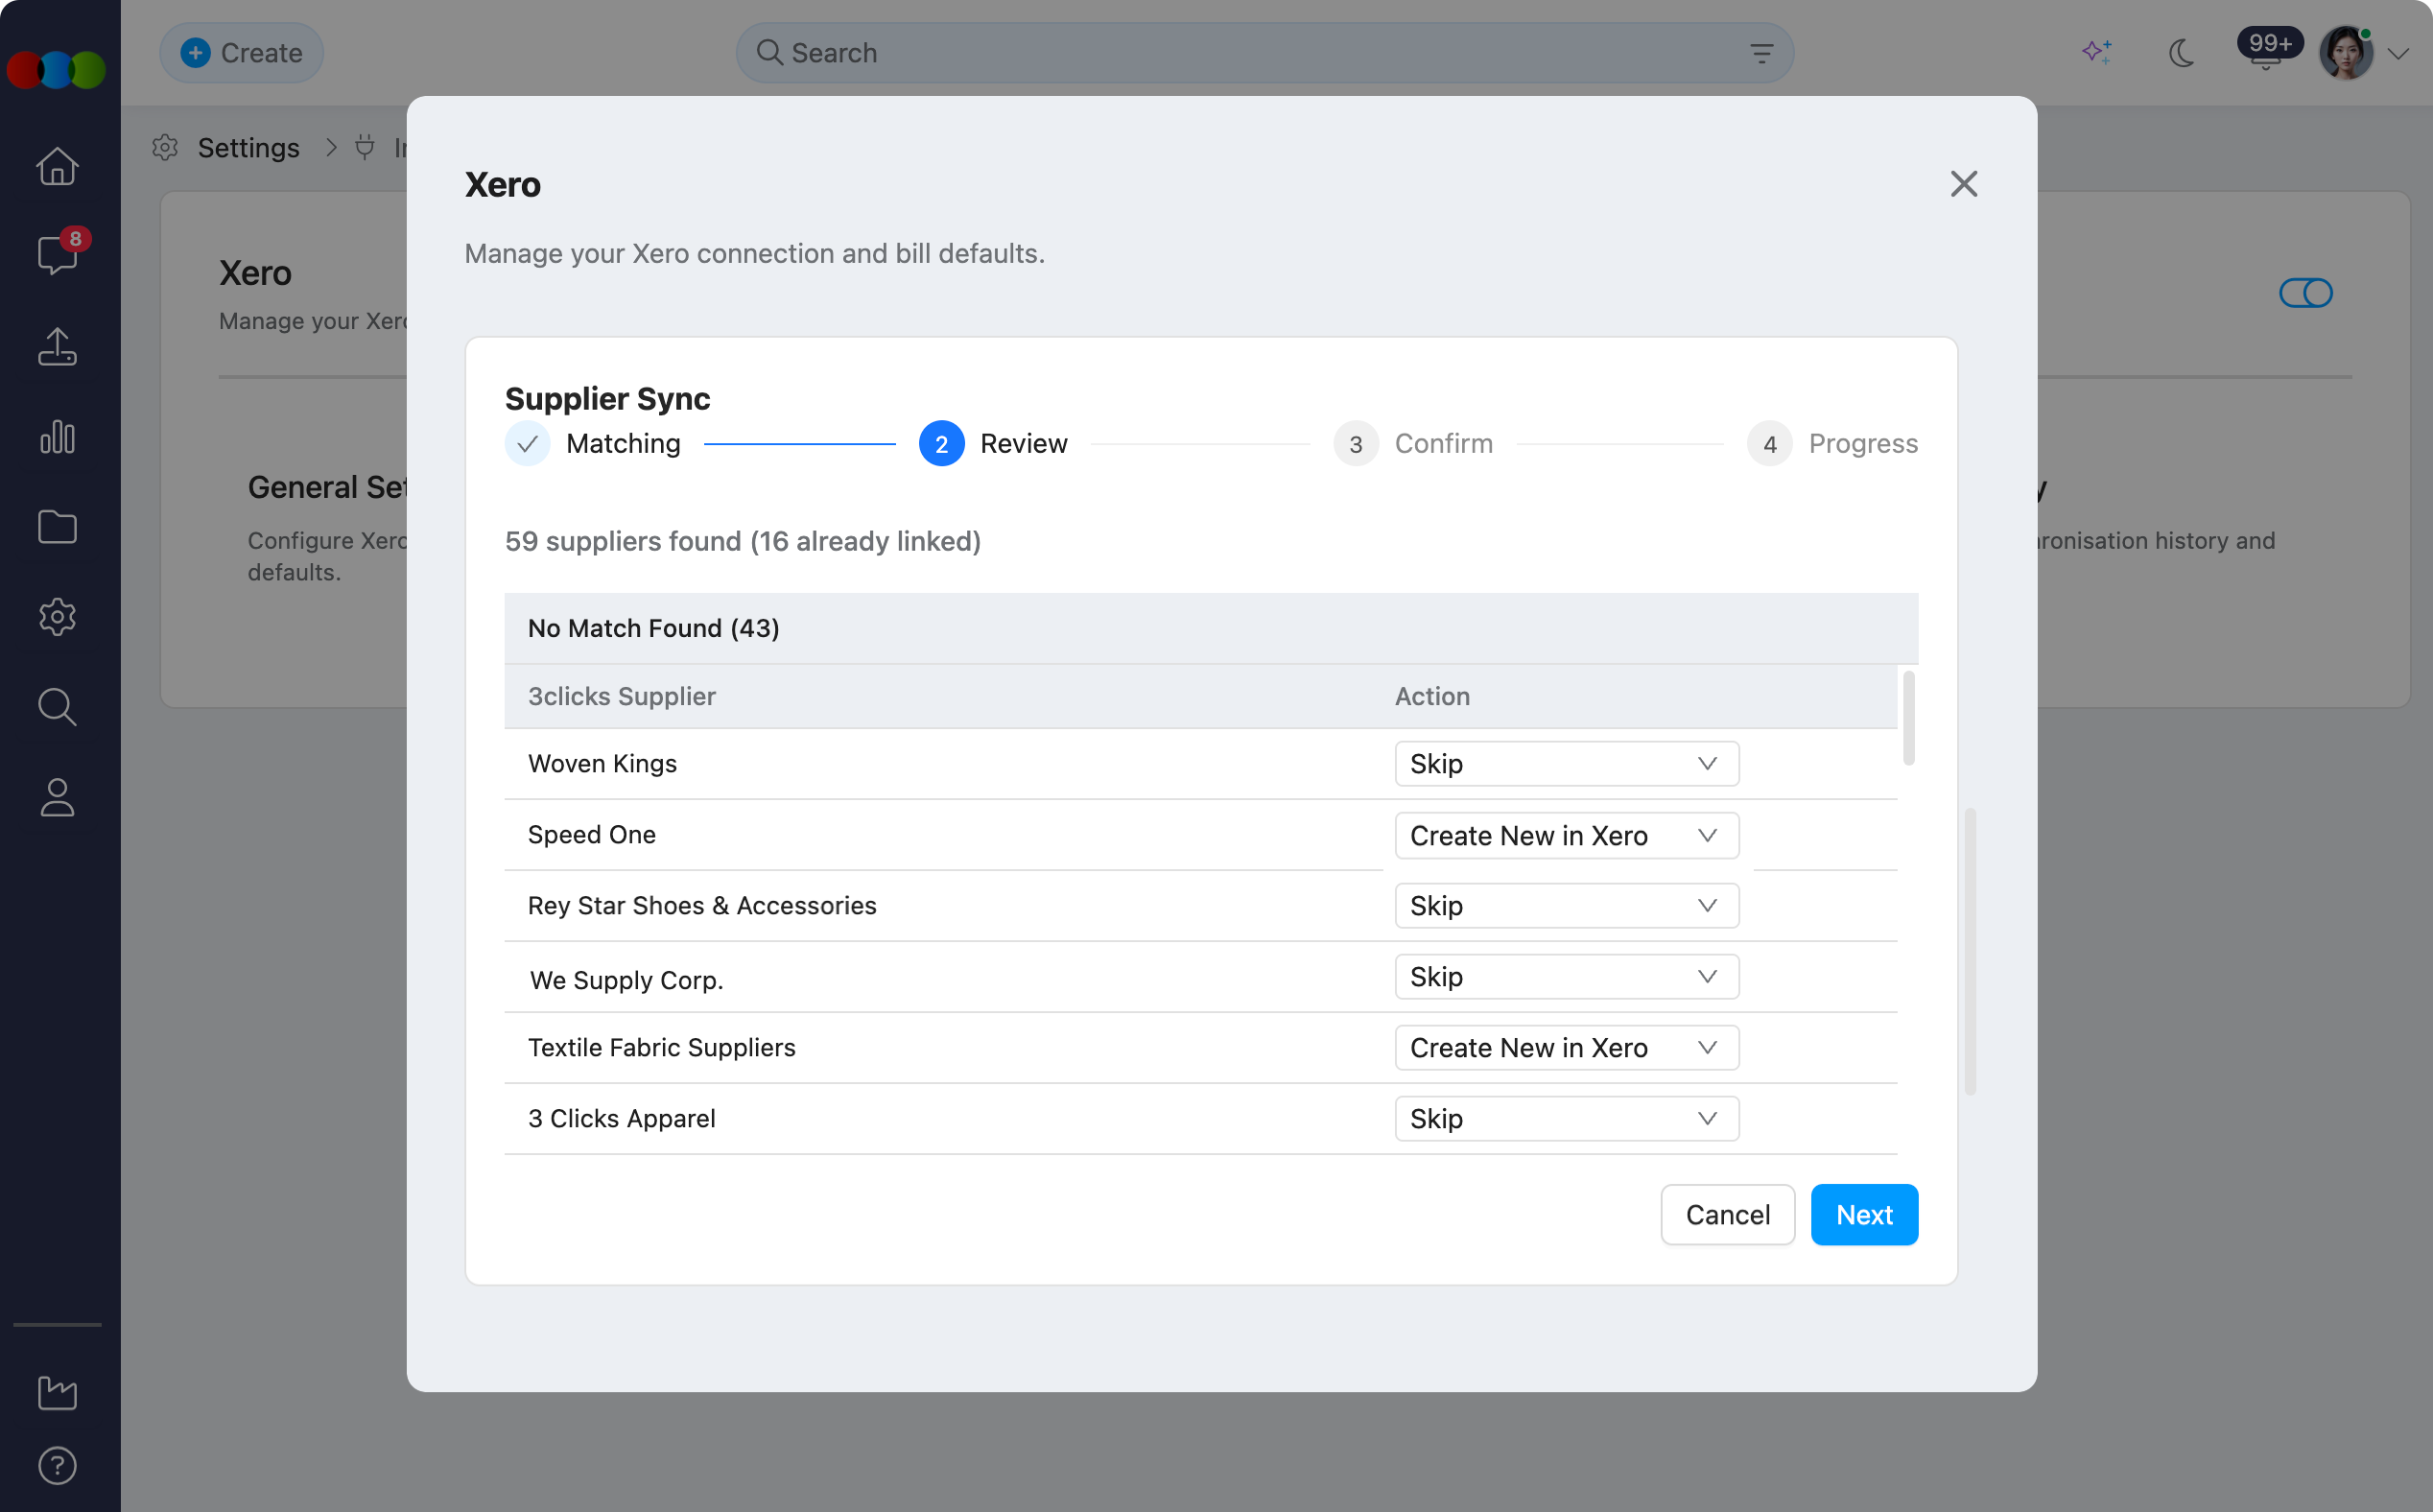
| 2. Review | Lists suppliers that need a decision. Use the Action column to choose Skip or Create New in Xero for each unmatched supplier. |
| 3. Confirm | Summarises how many suppliers will be linked, how many new Xero Contacts will be created, and how many will be skipped. |
| 4. Progress | Shows the results after the sync runs (Linked and Created counts). Click Done to finish. |
1. Matching
Matching runs first and automatically identifies suppliers that already have a Xero Contact link versus those that need review. When matching completes, it will then advances to Review.
2. Review
Review suppliers that were not matched automatically. The summary shows totals such as 59 suppliers found (16 already linked) and groups unmatched rows (for example, No Match Found).
| Column | Description |
|---|---|
| 3clicks Supplier | The supplier name in 3 Clicks. |
| Action | Choose Skip to leave the supplier unlinked for now, or Create New in Xero to create a new Xero Contact. |
Click Next to continue, or Cancel to leave without applying changes.
3. Confirm
Confirm the planned outcomes before anything is written to Xero:
- How many suppliers will be linked
- How many new Xero Contacts will be created
- How many suppliers will be skipped
Click Start Sync to apply the actions, or Back to return to Review.
Xero > Supplier Sync > Confirm 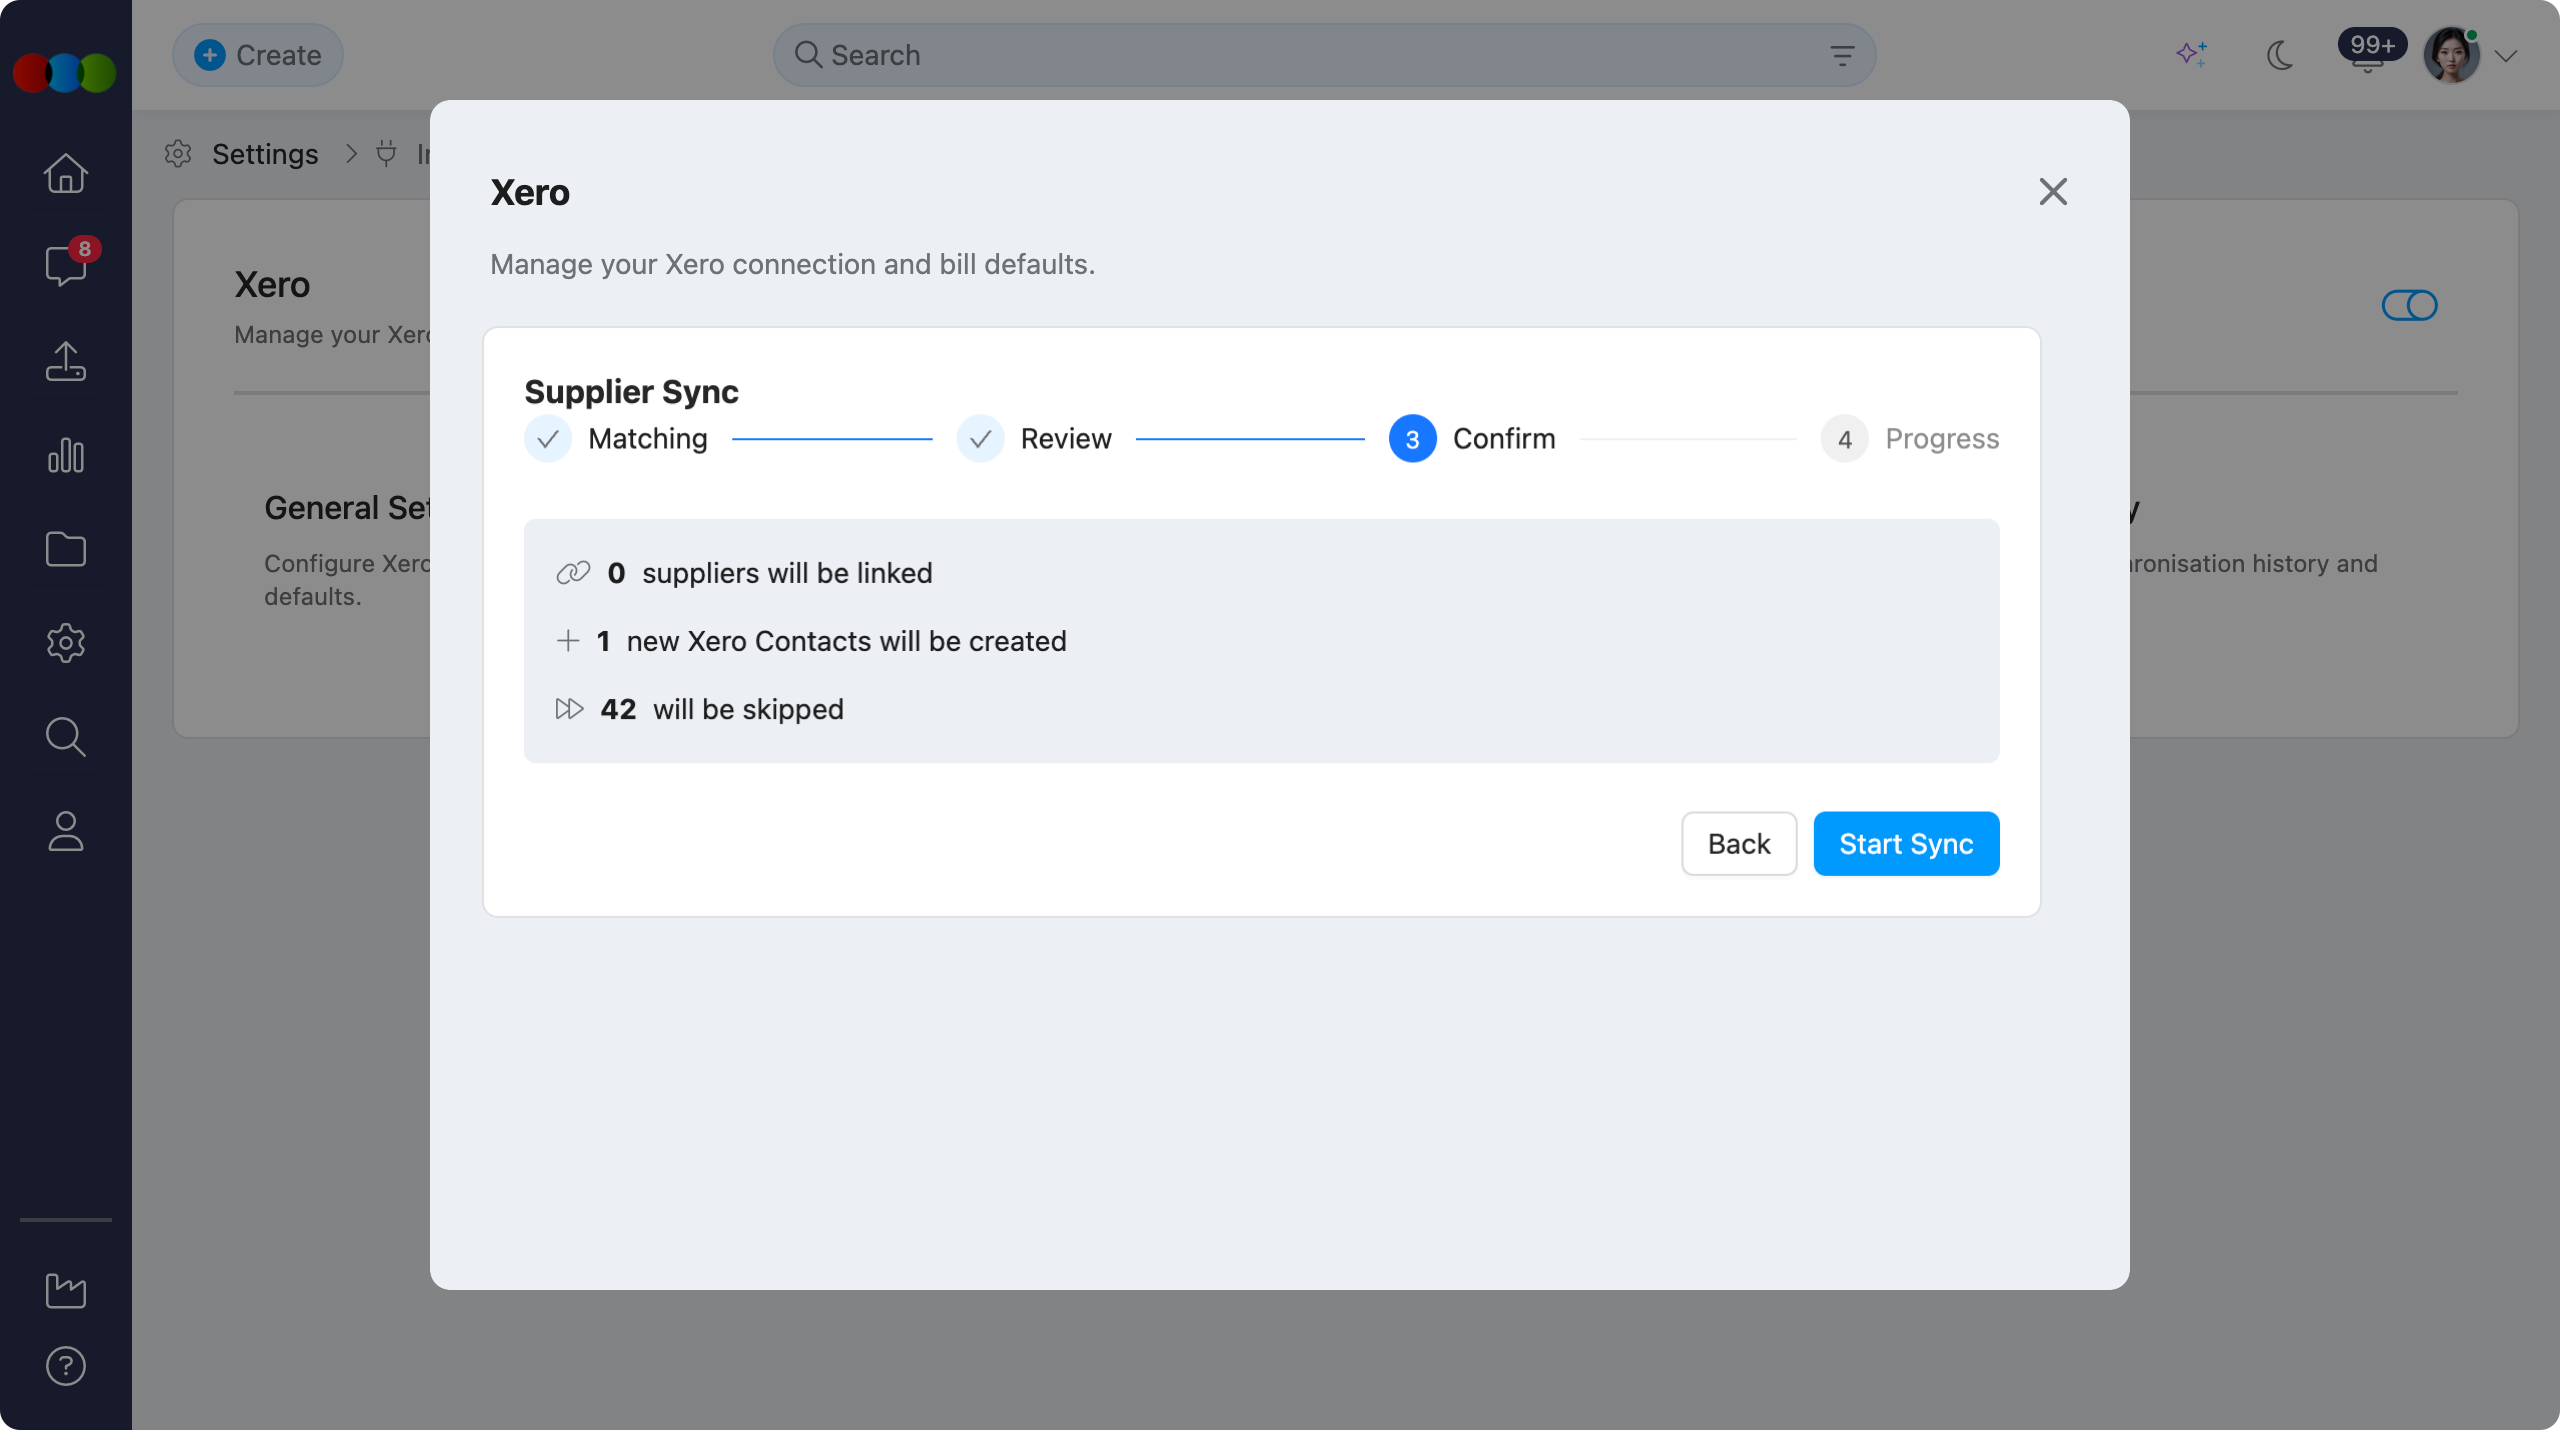
4. Progress
After the sync completes, Progress shows confirmation of how many suppliers were Linked and how many Contacts were Created. Click Done to close the pop-up and return to General Settings. The linked count updates to reflect the new totals.
Xero > Supplier Sync > Progress 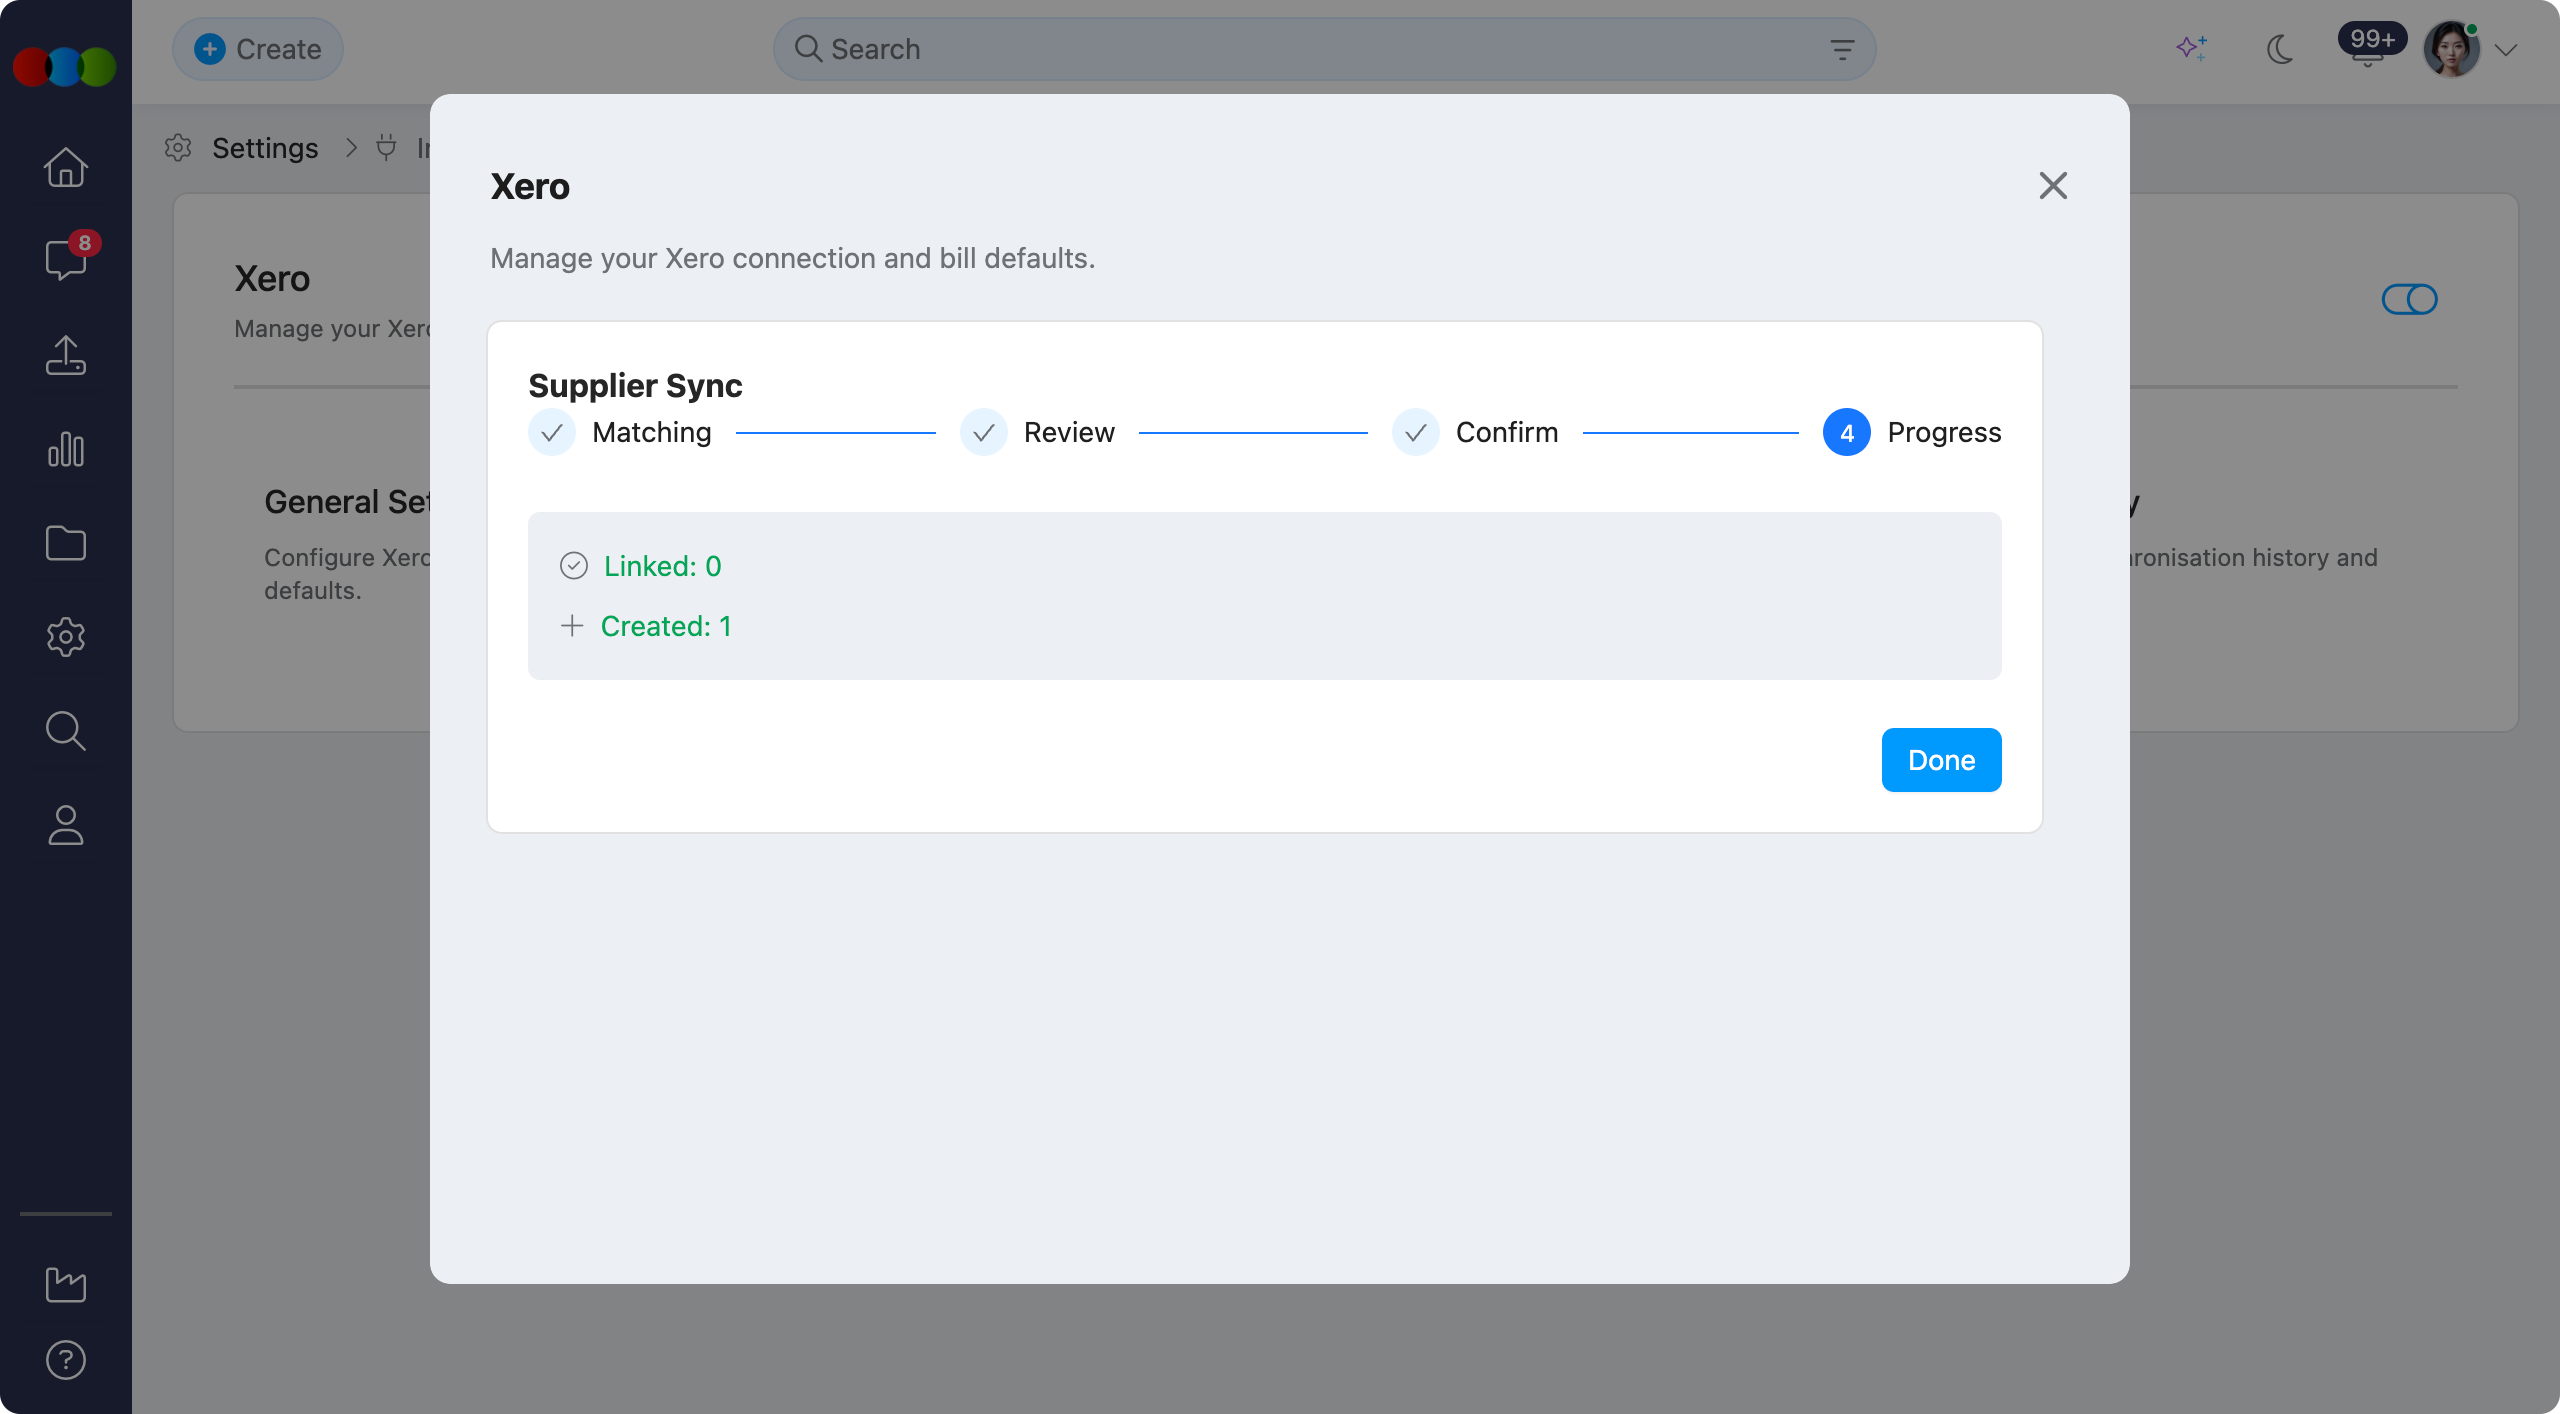
Common Pitfall
Choosing Create New in Xero for suppliers that already exist under a different name in Xero can create duplicate Contacts. Prefer linking or skipping when you suspect a match, and tidy duplicates in Xero before the next sync.
Pro Tips for Xero General Settings
- Connect the correct organisation first: Confirm the organisation name shown after OAuth matches the live Xero company before configuring defaults or pushing orders.
- Set defaults, then refine with mappings: Use Default Account Code and Default Payment Days as a safety net, then complete Account & Tax and Payment Terms mappings for accurate per-supplier behaviour.
- Keep auto-submit off during go-live: Leave bills in DRAFT until sync logs and pilot bills look correct, then enable automation when finance is ready.
- Run Supplier Sync before the first order push: Link or create Contacts for active suppliers so bill sync does not fail on missing contacts.
- Push a pilot set next: After connection, defaults, and Supplier Sync, follow How Push to Xero Works to push from Order Search or Documents > Purchase Order and confirm bills in Xero.
Related Settings
- Xero › Overview
- Xero › How Push to Xero Works
- Xero › Account & Tax Mappings
- Xero › Payment Terms Mapping
- Xero › Sync Activity
- Site Settings > Company > Suppliers
- Site Settings > Company > Terms
- Site Settings > Company > Tax
Troubleshooting
Why does Connect to Xero not complete or return without Connected status?
The OAuth flow may have been cancelled, timed out, or authorised against the wrong organisation. The integration feature toggle must also be on.
Steps to resolve:
- Open Site Settings > Integration > Xero and confirm the integration is enabled.
- Open General Settings and select Connect to Xero again.
- Complete Allow access for the correct Xero organisation.
- Confirm the connected organisation name and connection time appear under Connection Status.
Why are bills using the wrong account code or due date?
Bill line items fall back to Default Account Code for PO Bills and Default Payment Days when a specific mapping is missing or incomplete.
Steps to resolve:
- Check Default Account Code for PO Bills and Default Payment Days on this page.
- Review Account & Tax Mappings for the cost type or category in use.
- Review Payment Terms Mapping for the supplier terms.
- Retry a single test order and confirm the resulting Xero bill.
Why was a bill not voided when the order was cancelled?
Void Bill on Order Cancellation only voids bills that are still DRAFT or SUBMITTED. Bills that have moved further in Xero are left unchanged.
Steps to resolve:
- Confirm Void Bill on Order Cancellation is enabled in General Settings.
- Check the bill status in Xero for the linked order.
- If the bill is already authorised or paid, void or credit it manually in Xero according to your finance process.
- Review Sync Activity for void attempts and error messages.
Why is the Supplier Sync linked count still low after I finished syncing?
Suppliers marked Skip are not linked or created. Only Create New in Xero (and automatic matches that are linked) increase the linked count.
Steps to resolve:
- Check the Confirm summary before Start Sync — note how many will be linked, created, and skipped.
- Re-run Supplier Sync and change Skip to Create New in Xero for suppliers that should be in Xero.
- Click Start Sync, wait for Progress, then click Done.
- Confirm the updated count on General Settings (for example,
16 / 59 suppliers linked to Xero Contacts).