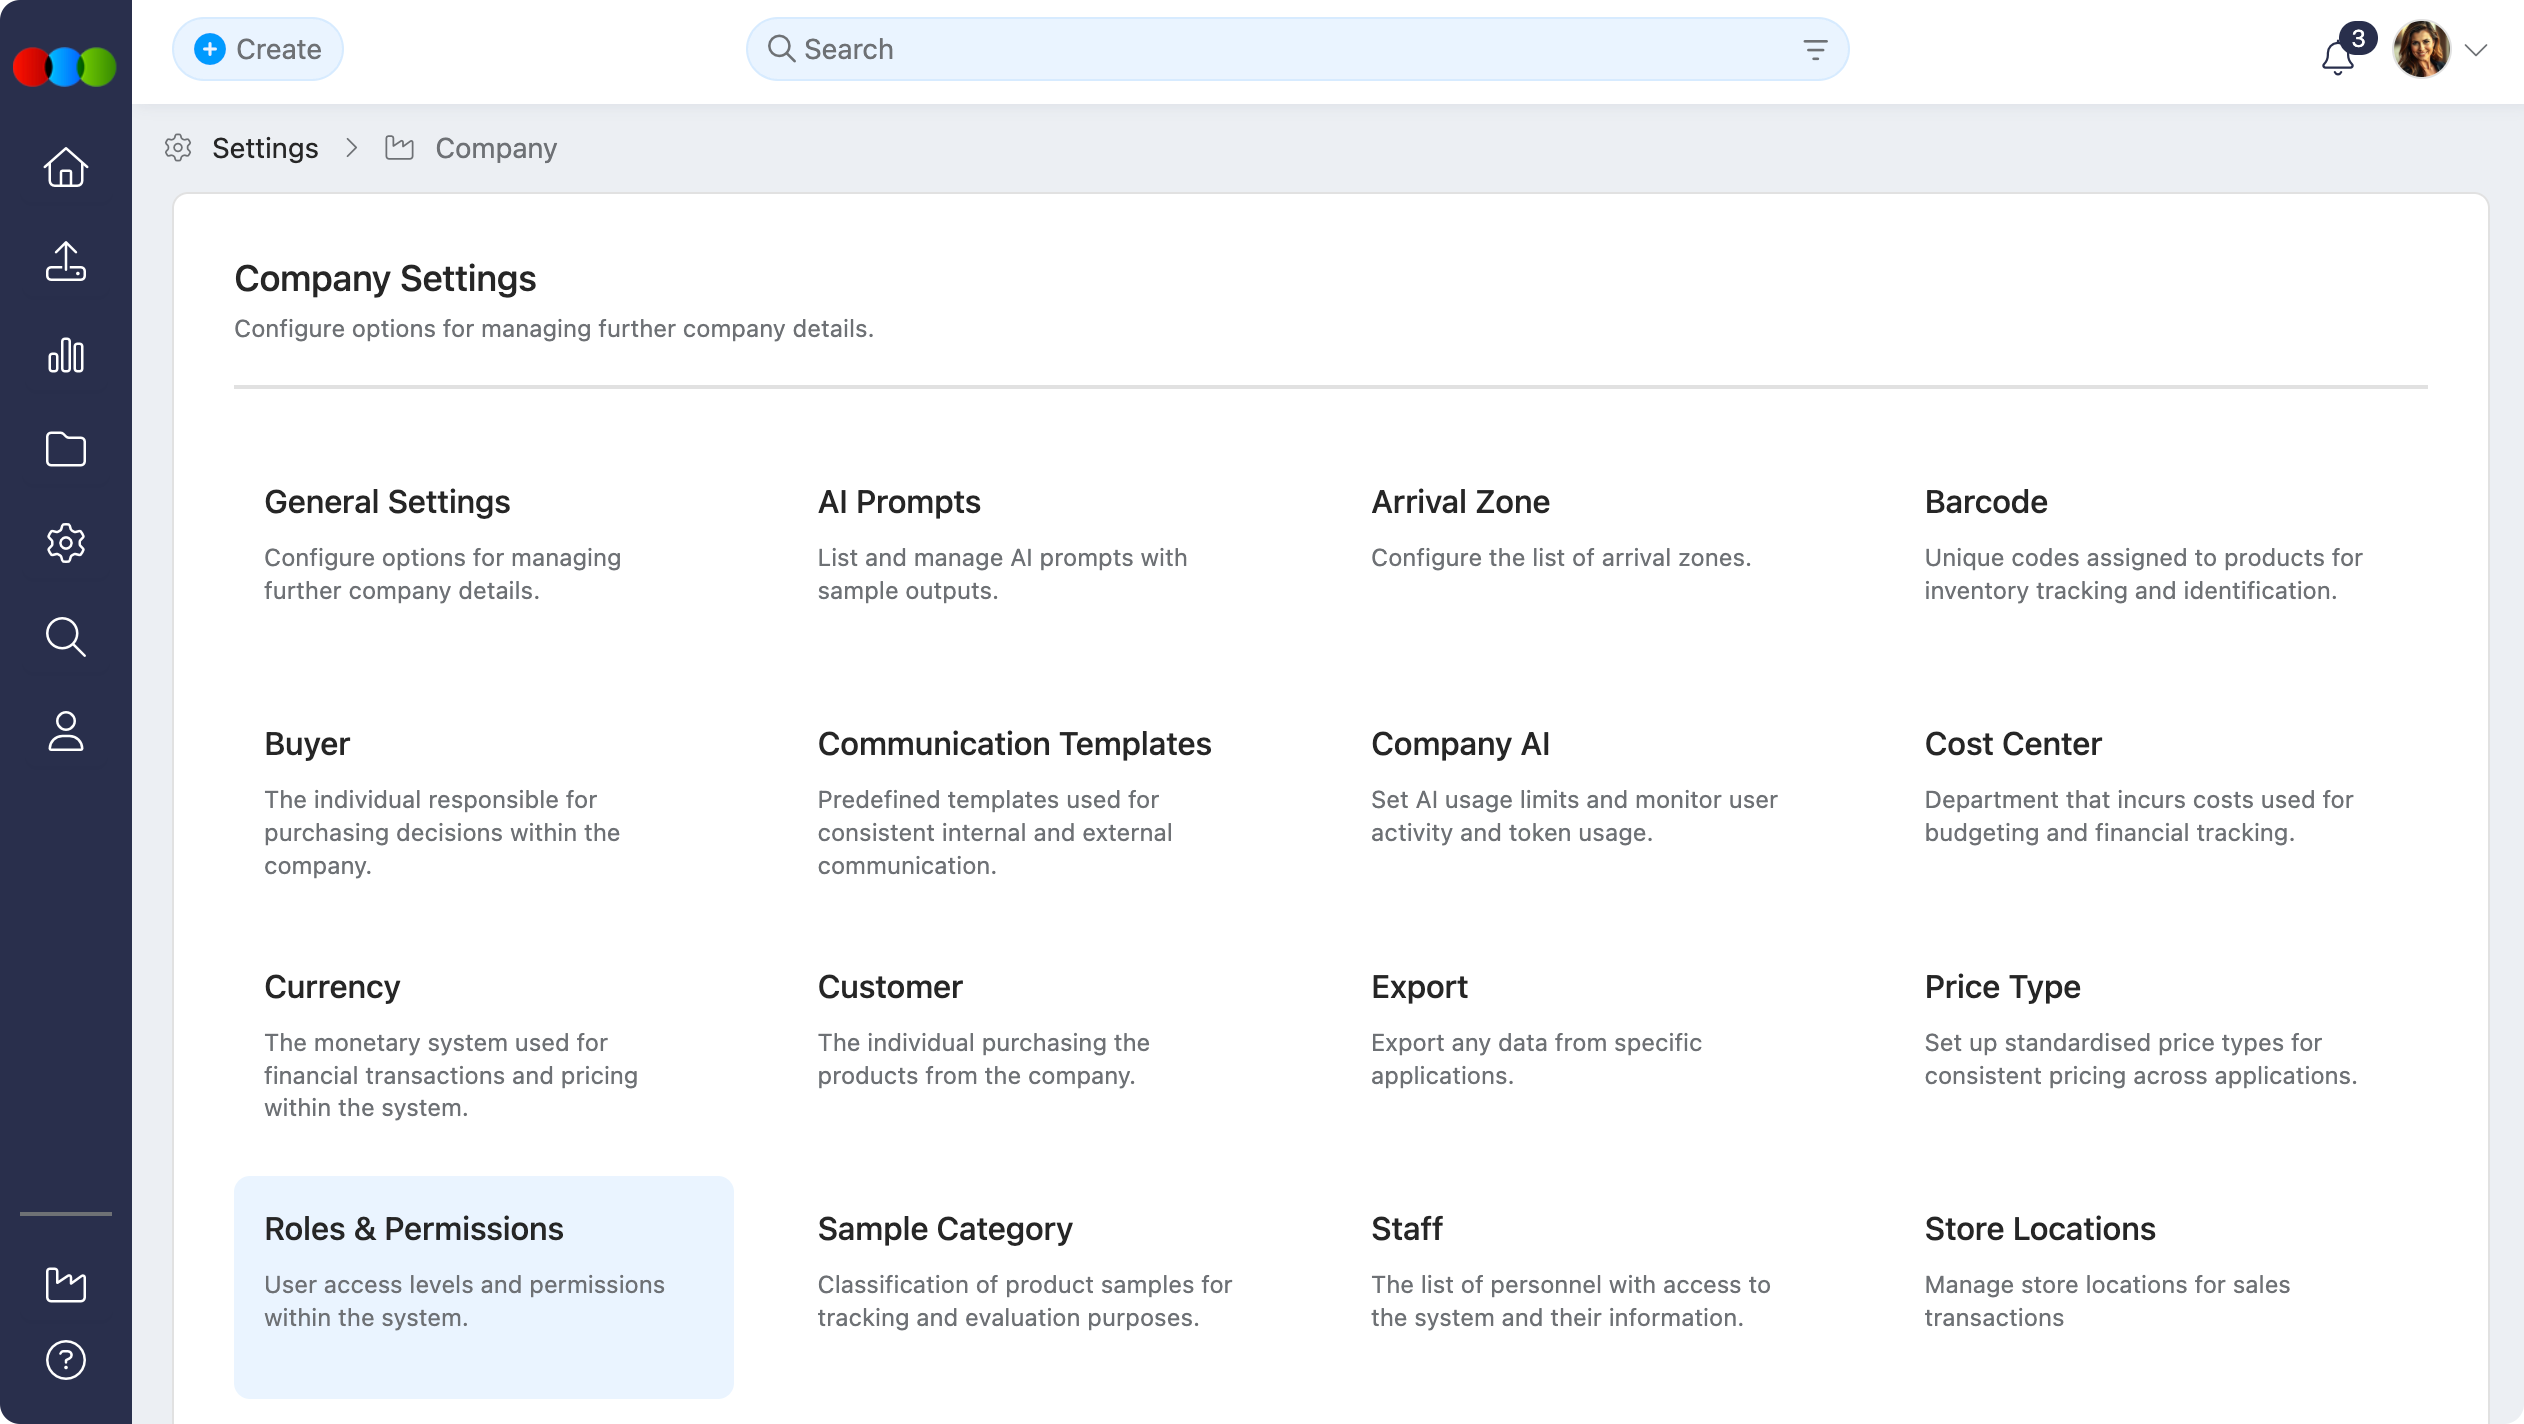
Roles & Permissions
The Roles & Permissions section enables administrators to create and manage role-based access control templates. Each role belongs to one of three Role Scopes: Production Portal, Supplier Portal, or Sales Order / DAM Portal and defines what users can see and do in that portal.
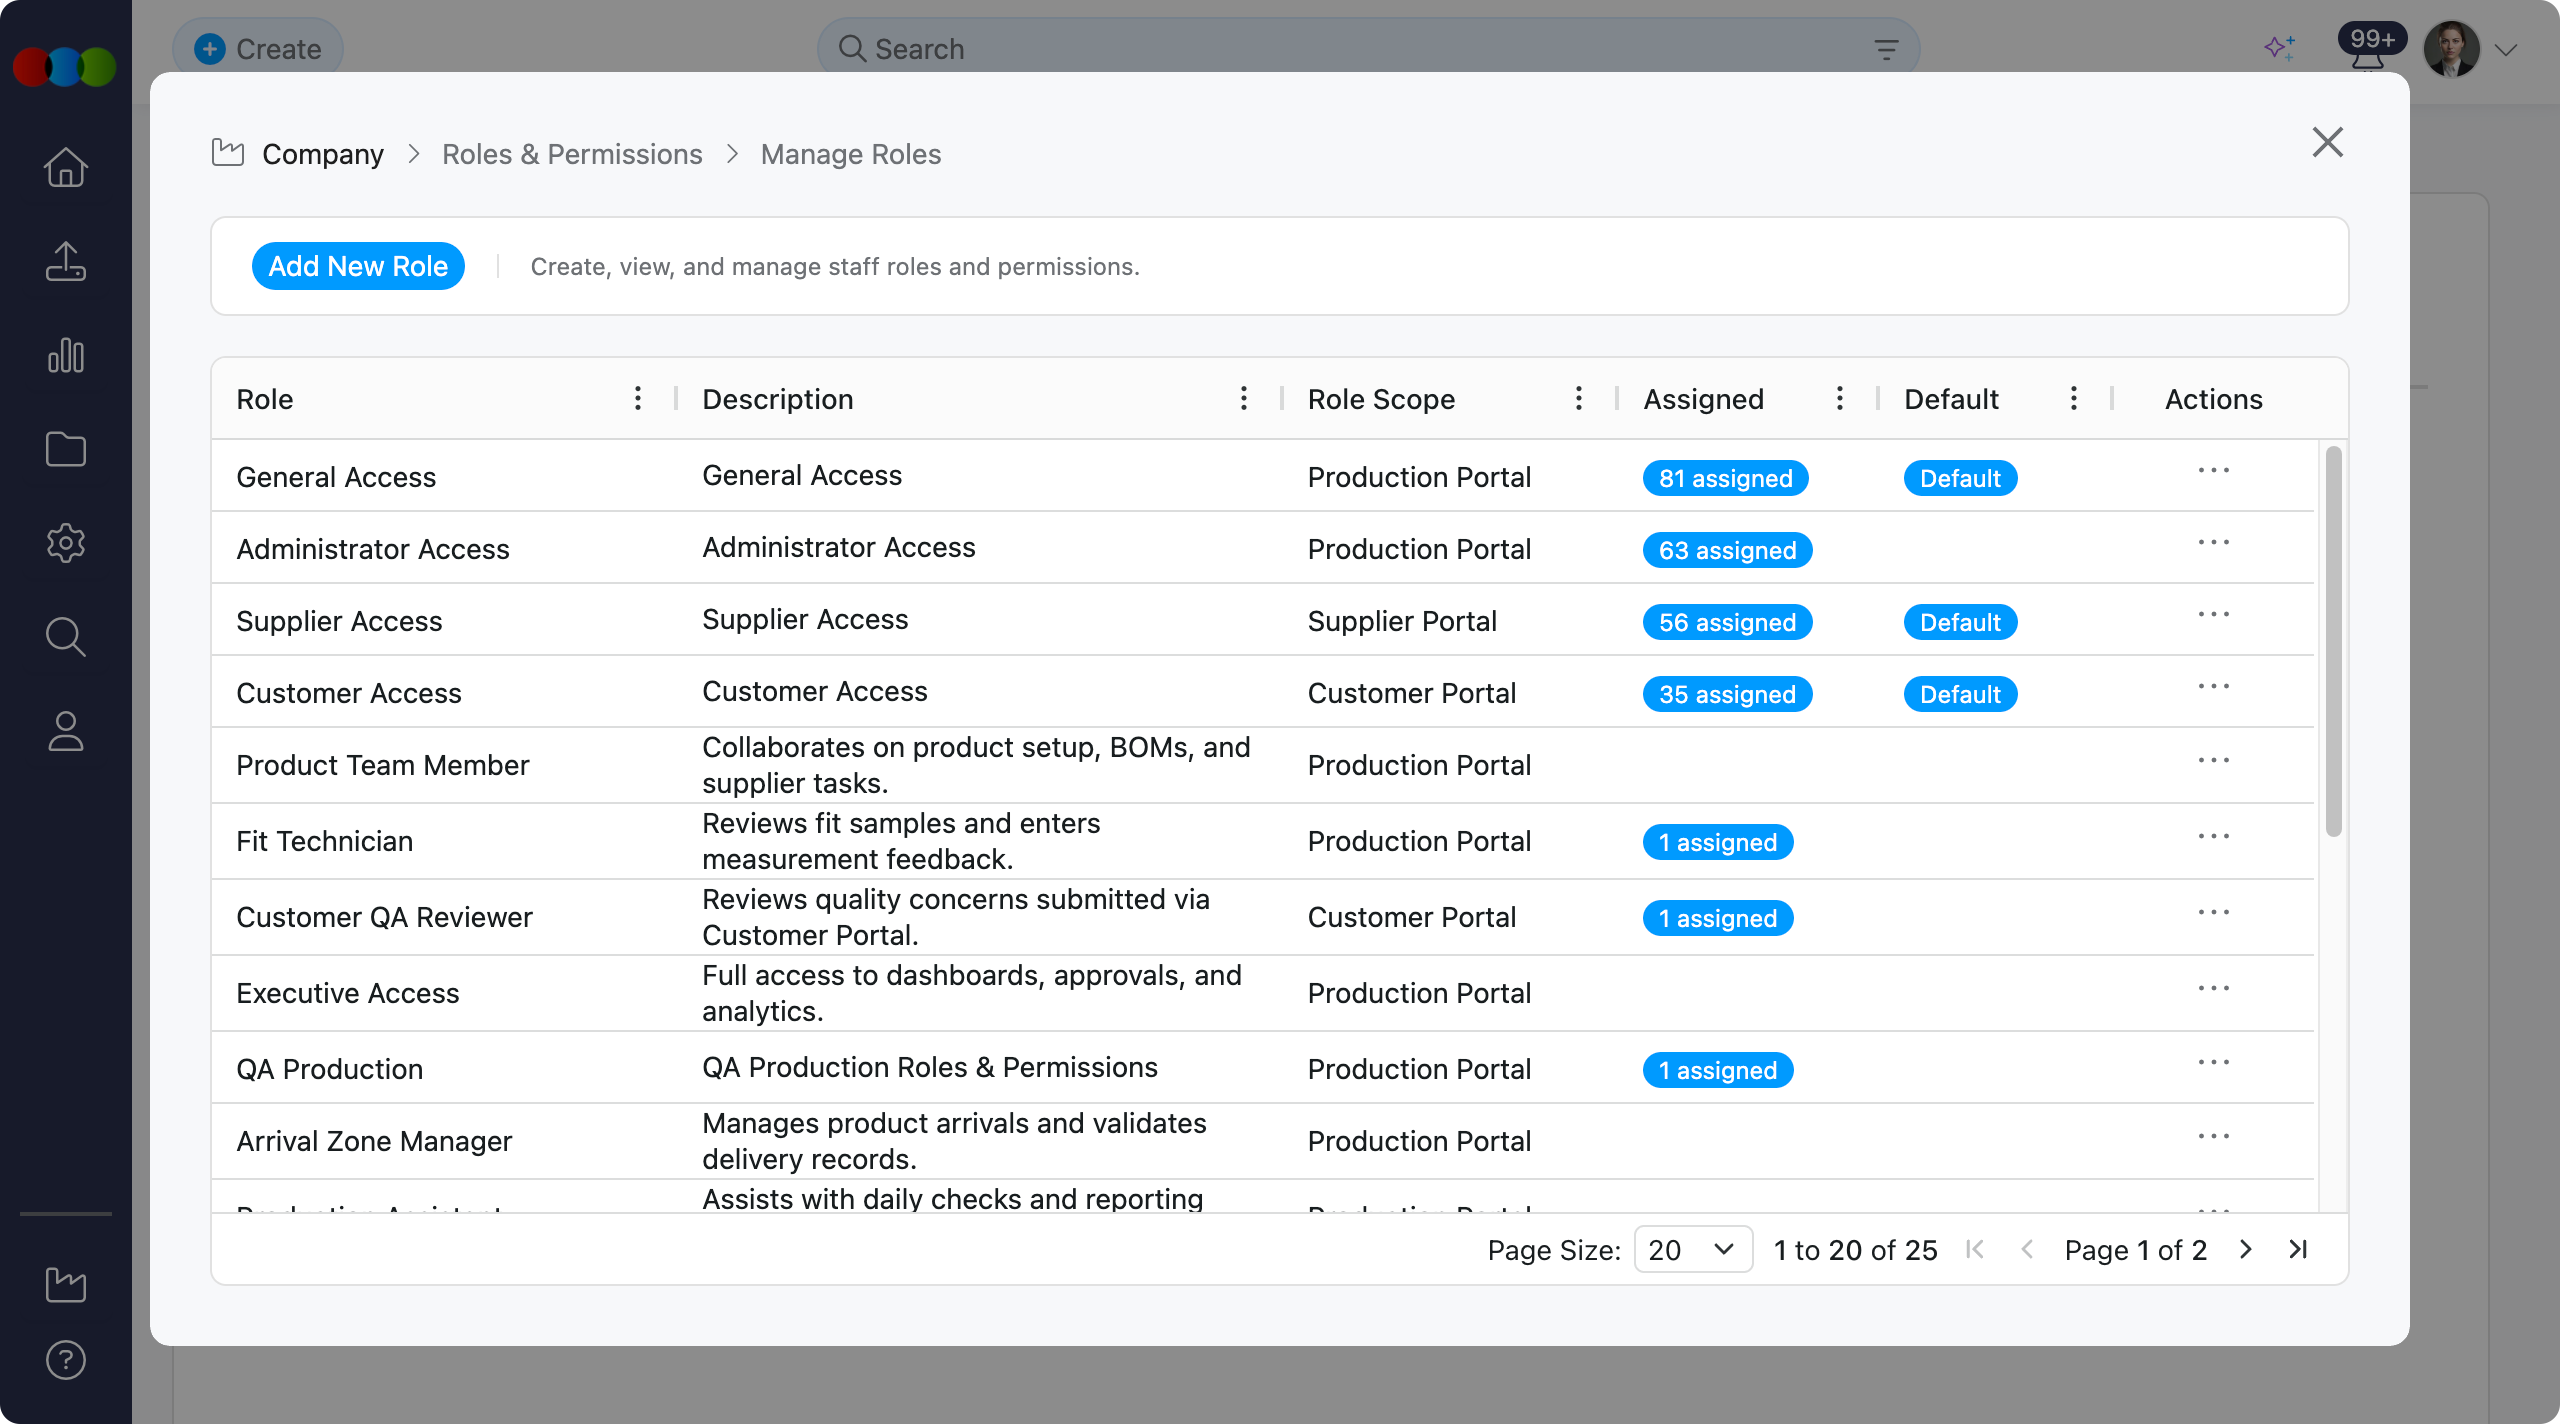
Roles are permission templates that can be assigned to instance staff, supplier accounts, or customer portal users depending on scope. By creating distinct roles, you can standardise access for different job functions (e.g., Merchandiser, Factory Viewer, Retail Buyer). Each role is a template that can be assigned to multiple users, simplifying user management and enforcing consistent security policies across your organisation.
The permissions matrix differs by scope: Production Portal roles expose the full internal matrix (View, Edit, Create, Delete, and Advanced per application); Supplier Portal roles are view-only for standard apps; Sales Order / DAM Portal roles focus on customer-facing Sales Order and DAM/asset applications rather than the full staff matrix.
Quick Check - Before You Start
- Use an account with permission to edit Site Settings › Company › Roles & Permissions (and Administration Modules if you need sub-area access).
- Decide whether you are configuring Production Portal, Supplier Portal, or Sales Order / DAM Portal roles—matrices, assignment paths, and options differ.
- Know where roles are assigned: Staff (Production Portal), Suppliers (Supplier Portal), or Customer (Sales Order / DAM Portal).
- Review downstream impact: order delete, compliance, AI, and report access all follow the matrix you set here.
Role Scopes
When you create a role, you choose a Role Scope that determines which portal the permission template applies to. Each scope has its own permissions matrix and assignment path.
| Role Scope | Applies To | Permissions Matrix | Assign Role Via |
|---|---|---|---|
| Production Portal | Internal instance staff | Full matrix: View, Edit, Create, Delete, and Advanced per application | Site Settings › Company › Staff in Role dropdown |
| Supplier Portal | Supplier Portal users | View-only for standard apps (no Edit, Create, or Delete columns) | Site Settings › Company › Suppliers in Roles and Permissions field on the supplier record |
| Sales Order / DAM Portal | Customer Portal buyers and DAM users | Focused on Sales Order, Style, Component, and Drive (not the full staff matrix) | Site Settings › Company › Customer in Roles & Permissions dropdown |
The sections below document how to configure roles for each scope.
Managing Roles & Permissions
Add a Role - Production Portal
Use Production Portal roles for internal instance staff who work in the main application.
- Click the Add New button at the top left.
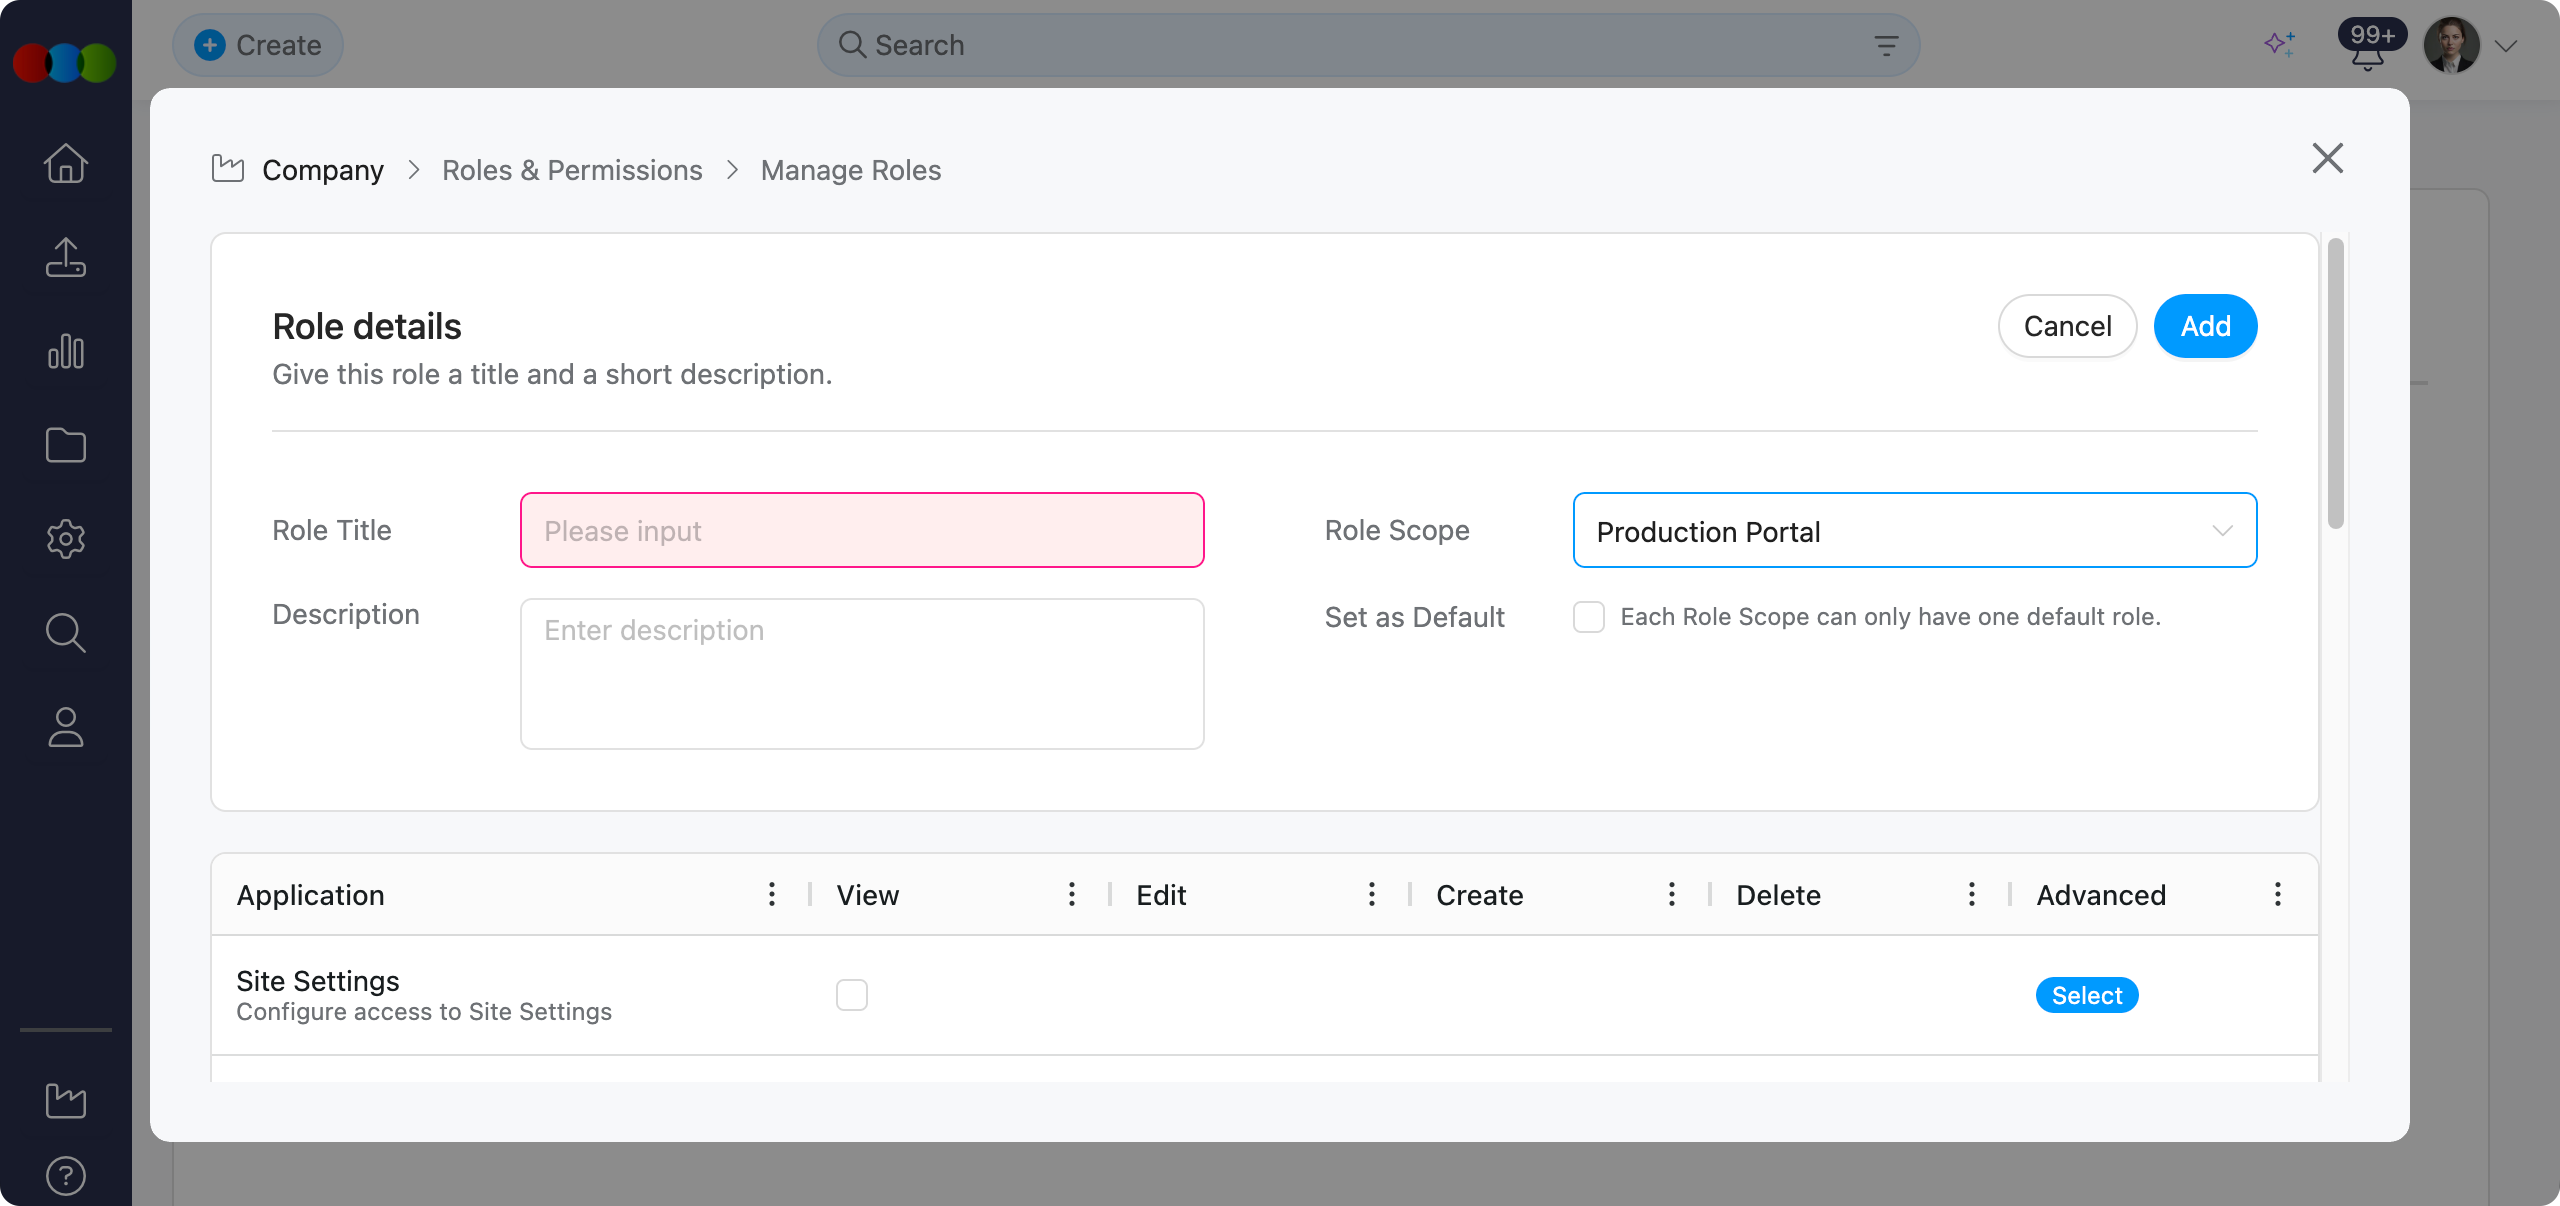
- Select Production Portal as the role scope.
- Enter a Role Title and configure the permissions matrix. The table shows the full matrix with View, Edit, Create, Delete, and Advanced per application.
- Click Save to create the new role template.
After saving, confirm the role list grid Role Scope column shows Production Portal. Assign the role to a staff member in Site Settings › Company › Staff.
Form Fields
| Field | Type | Description |
|---|---|---|
| Role Title | Text (mandatory) | A unique name for the role (e.g., Merchandiser, Production Manager). |
| Role Scope | Fixed | Production Portal—applies to internal users. |
| Description | Free text | Optional notes about the role's purpose or usage. |
| Set as Default | Checkbox | When checked, this role becomes the default for Production Portal. Only one default per scope—a confirmation pop-up appears: "Are you sure you want to change the default role? Setting this role as the new default will replace the existing default role for Production Portal. Are you sure you want to proceed with this change?" |
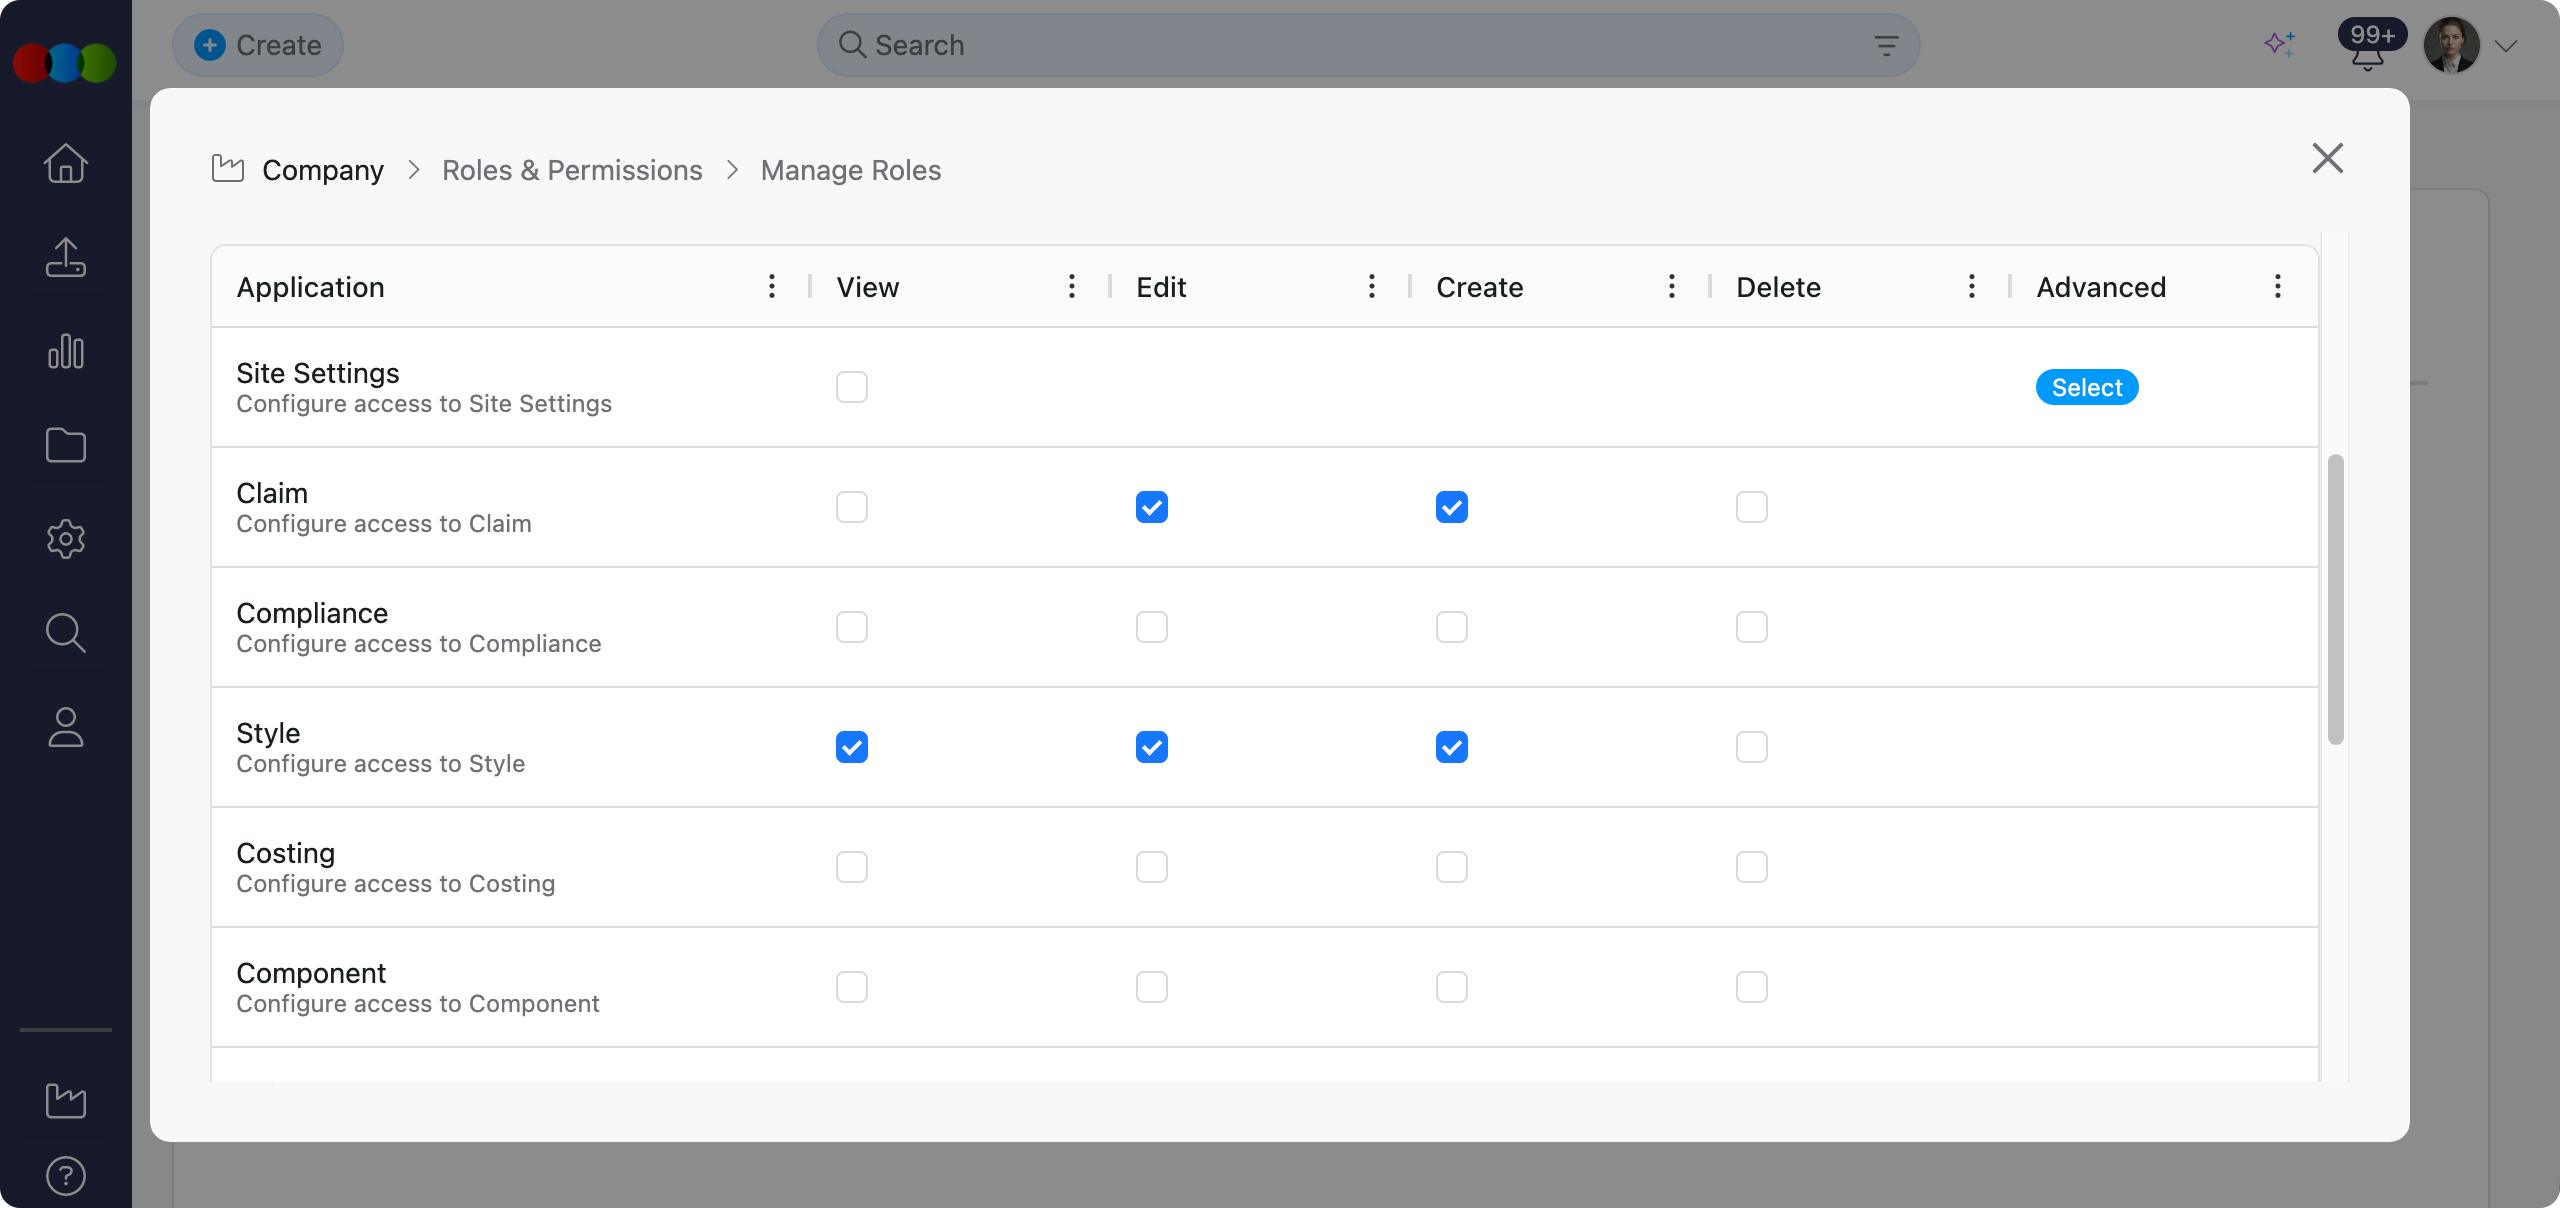
Permissions Matrix Columns
| Column | Control | Description |
|---|---|---|
| Application | Text | Name of the application or module. |
| View | Checkbox | Grant read-only access. |
| Edit | Checkbox | Grant permission to modify existing records. |
| Create | Checkbox | Grant permission to create new records. |
| Delete | Checkbox | Grant permission to delete records. |
| Advanced | Select pill | Opens a pop-up for sub-module permissions where available. |
Application Permissions Reference
| Application | View | Edit | Create | Delete | Advanced |
|---|---|---|---|---|---|
| Site Settings | ✓ | — | — | — | Administration Modules |
| Drive | ✓ | ✓ | — | — | — |
| Sales Order | ✓ | ✓ | — | — | — |
| Claim | ✓ | ✓ | ✓ | ✓ | — |
| Compliance | ✓ | ✓ | ✓ | ✓ | — |
| Style | ✓ | ✓ | ✓ | ✓ | — |
| Costing | ✓ | ✓ | ✓ | ✓ | — |
| Component | ✓ | ✓ | ✓ | ✓ | — |
| Shipping | ✓ | ✓ | ✓ | ✓ | — |
| Order | ✓ | ✓ | ✓ | ✓ | — |
| Planner | ✓ | ✓ | ✓ | ✓ | Planner Permission (Advanced) |
| License | ✓ | ✓ | ✓ | ✓ | — |
| AI | — | — | ✓ | — | AI Permission (Advanced) |
| Home | ✓ | — | — | — | Home Permission |
| Reports | ✓ | — | — | — | Reports Permission |
Planner Permission (Advanced)
When Advanced is clicked for Planner, the following option can be configured:
| Option | Description |
|---|---|
| Total Sales | If enabled - users can view Total Sales data. If disabled - the Total Sales column is hidden in Planner and users cannot access this data in Planner, Search, or the Chatbot. |
Home Permission
When View is clicked for Home, the following option applies:
| Option | Description |
|---|---|
| Calendar | If enabled — the Calendar tab is displayed in Home and users can open the outstanding activities calendar (Home › Calendar). If disabled — the Calendar tab is not displayed in Home. |
AI Permission (Advanced)
When Advanced is clicked for AI (the Create permission must be enabled for AI), the following option can be configured:
| Option | Description |
|---|---|
| Sales Data | If enabled - the Chatbot and other AI features can access and use sales-related data. If disabled - sales data is not available through AI. Planner and Search sales columns still follow Planner Permission (Advanced). |
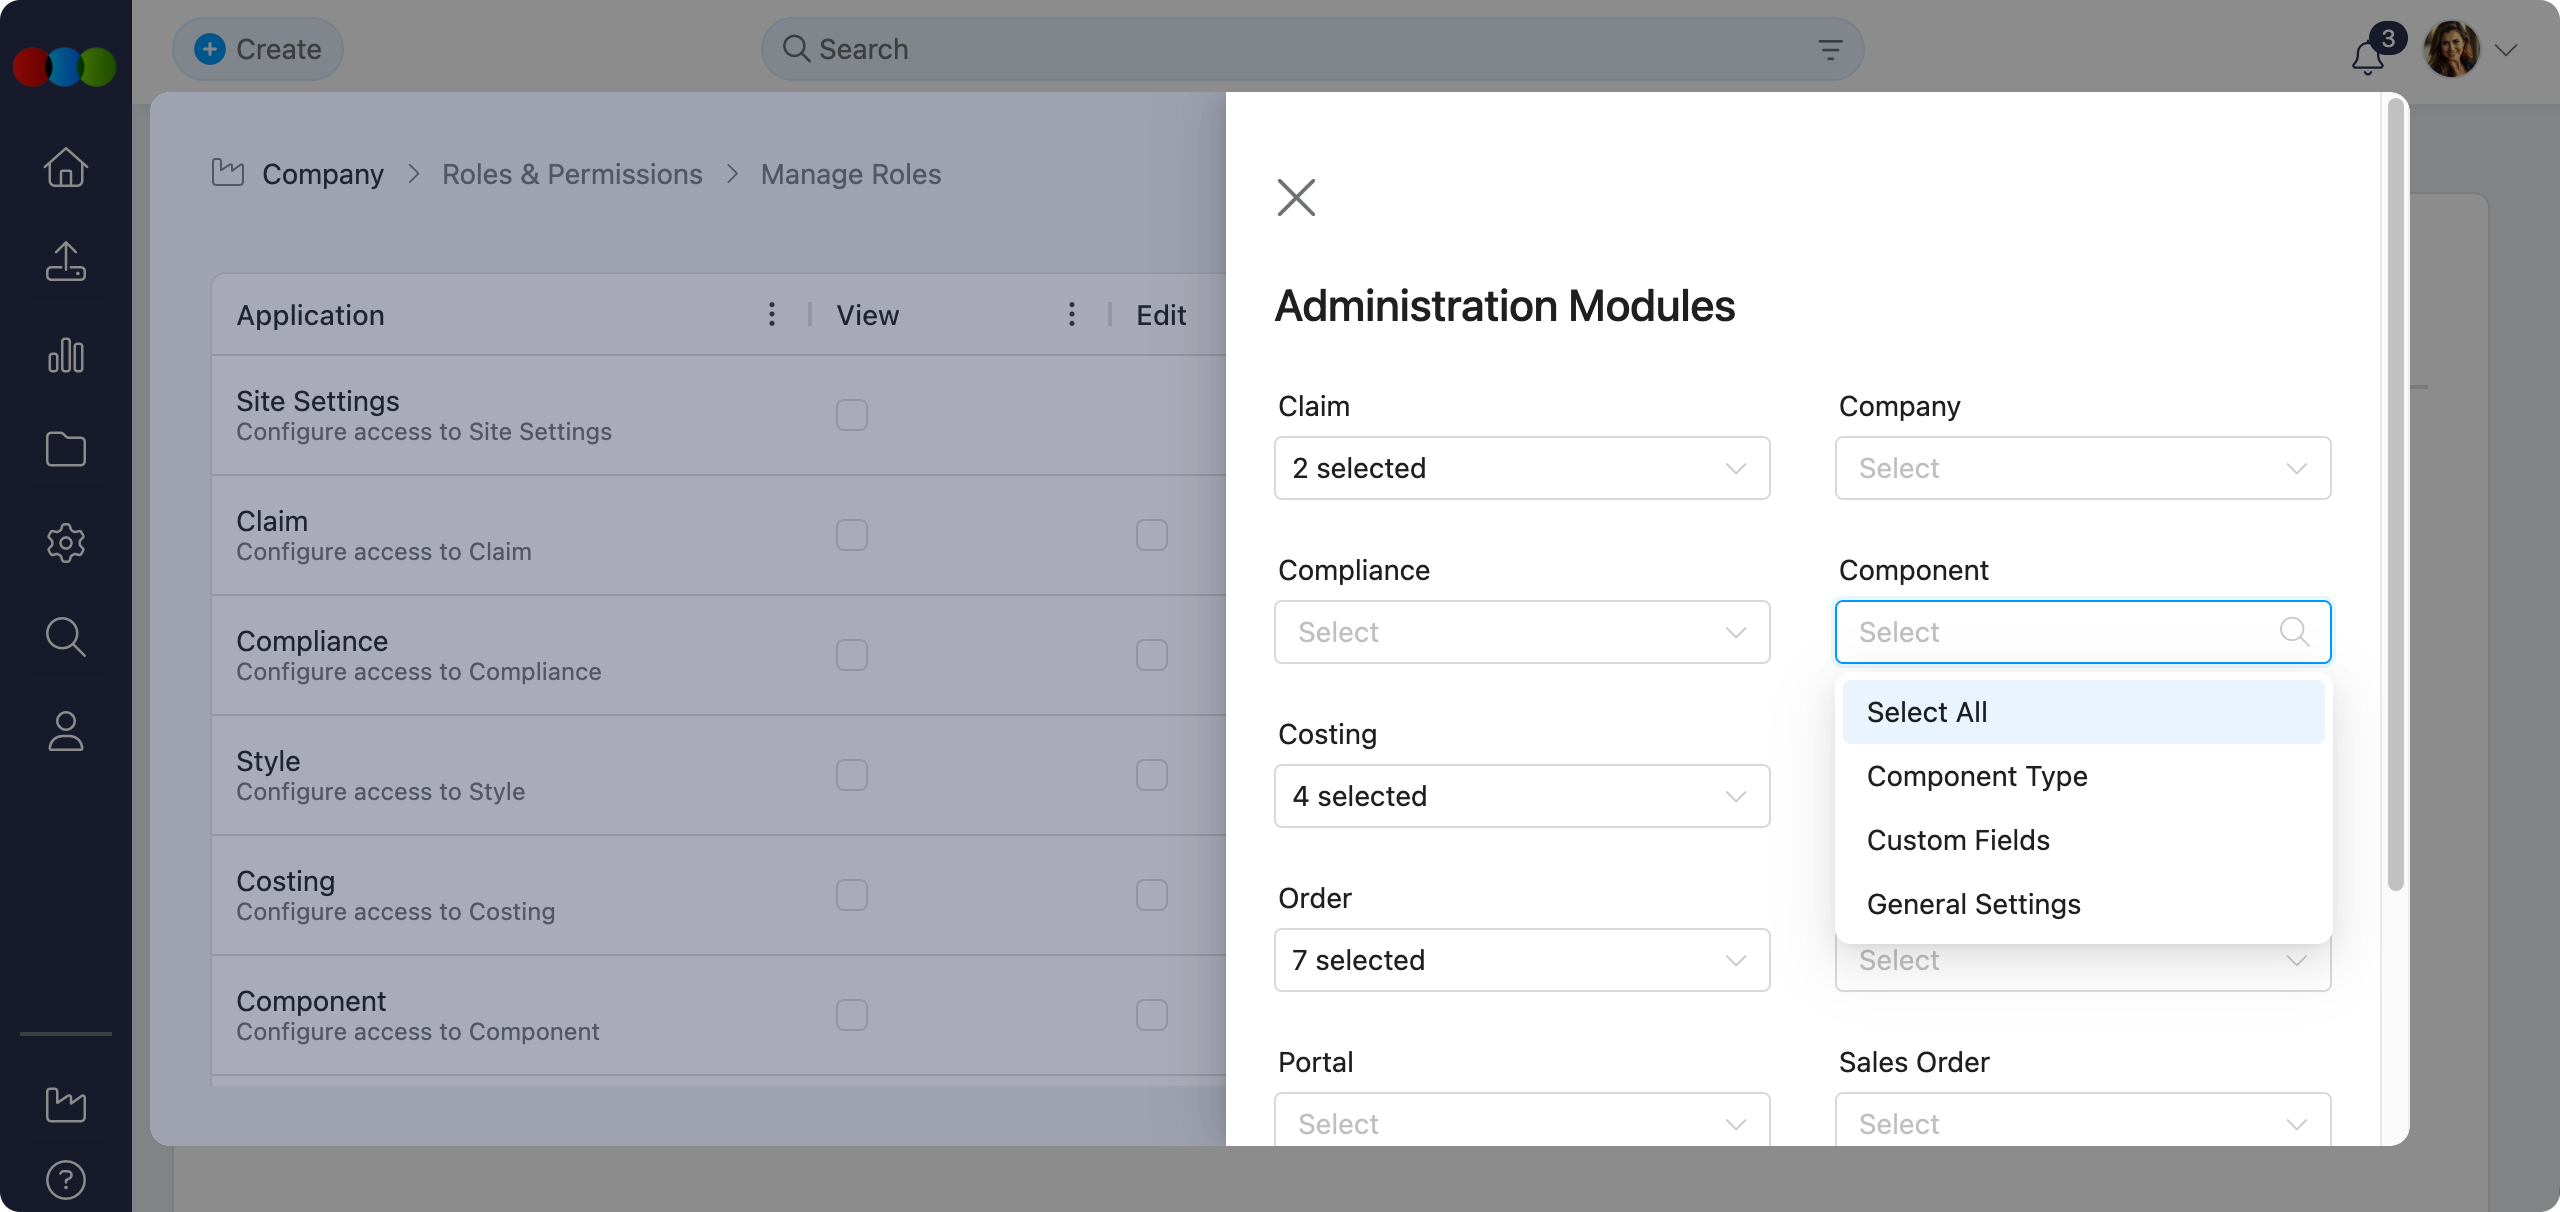
Administration Modules (Advanced)
When Advanced is clicked for Site Settings, the following sub-modules can be configured:
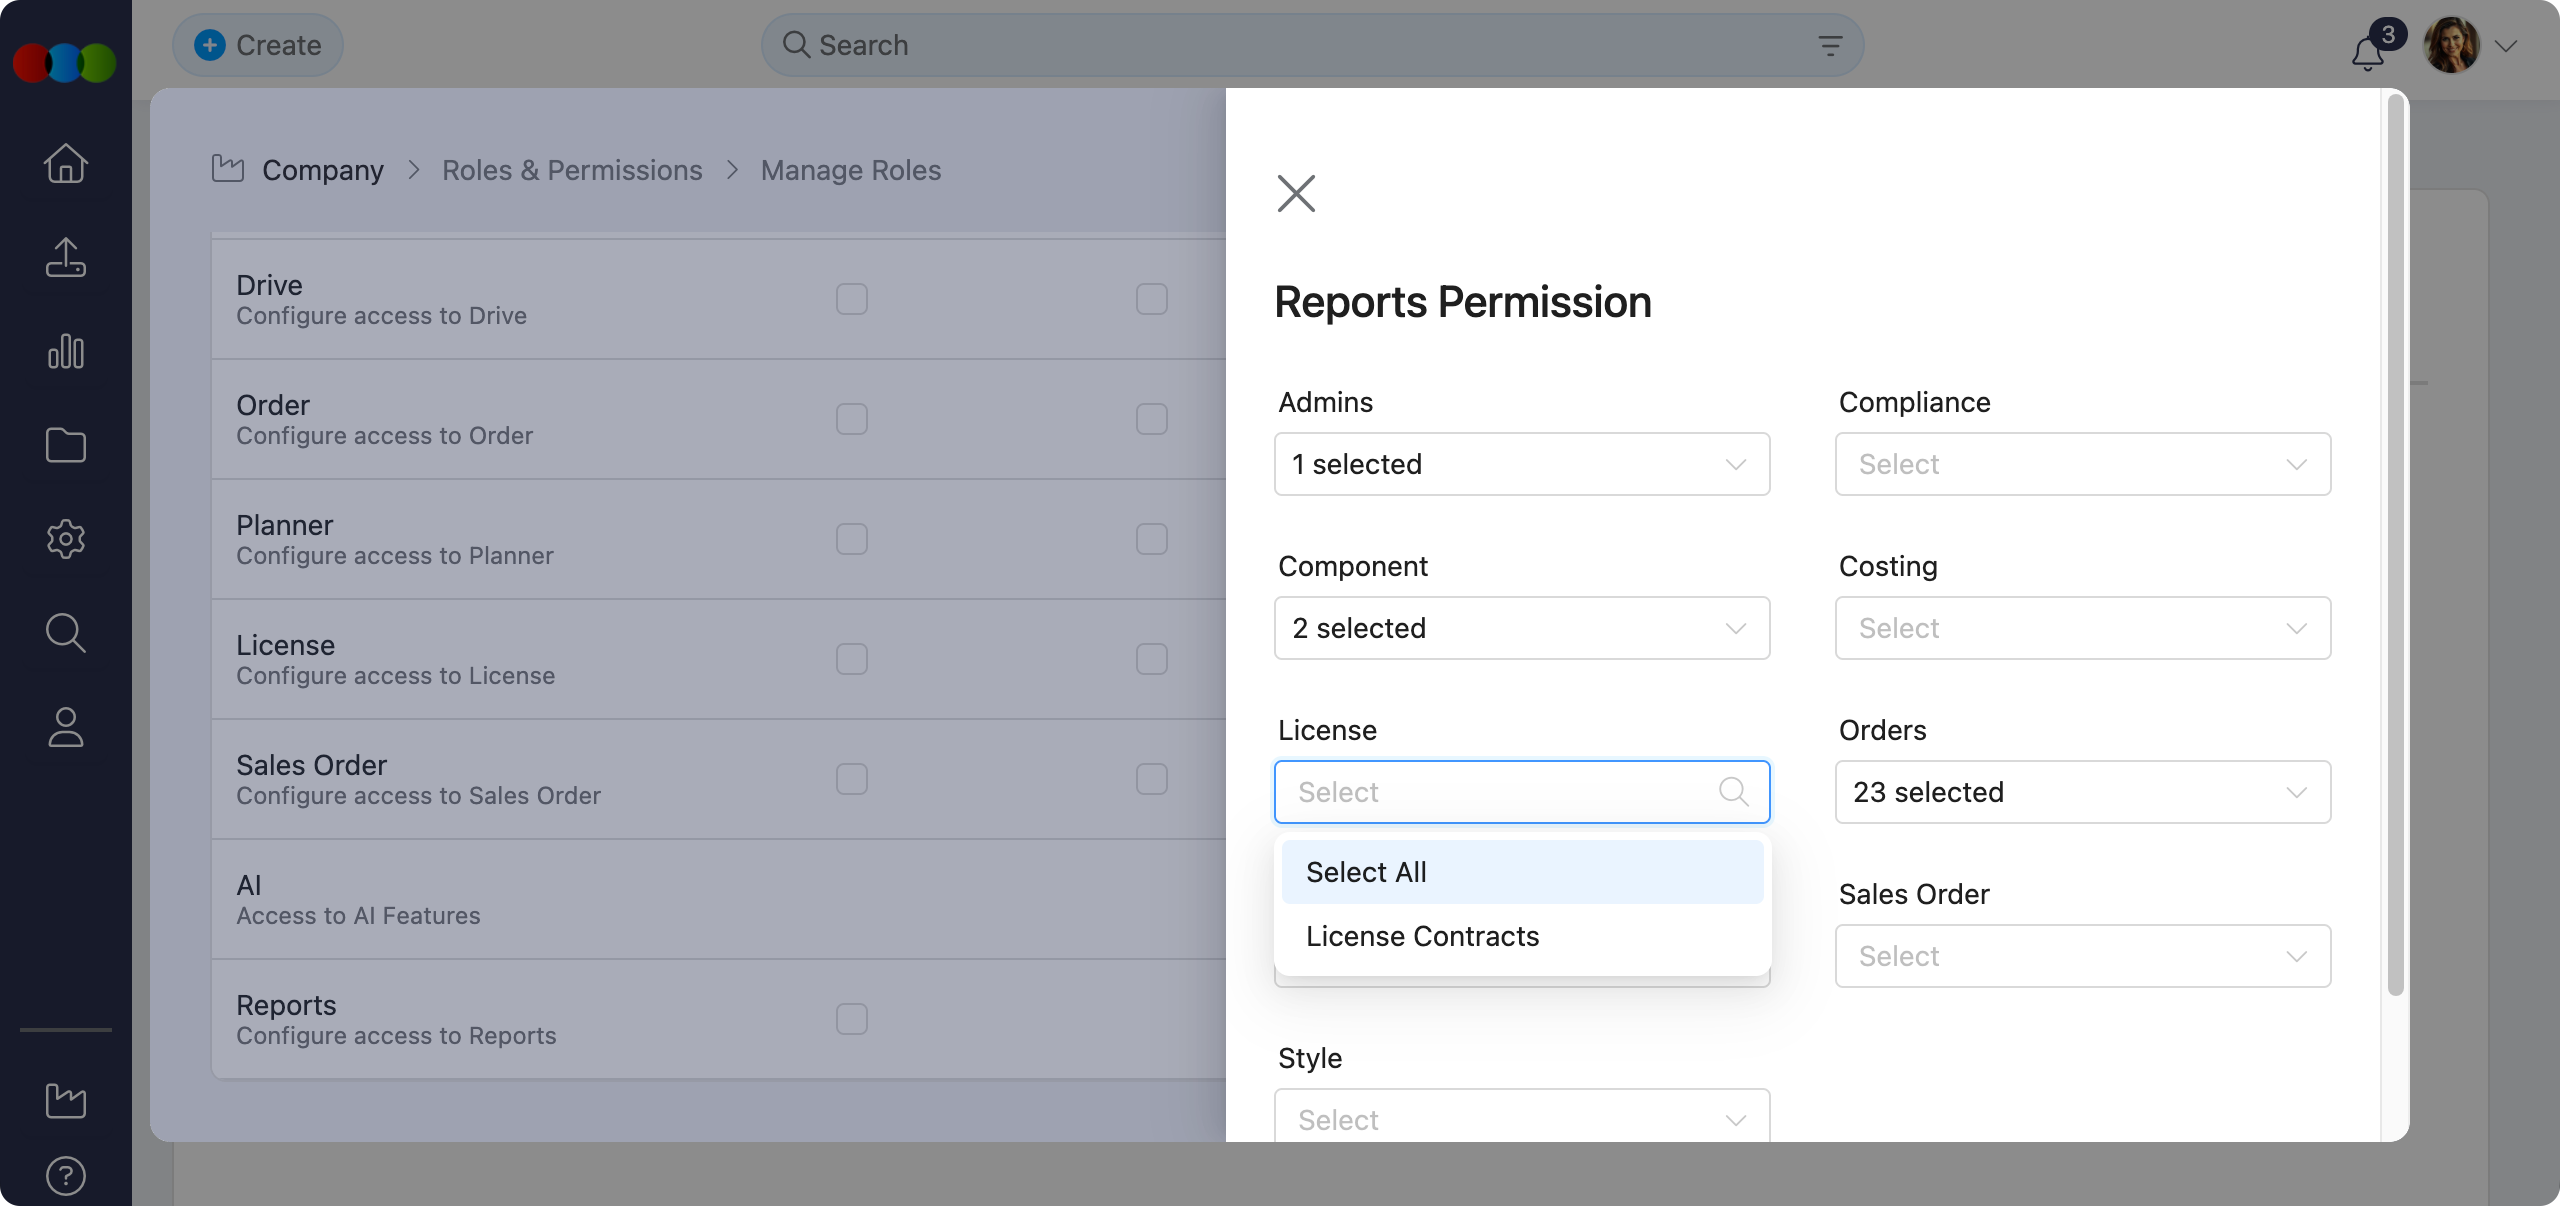
Reports Permission (Advanced)
When Advanced is clicked for Reports, the following report types can be configured:
Add a Role - Supplier Portal
Use Supplier Portal roles to control which modules vendor users can access in the Supplier Portal.
- Click the Add New button at the top left.
- Select Supplier Portal as the role scope.
- Enter a Role Title and configure the permissions matrix. The table shows view-only applications (no Edit, Create, or Delete columns for standard apps).
- Click Save to create the new role template.
After saving, confirm the role list grid Role Scope column shows Supplier Portal. Assign the role on the supplier record in Site Settings › Company › Suppliers. When a supplier portal user signs in, they see only the modules granted by View permissions on their role (for example Style or Order when those applications are enabled).
Form Fields
| Field | Type | Description |
|---|---|---|
| Role Title | Text (mandatory) | A unique name for the role (e.g., Factory Viewer, Agent - Orders Only). |
| Role Scope | Fixed | Supplier Portal which applies to supplier portal users. |
| Description | Free text | Optional notes about the role's purpose or usage. |
| Set as Default | Checkbox | When checked, this role becomes the default for Supplier Portal. Only one default per scope—a confirmation pop-up appears: "Are you sure you want to change the default role? Setting this role as the new default will replace the existing default role for Supplier & Customer Portal. Are you sure you want to proceed with this change?" |
Permissions Matrix Columns
| Column | Control | Description |
|---|---|---|
| Application | Text | Name of the application or module available in the Supplier Portal. |
| View | Checkbox | Grant read-only access to the module. Supplier portal users cannot edit, create, or delete records through standard app permissions. |
| Advanced | Select pill | Opens a pop-up for sub-module permissions where available. |
View-Only Access
Supplier Portal roles do not include Edit, Create, or Delete columns for standard applications. Portal users interact with customer-shared records within the access granted by View (and any Advanced options).
Application Permissions Reference
| Application | View | Advanced |
|---|---|---|
| Style | ✓ | — |
| Order | ✓ | — |
| Costing | ✓ | — |
| Claim | ✓ | — |
| Compliance | ✓ | — |
| Drive | ✓ | — |
Add a Role - Sales Order / DAM Portal
Use Sales Order / DAM Portal roles for customer and buyer access to the Customer Portal, including the B2B Online Store, sales order history, and DAM (Digital Asset Management) assets.
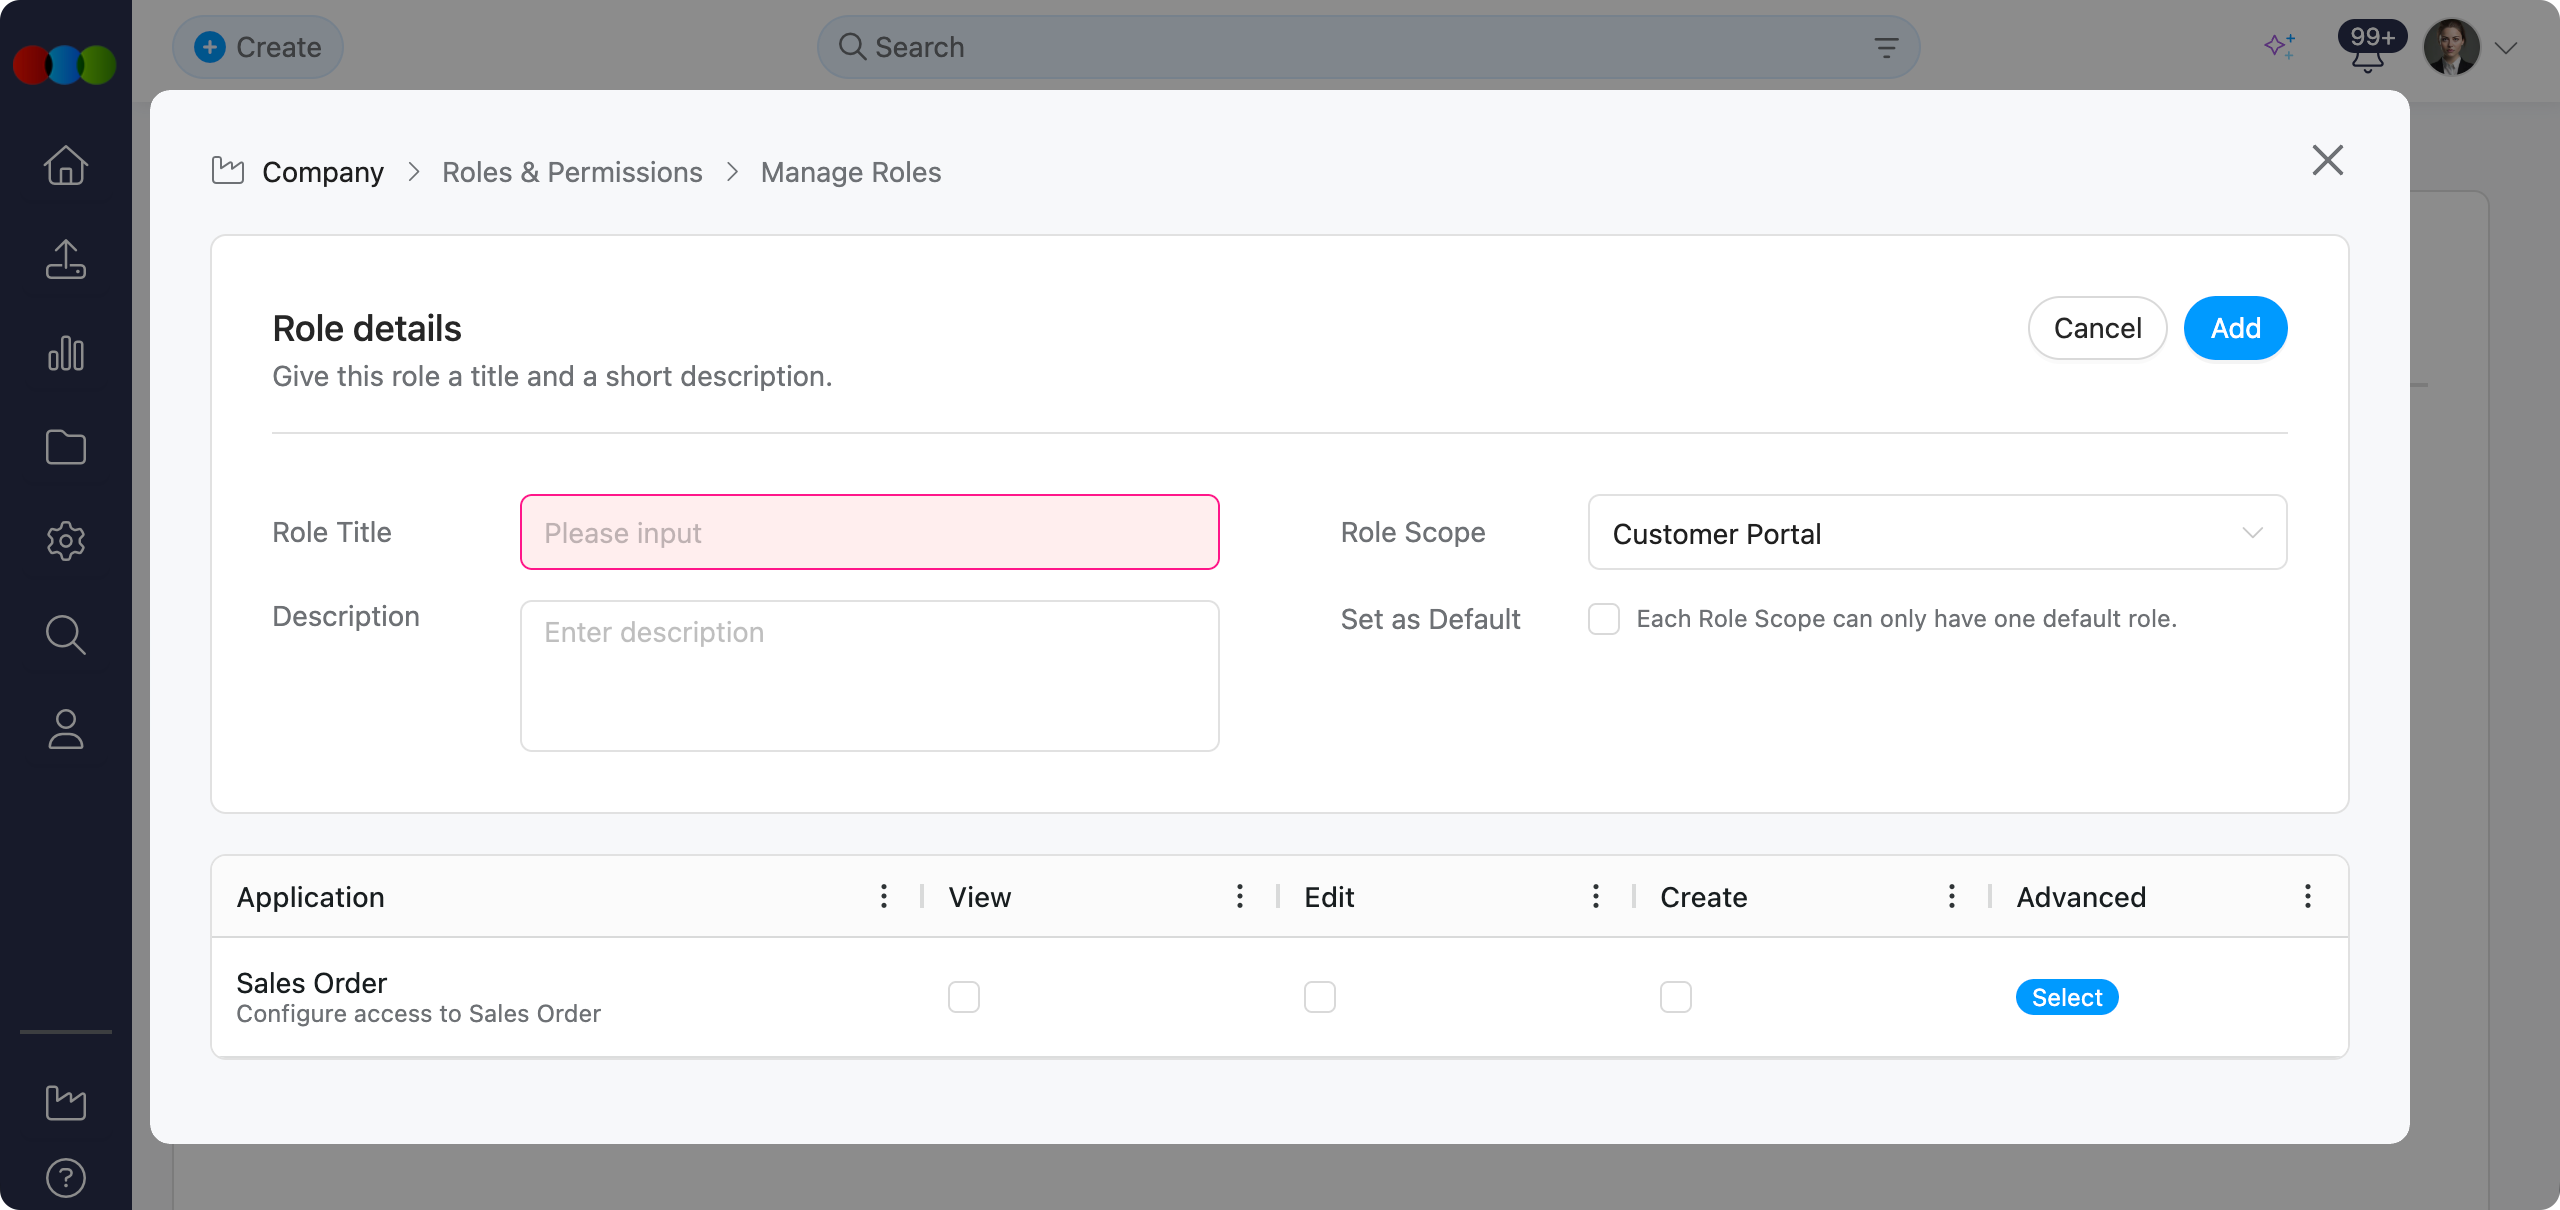
- Click the Add New button at the top left.
- Select Sales Order / DAM Portal as the role scope.
- Enter a Role Title and configure the permissions matrix—the table focuses on Sales Order, Style, Component, and Drive rather than the full staff PLM matrix.
- Click Save to create the new role template.
After saving, confirm the role list grid Role Scope column shows Sales Order / DAM Portal. Assign the role on the customer record in Site Settings › Company › Customer. The Roles & Permissions dropdown includes the new role. Portal users then see only the areas their role allows. For example the Store and checkout when Sales Order permissions are enabled, or read-only product information in the Asset Library when Style > View is granted.
Form Fields
| Field | Type | Description |
|---|---|---|
| Role Title | Text (mandatory) | A unique name for the role (e.g., Retail Buyer, Wholesale Manager, DAM Viewer). |
| Role Scope | Fixed | Sales Order / DAM Portal—applies to Sales Order and DAM portal users. |
| Description | Free text | Optional notes about the role's purpose or usage. |
| Set as Default | Checkbox | When checked, this role becomes the default for Sales Order / DAM Portal. Only one default per scope—a confirmation pop-up appears: "Are you sure you want to change the default role? Setting this role as the new default will replace the existing default role for Sales Order / DAM Portal. Are you sure you want to proceed with this change?" |
Permissions Matrix Columns
| Column | Control | Description |
|---|---|---|
| Application | Text | Name of the application or module. |
| View | Checkbox | Grant read-only access. |
| Edit | Checkbox | Grant permission to modify existing records. |
| Create | Checkbox | Grant permission to create new records. |
| Advanced | Select pill | Opens a pop-up for sub-module permissions where available. |
No Delete Permission
Sales Order / DAM Portal roles do not include a Delete permission.
Application Permissions Reference
| Application | View | Edit | Create | Advanced |
|---|---|---|---|---|
| Sales Order | ✓ | ✓ | ✓ | Sales Order Permission (Advanced) |
| Style | ✓ | — | — | Style Permission (Advanced) |
| Component | ✓ | — | — | — |
| Drive | ✓ | — | — | — |
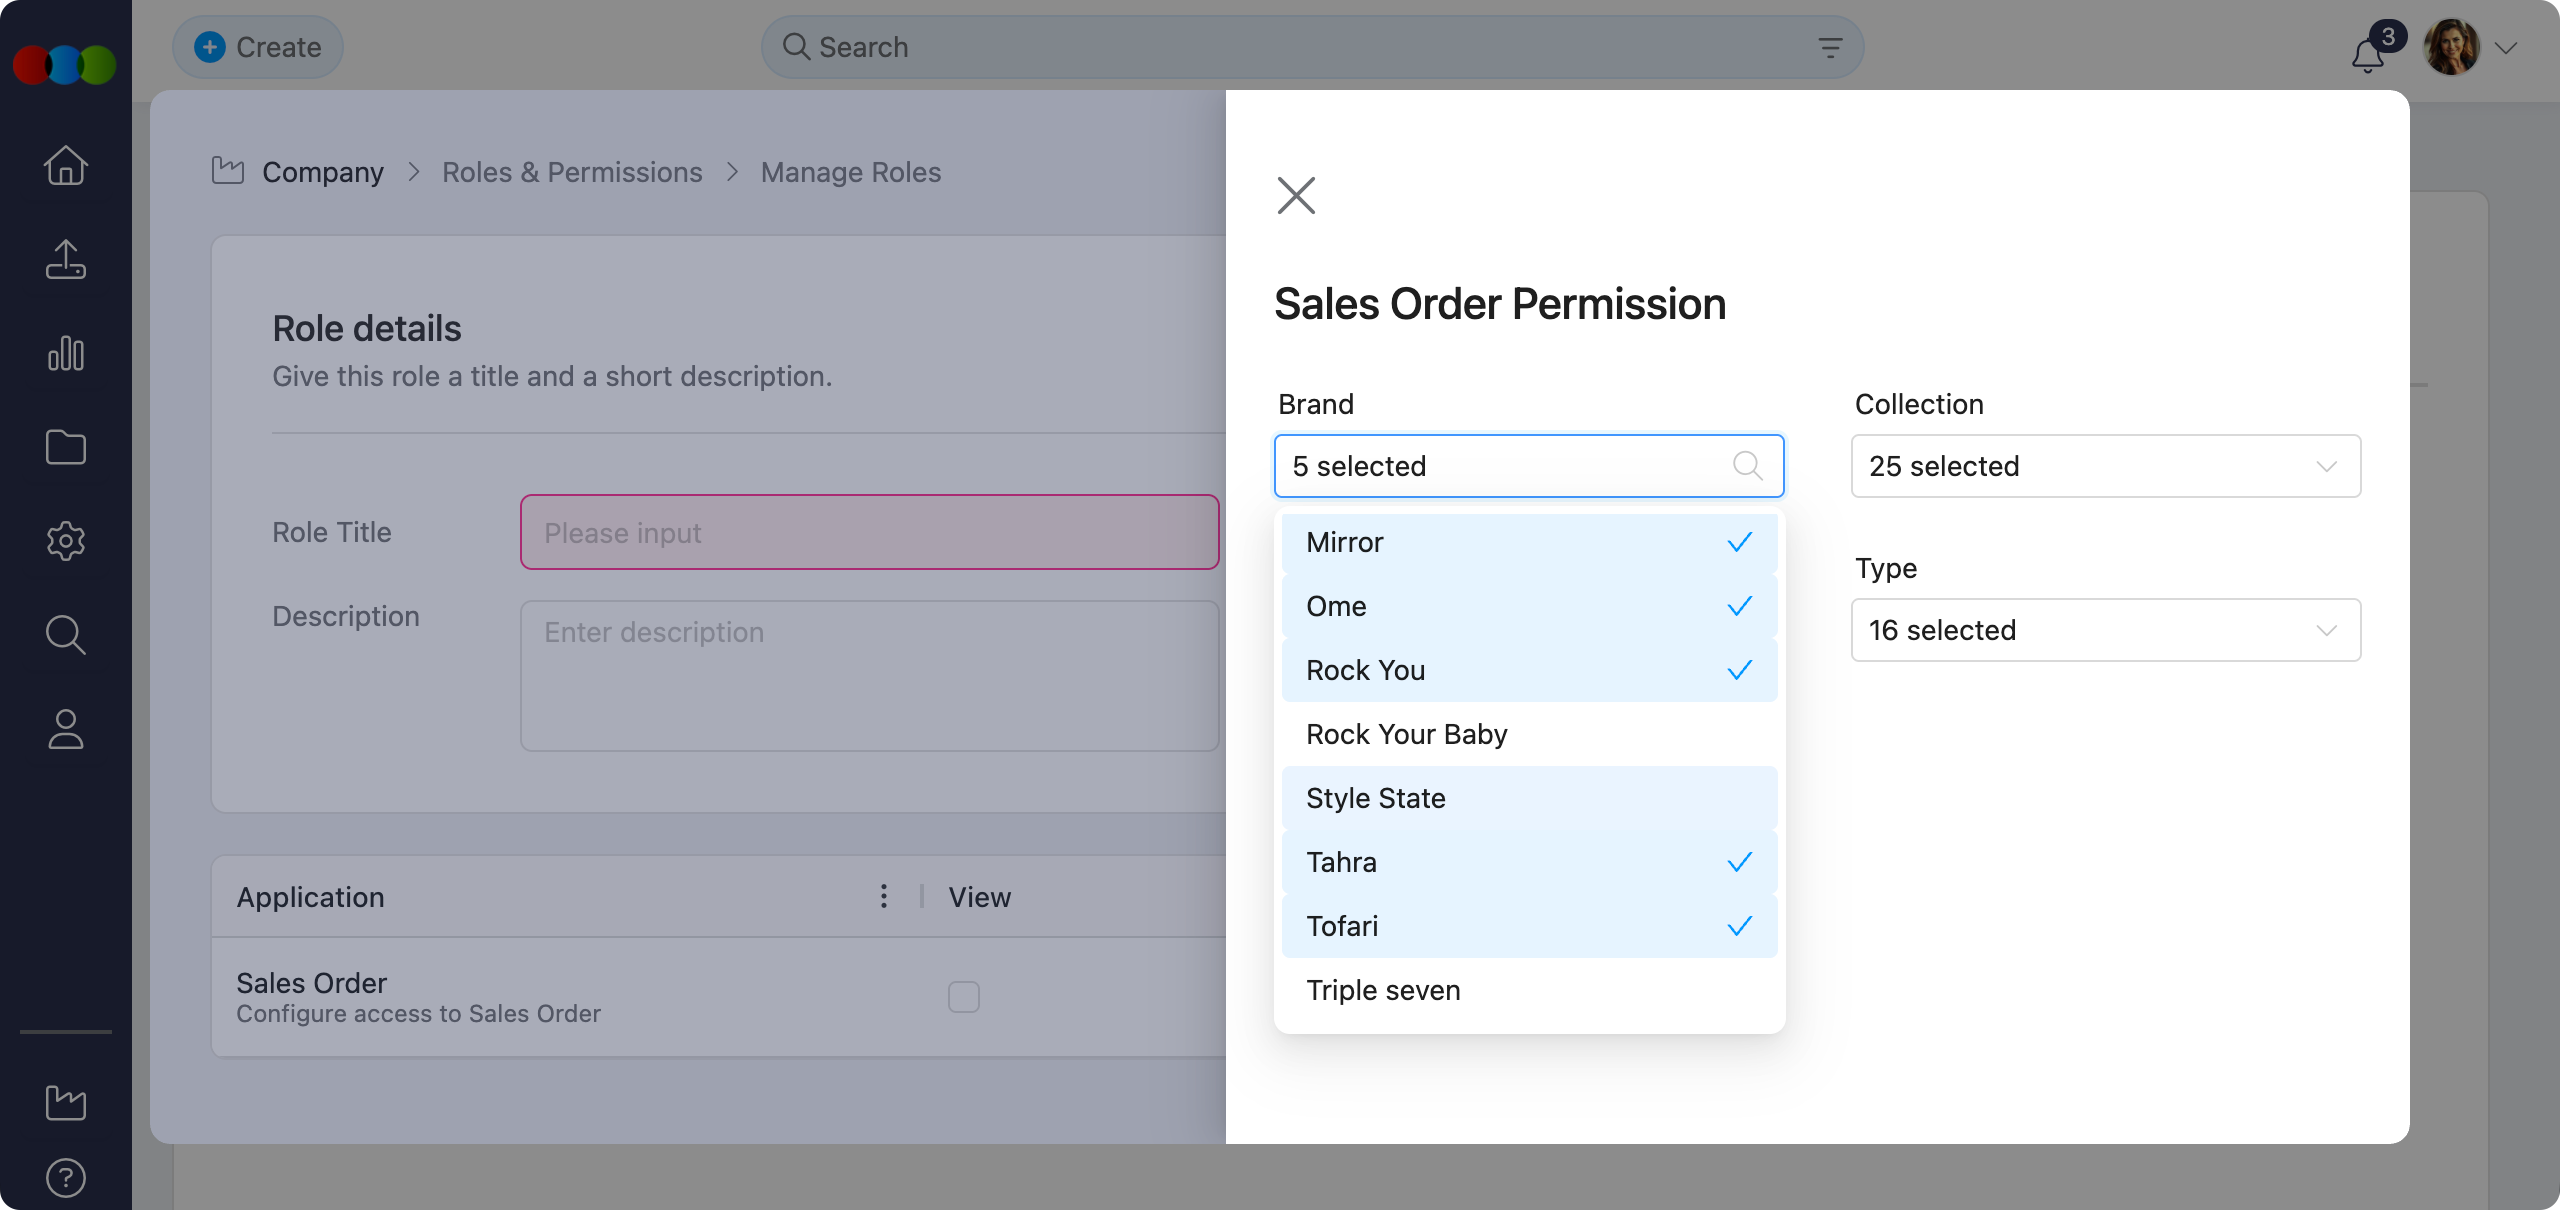
Sales Order Permission (Advanced)
When Advanced is clicked for Sales Order, the following options can be configured. Values are sourced from Site Settings:
| Option | Configuration Source |
|---|---|
| Brand | Site Settings › Style › Brand |
| Collection | Site Settings › Style › Collection |
| License | Site Settings › Style › License |
| Type | Site Settings › Style › Type |
Style Permission (Advanced)
When Advanced is clicked for Style, the following options can be configured. Values are sourced from Site Settings:
| Option | Configuration Source |
|---|---|
| Brand | Site Settings › Style › Brand |
| Collection | Site Settings › Style › Collection |
| License | Site Settings › Style › License |
| Type | Site Settings › Style › Type |
Edit a Role
- Click the three-dot menu icon next to the role you wish to modify and select Edit.
- Update the role name or adjust the permissions as needed.
- Click Save to apply the changes.
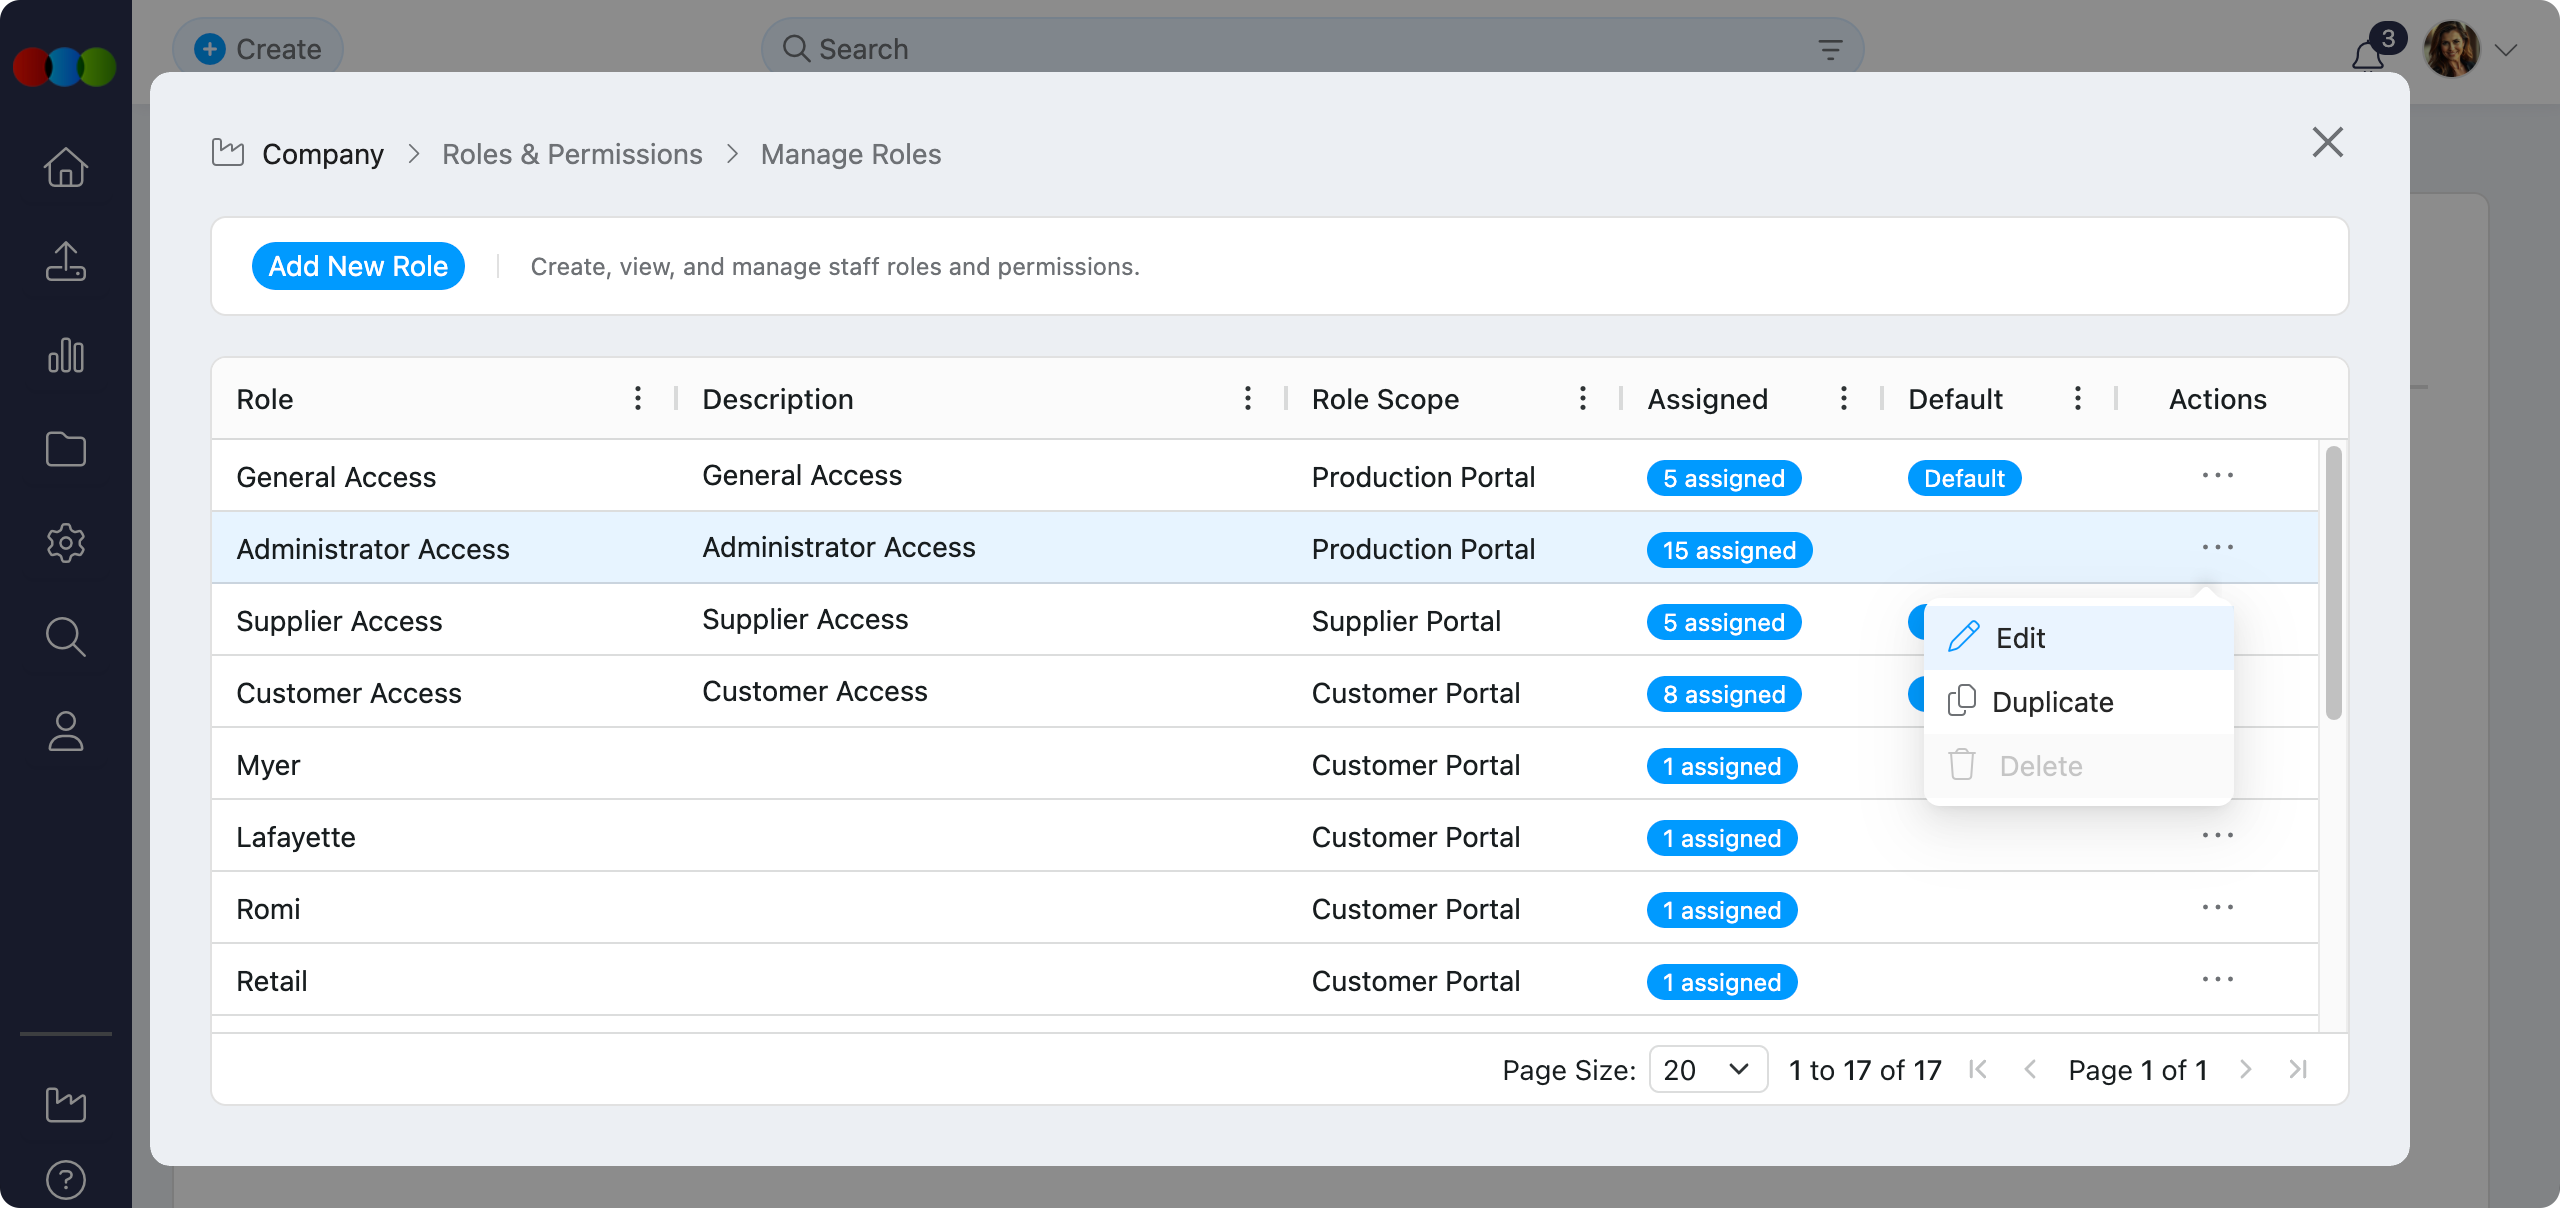
Duplicate a Role
This feature allows you to quickly create a new role based on an existing one.
- Click the three-dot menu icon next to a role and select Duplicate.
- Give the new role a unique name and make any necessary adjustments to its permissions.
- Click Save to create the copied role.

Delete a Role
- Click the trash icon next to the role you wish to remove.
- Confirm the action in the pop-up window.
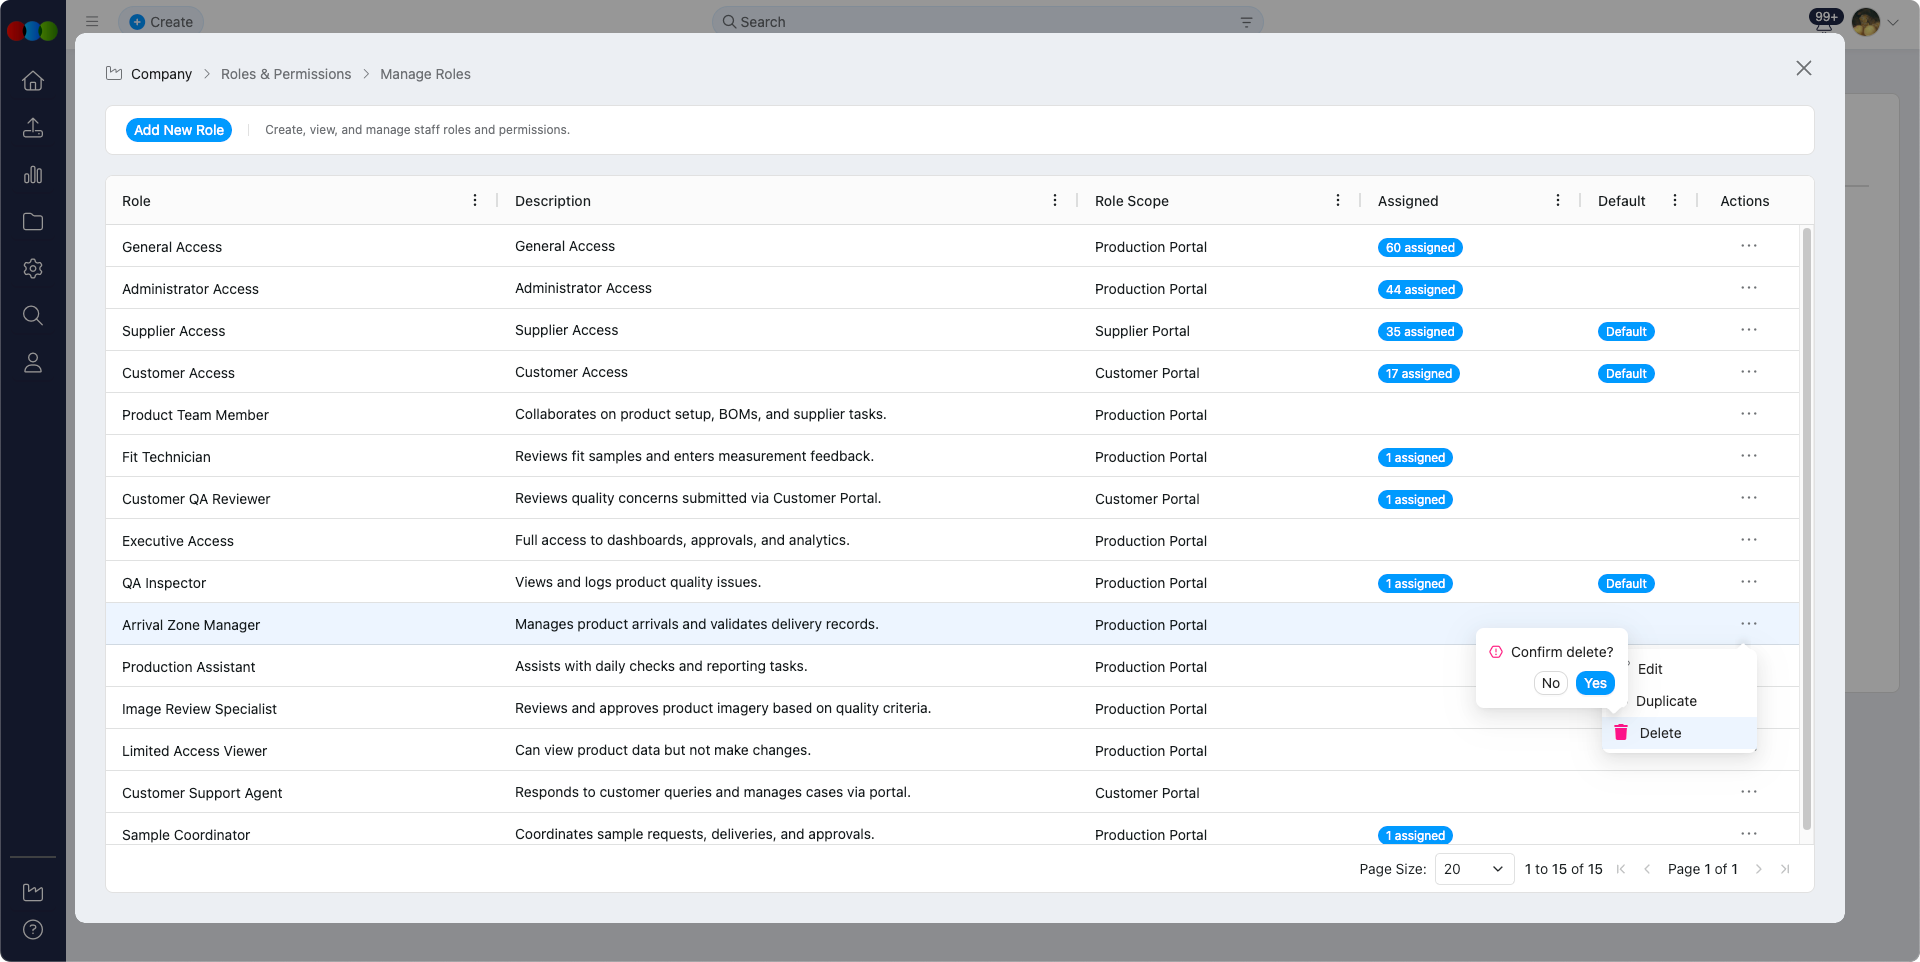
Default Roles
System-default roles cannot be deleted.
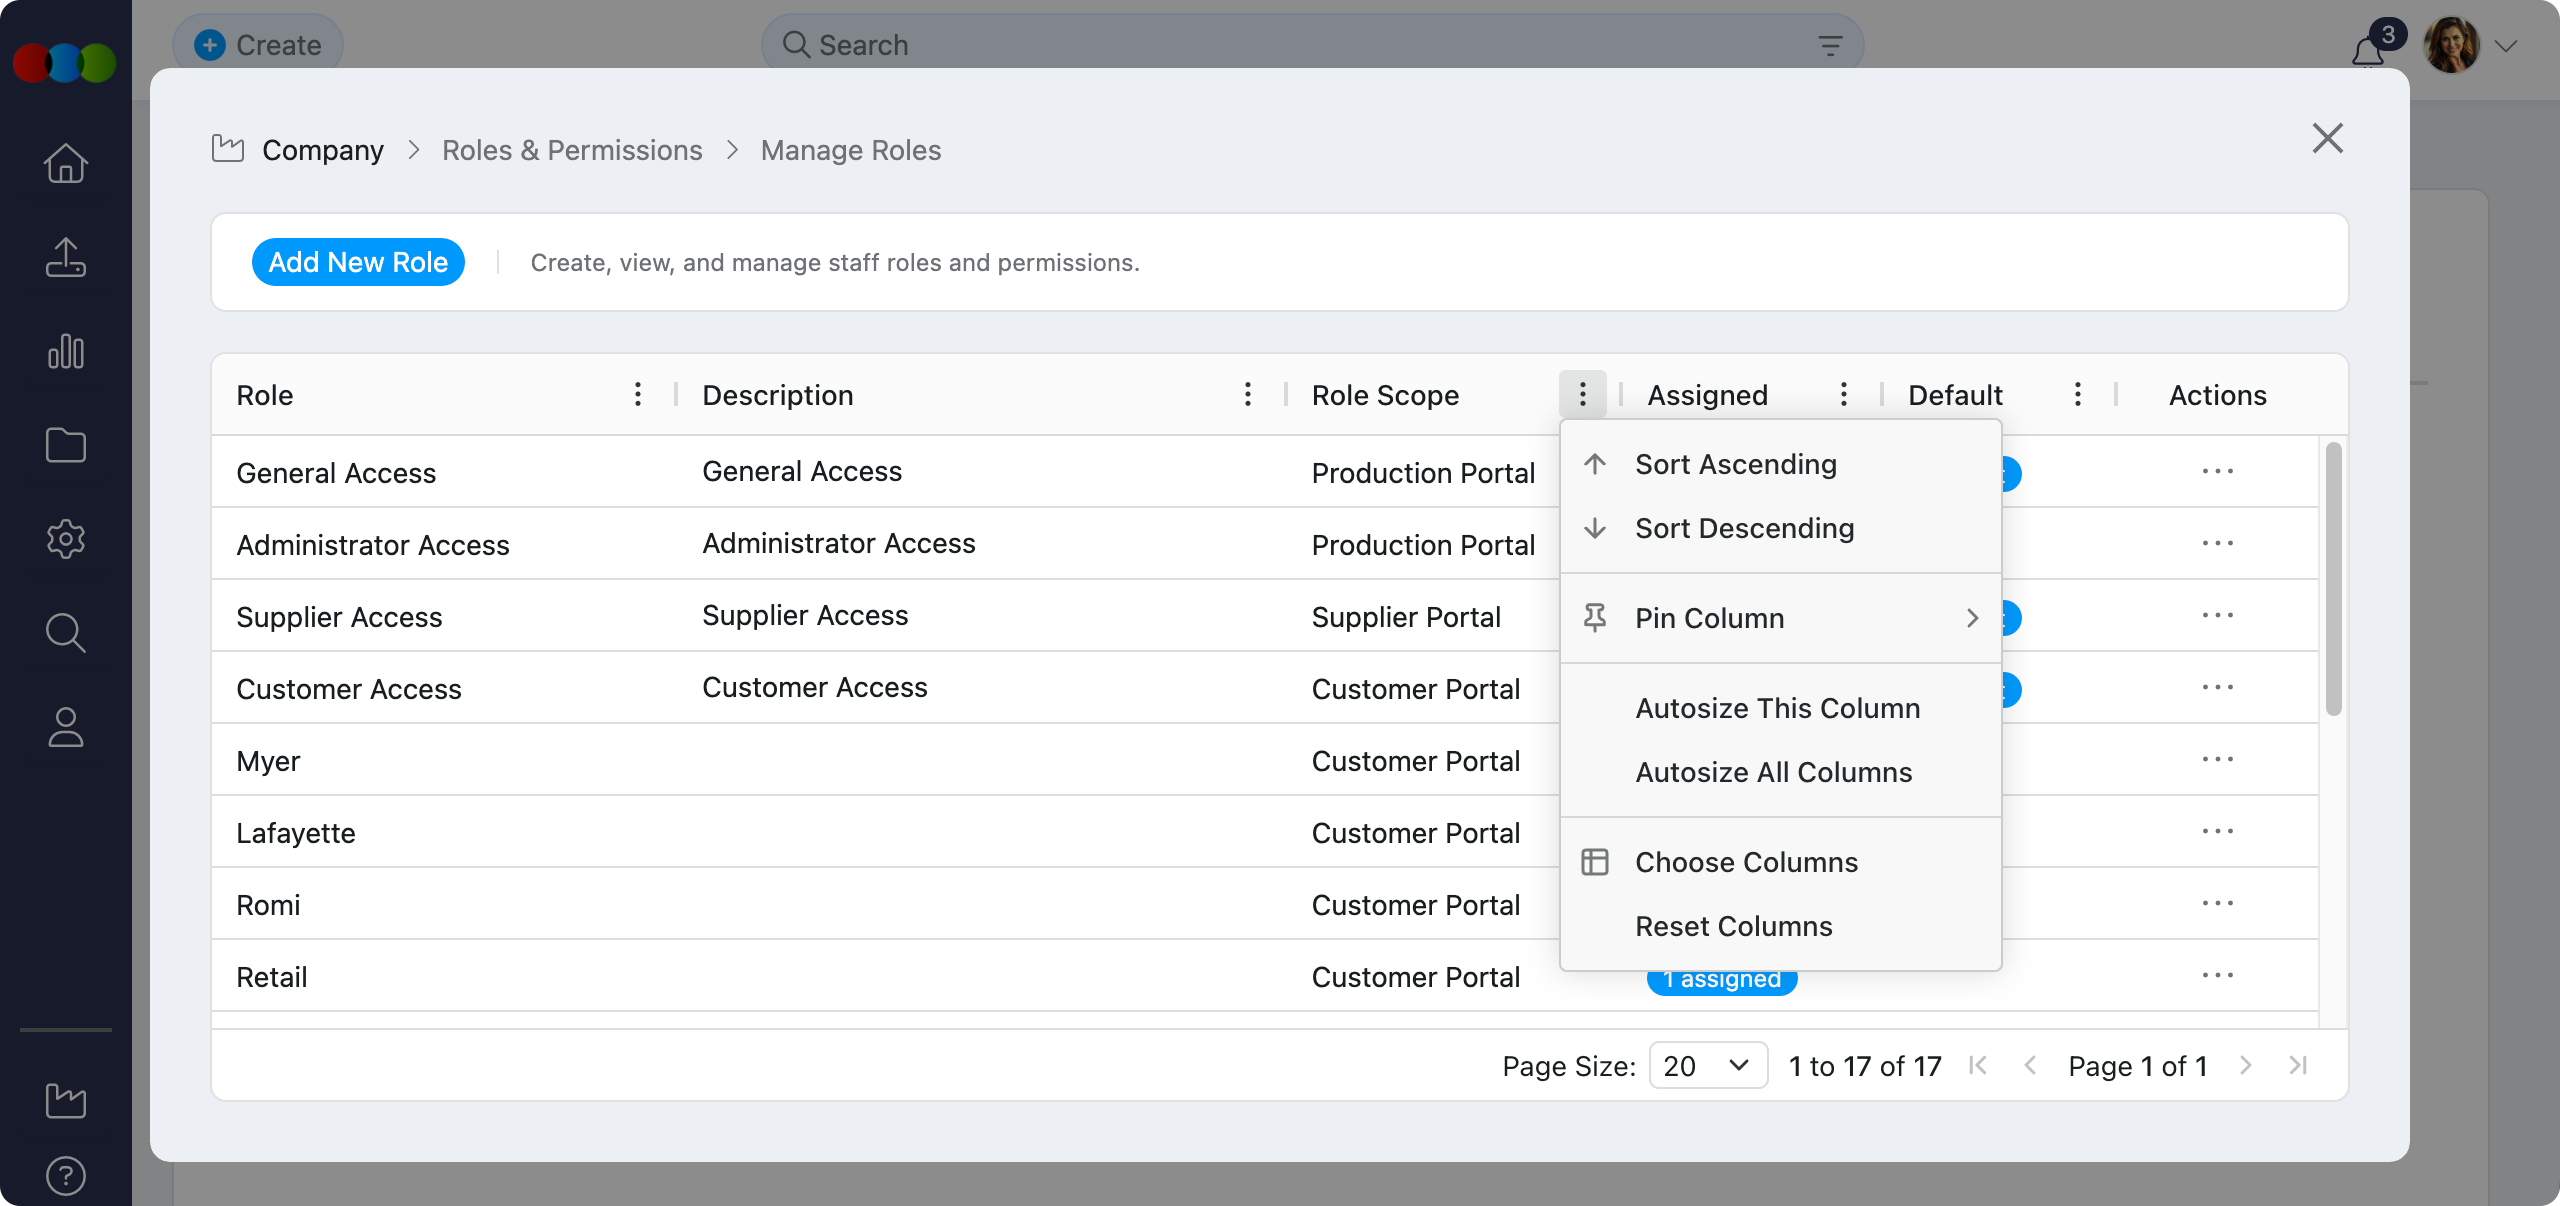
Table Flexibility
Users can tailor the table layout using the following controls:
| Feature | Description |
|---|---|
| Sort by Ascending or Descending | Reorder roles by clicking on any column header. |
| Pin Column | Lock important columns in place whilst scrolling horizontally. |
| Autosize This Column | Automatically resize the specific column to fit its content. |
| Autosize All Columns | Applies autosizing on all columns. |
| Choose Columns | Show or hide individual table columns. |
| Reset Columns | Return the table to the default configuration. |
Import
Bulk Import options (from the upload icon in the main navigation, and where applicable on application screens) use the same Roles & Permissions checks as creating or editing records. Each Import option appears only when your role grants the required access. If none of the imports available for that screen apply to your role, the upload icon is hidden.
| Import option | Required permissions |
|---|---|
| Import Components | Component — Create or Edit |
| Import Orders | Order — Create or Edit |
| Import Shipment | Shipping — Create or Edit. View-only access does not show this option (even if you can see shipments). |
| Import Spec Template | See the note below — controlled separately from main Style Create/Edit. |
| Import Style Files | Style — Edit |
Import Style (bulk new or updated styles via spreadsheet from the import menu) follows Style — Create or Edit, matching the records the import creates or updates. See Style › Import › New Styles and Style › Import › Update Existing Styles.
Import Spec Template and Site Settings
Import Spec Template visibility follows the Spec Template option under Administration Modules > Style (when your administrator configures which Site Settings areas a role can access), not only the main Style application Create/Edit checkboxes. It can appear when Spec Template is enabled for Site Settings but Style Create/Edit is off; it is hidden when Spec Template is disabled even if Style Create/Edit is on.
Related Documentation
Roles and permissions affect access across several modules. For detailed guidance, refer to:
| Path | Description |
|---|---|
| Site Settings › Company › Staff | Assign Production Portal roles when creating or editing staff records. |
| Site Settings › Company › Suppliers | Assign Supplier Portal roles on supplier records; controls vendor portal access. |
| Site Settings › Company › Customer | Customer records, Portal Search, and B2B Online Store linkage; assign Sales Order / DAM Portal roles here. |
| Site Settings › Company › Company AI | Configure AI access permissions—ensure Roles & Permissions allows create and access for AI features. |
| Customer Portal › Overview | End-user portal experience; access is governed by Sales Order / DAM Portal roles. |
| Supplier Portal › Overview | End-user supplier portal experience; access is governed by Supplier Portal roles. |
| Customer Portal › Sales Order | Customer-facing order history; requires Sales Order permissions on the portal role. |
| Order › Status | Order status changes may be restricted based on roles and permissions. |
| Order › Delete | Order > Delete permission on the user's Production Portal role. |
| Claim › Delete | Claim > Delete permission on the user's Production Portal role; assign the role in Staff. |
| Claim › Status | Status changes may be restricted by Claim permissions on the user's Production Portal role. |
| Style Import | Bulk style import — Create or Edit for Style; see Import. |
| Spec Import | Import Spec Template — Spec Template; see Import entry points and permissions. |
| Style › Delete | Role-based permissions control who can delete styles. |
Tip
- Use descriptive names (e.g., Finance - Read Only, Production - Full Access) to make roles easy to identify and assign.
- Leverage duplication to save time—duplicate an existing role and make minor adjustments instead of creating one from scratch.
- Conduct regular reviews of roles and permissions to ensure they align with your current business processes and security requirements.
- Configure roles before onboarding new staff to streamline user setup and avoid permission gaps.
Troubleshooting
Why is the Save button disabled or my role changes not applying?
You may be missing Site Settings edit permission, or the session may need a refresh after an administrator updated your access.
Steps to resolve:
- Confirm your user has Site Settings with Edit (or equivalent) in Roles & Permissions for the Production Portal scope.
- Reload the page or sign out and back in, then try Save again.
- If you are not an administrator, ask an admin to verify Administration Modules includes the sub-area you need.
Why can a user see a module but not a specific Site Settings sub-page?
Site Settings uses a parent permission plus Administration Modules for granular areas such as Order, Style, or Costing settings.
Steps to resolve:
- Open the role and click Advanced next to Site Settings.
- Enable the sub-modules that match the documentation links your user needs (for example Order › General Settings).
- Save the role and ask the user to refresh or re-login.
Why does Sales Order / DAM Portal advanced access not list the options I expect?
Sales Order and Style advanced options are driven by lists in Site Settings › Style (Brand, Collection, License, Type). Empty or incomplete lists limit what you can assign.
Steps to resolve:
- Verify the required values exist under Site Settings › Style for Brand, Collection, License, and Type.
- Return to the role and reopen the Sales Order advanced permission pop-up.
- Adjust selections to match the customer’s allowed ranges, then Save the role.
Why does a supplier portal user not see Style, Order, or other modules?
Supplier portal visibility follows the Supplier Portal role assigned on the supplier record and the View permissions enabled for each application.
Steps to resolve:
- Open Site Settings › Company › Suppliers and confirm the supplier has the correct Supplier Portal role in Roles and Permissions.
- In Site Settings › Company › Roles & Permissions, edit the role and enable View for the required applications (for example Style or Order).
- Ask the supplier user to sign out and back in after permission changes.
Why is the upload (Import) icon missing, or why does an Import option not appear?
Bulk Import entry points check the same permissions as creating or editing the relevant records. If your role does not include the required access, the option or icon is hidden.
Steps to resolve:
- Review Import entry points and permissions for the import you need.
- Ask an administrator to update your role in Site Settings > Company > Roles & Permissions.
- Sign out and back in after permission changes.