Groups
The Groups module in Site Settings > Planner allows administrators to configure the custom groupings used within the Planner. These groups define how Styles are organised when users switch to the Fixed Group view in the Planner.
This enables you to create and manage grouping rules that determine how Styles are segmented during planning. Each group can be assigned one or more filters, allowing you to tailor how product data is structured and displayed.
When a plan is created, 3 Clicks copies the selected group heading and filter rules into that plan. This copied version becomes the plan's base filter. Planners can add extra filters within their own plan to narrow a Fixed Group tab, but those plan-level filters do not change the Admin template or affect other plans.
Available Filters
You can filter Planner Groups using the following options:
- Brand: Filter styles by brand association
- Category: Filter styles by main product category
- Type: Filter styles by product type classification
- Collection: Filter styles by collection grouping (e.g., Spring/Summer, Autumn/Winter)
- Gender: Filter styles by target gender (e.g., Men, Women, Unisex)
- Department: Filter styles by the department responsible for the style
These filters can be used individually or in combination to create precise grouping rules that match your planning requirements.
This configuration ensures that teams can work with consistent, meaningful groups that align with business needs, merchandising logic, or planning workflows.
Quick Check - Before You Start
- You can edit Site Settings › Planner › Groups
- Confirm Brand, Category, Type, Collection, Gender, and Department masters match how styles are tagged
- Changes made here apply to newly created plans; existing plans keep the copied base filters they already captured
How to Add a Group
| Step | Description |
|---|---|
| 1 | Go to Site Settings > Planner > Groups. 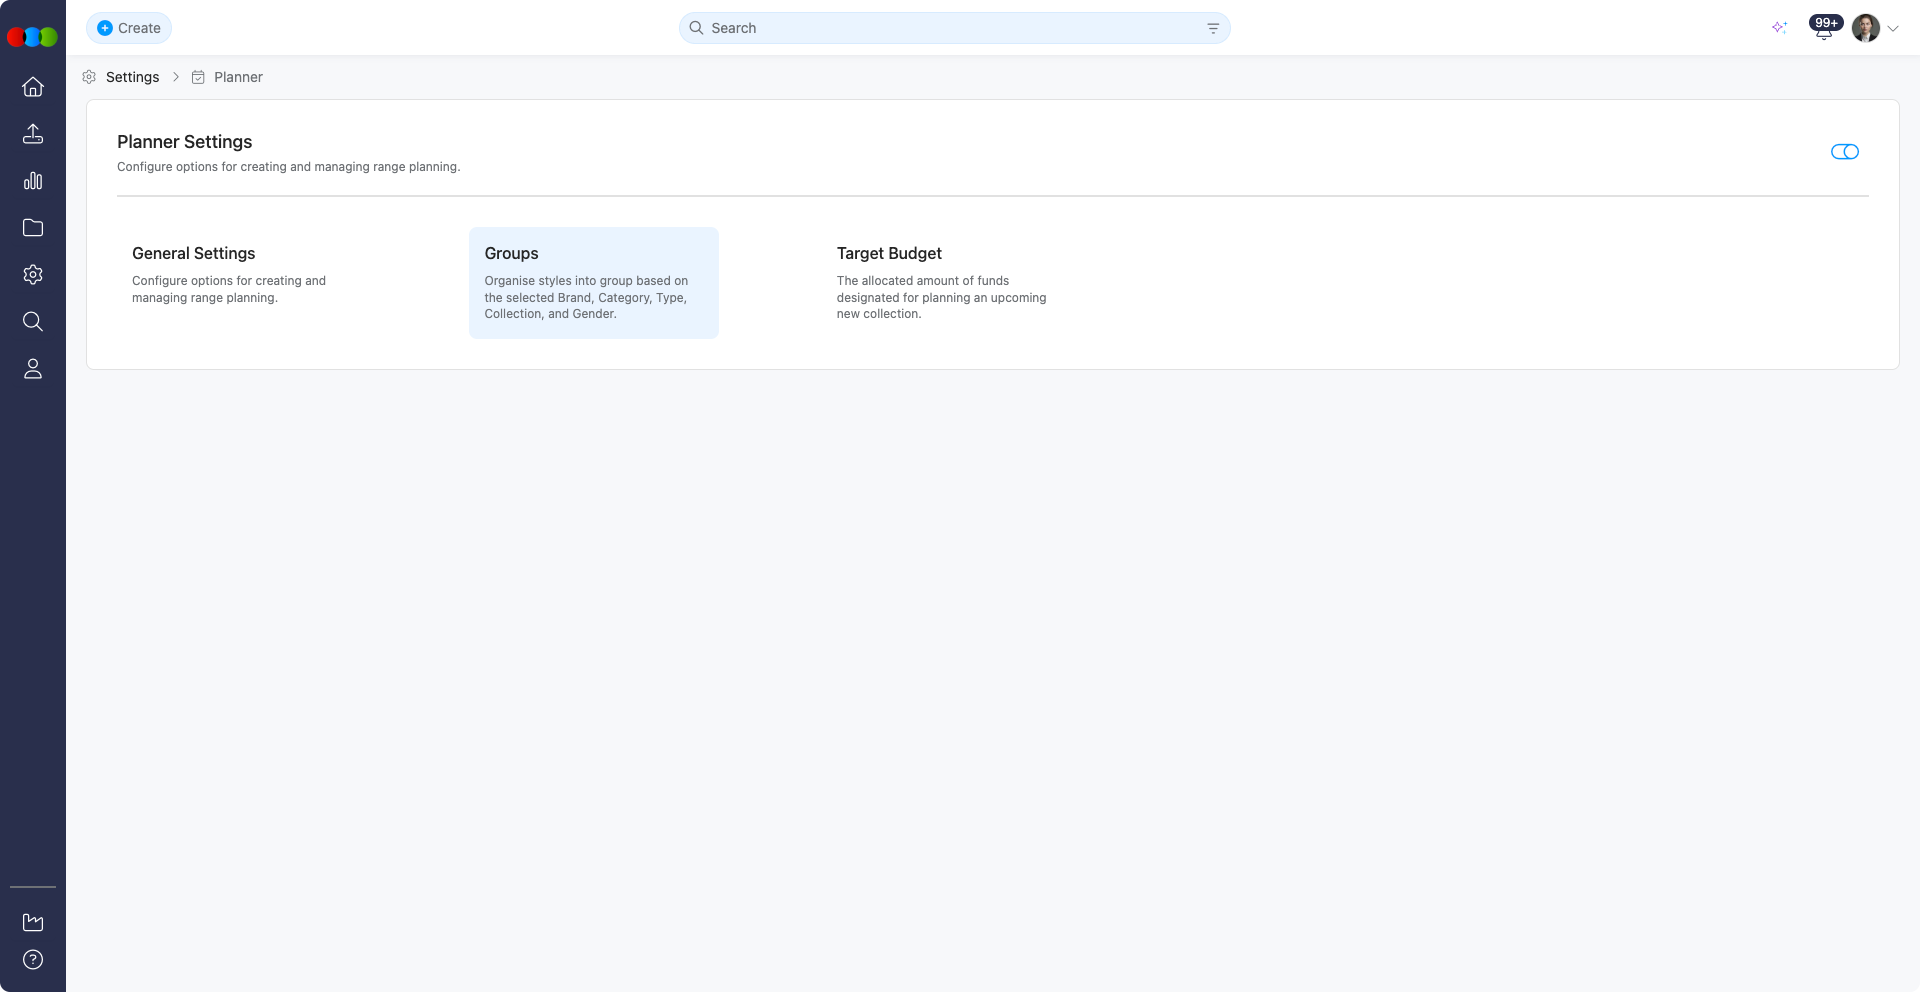 |
| 2 | Click the Add Group button to open the Groups pop-up window. The pop-up includes pre-populated data so you can assign items to groups more quickly. 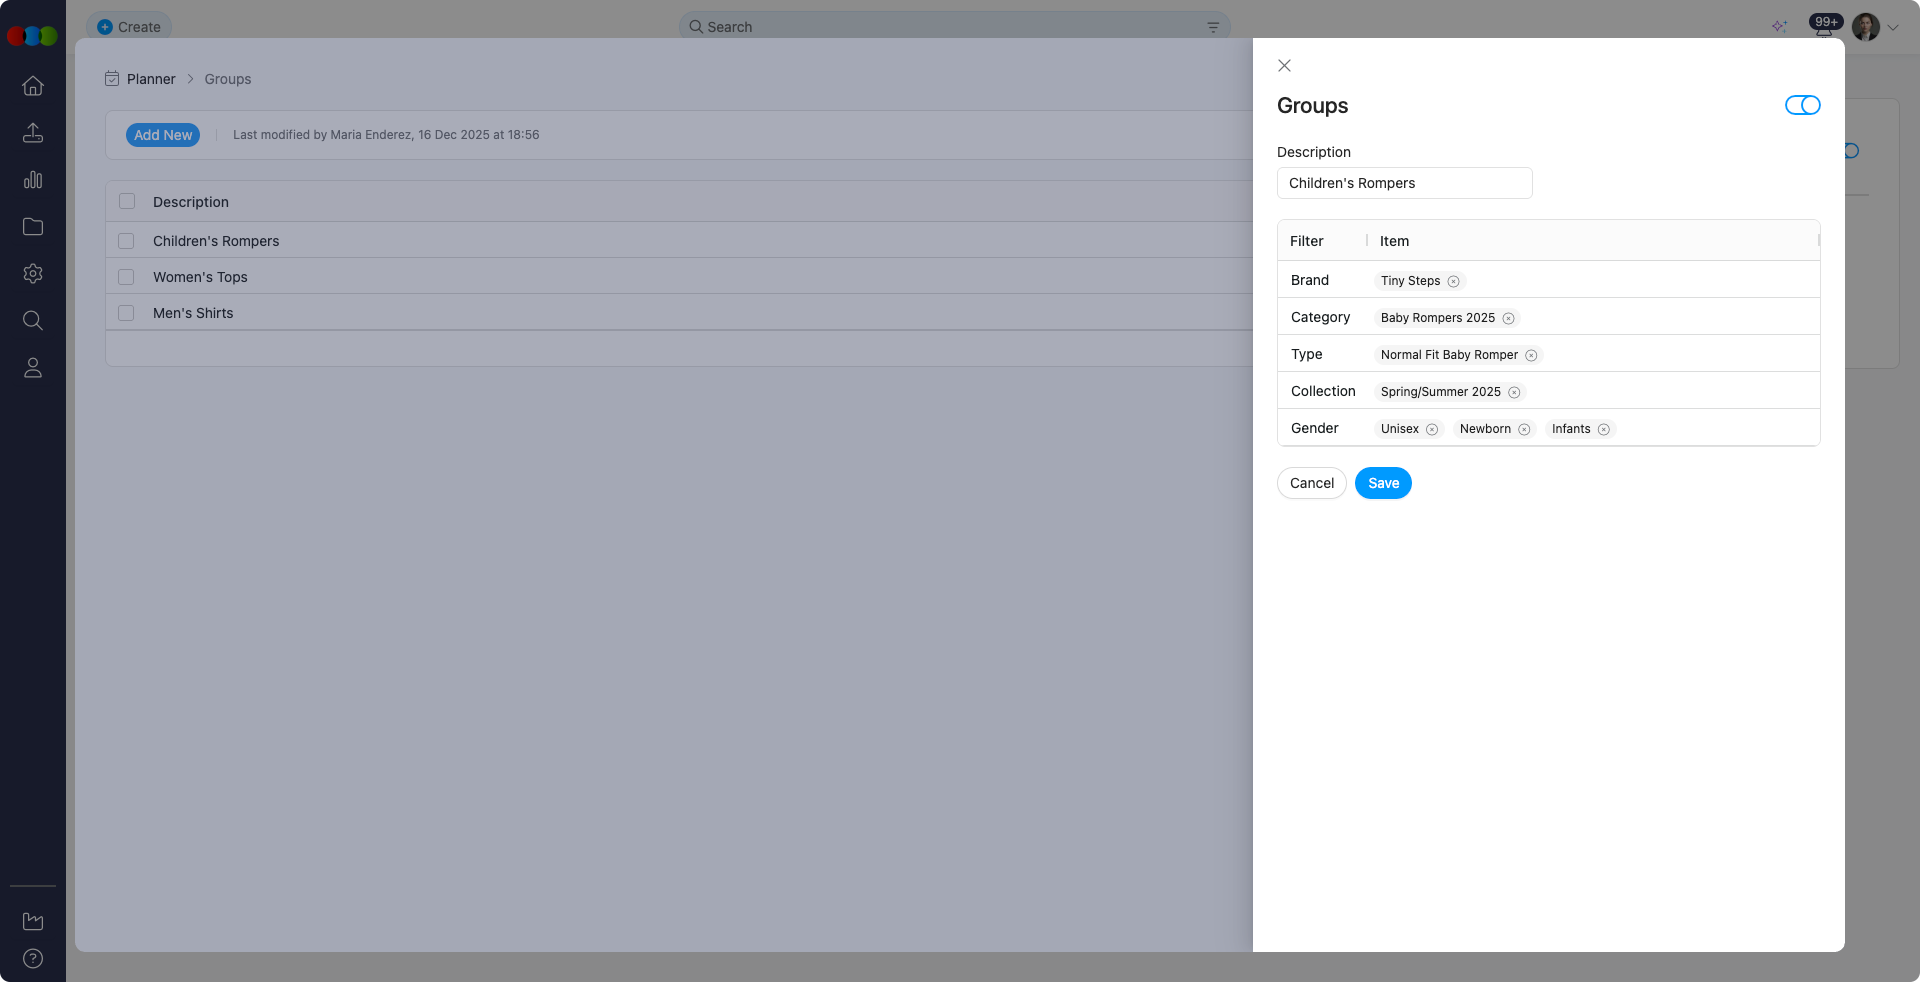 |
| 3 | Input the Group name in the Description field. |
| 4 | In the table, choose a Filter from the available options (Brand, Category, Type, Collection, Gender, or Department) and select an Item for that filter. You can add multiple filters to create more specific grouping rules. |
| 5 | Click Save to create the group. It will then appear in the list. |
| 6 | Go to Planner > View > Groups, select your new group, and switch to Fixed Group view to apply it. |
Groups configured here appear as selectable options under Planner > View > Groups, allowing users to filter their planning screen based on these structured segments.
Edit Groups and Filters
You can edit a group and modify its filters after creation. Open the group from the list and update the description or filter configuration as needed. Changes are saved when you click Save.
Planner independence
Editing a group's filter or items in Site Settings > Planner > Groups does not automatically update groups already copied into an existing planner. Existing plans retain the base filter captured at plan creation, while newly created plans inherit the updated Admin template.
Admin Base Filters and Plan-Level Filters
Group headings and filter rules defined here are treated as Admin base filters after they are copied into a plan. Admins can stack multiple filter levels in the template, such as Collection followed by Category, and each copied filter becomes part of the plan's base filter.
Plan-level additional filters are managed from Planner > Styles on a Fixed Group tab. They are additive only: they can narrow the copied base filter, but they cannot remove, override, or broaden it.
Admin changes do not backfill existing plans
Changing a group definition in Site Settings > Planner > Groups after a plan has been created will not update that existing plan. Existing plans retain the base filter captured at creation time. Only new plans inherit the updated Admin template.
Best practice
Keep Admin base filters broad enough to suit most seasons, then let planners narrow within the plan using plan-level additional filters. This reduces the need to create multiple Admin group templates for similar product categories.
History Logging
All actions in the group pop-up are logged in the history download for audit and traceability. You can review changes made to groups over time and track who made modifications.
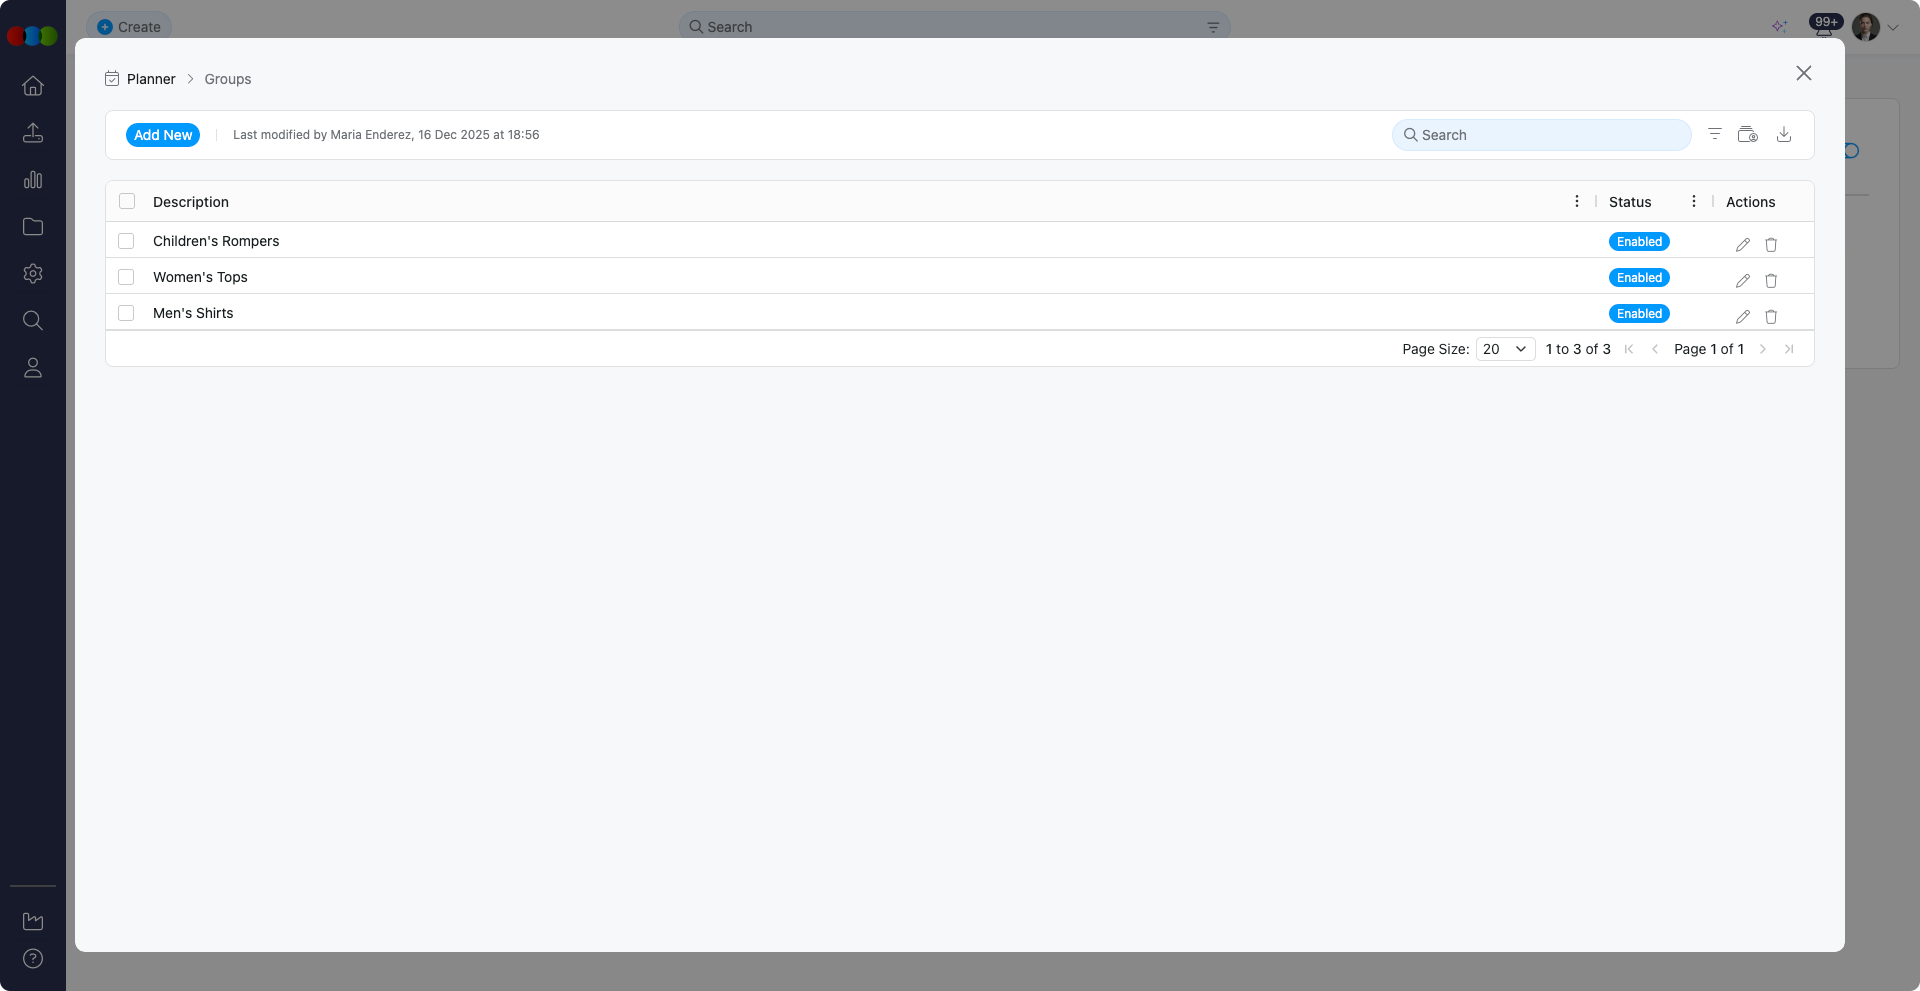
Table Flexibility
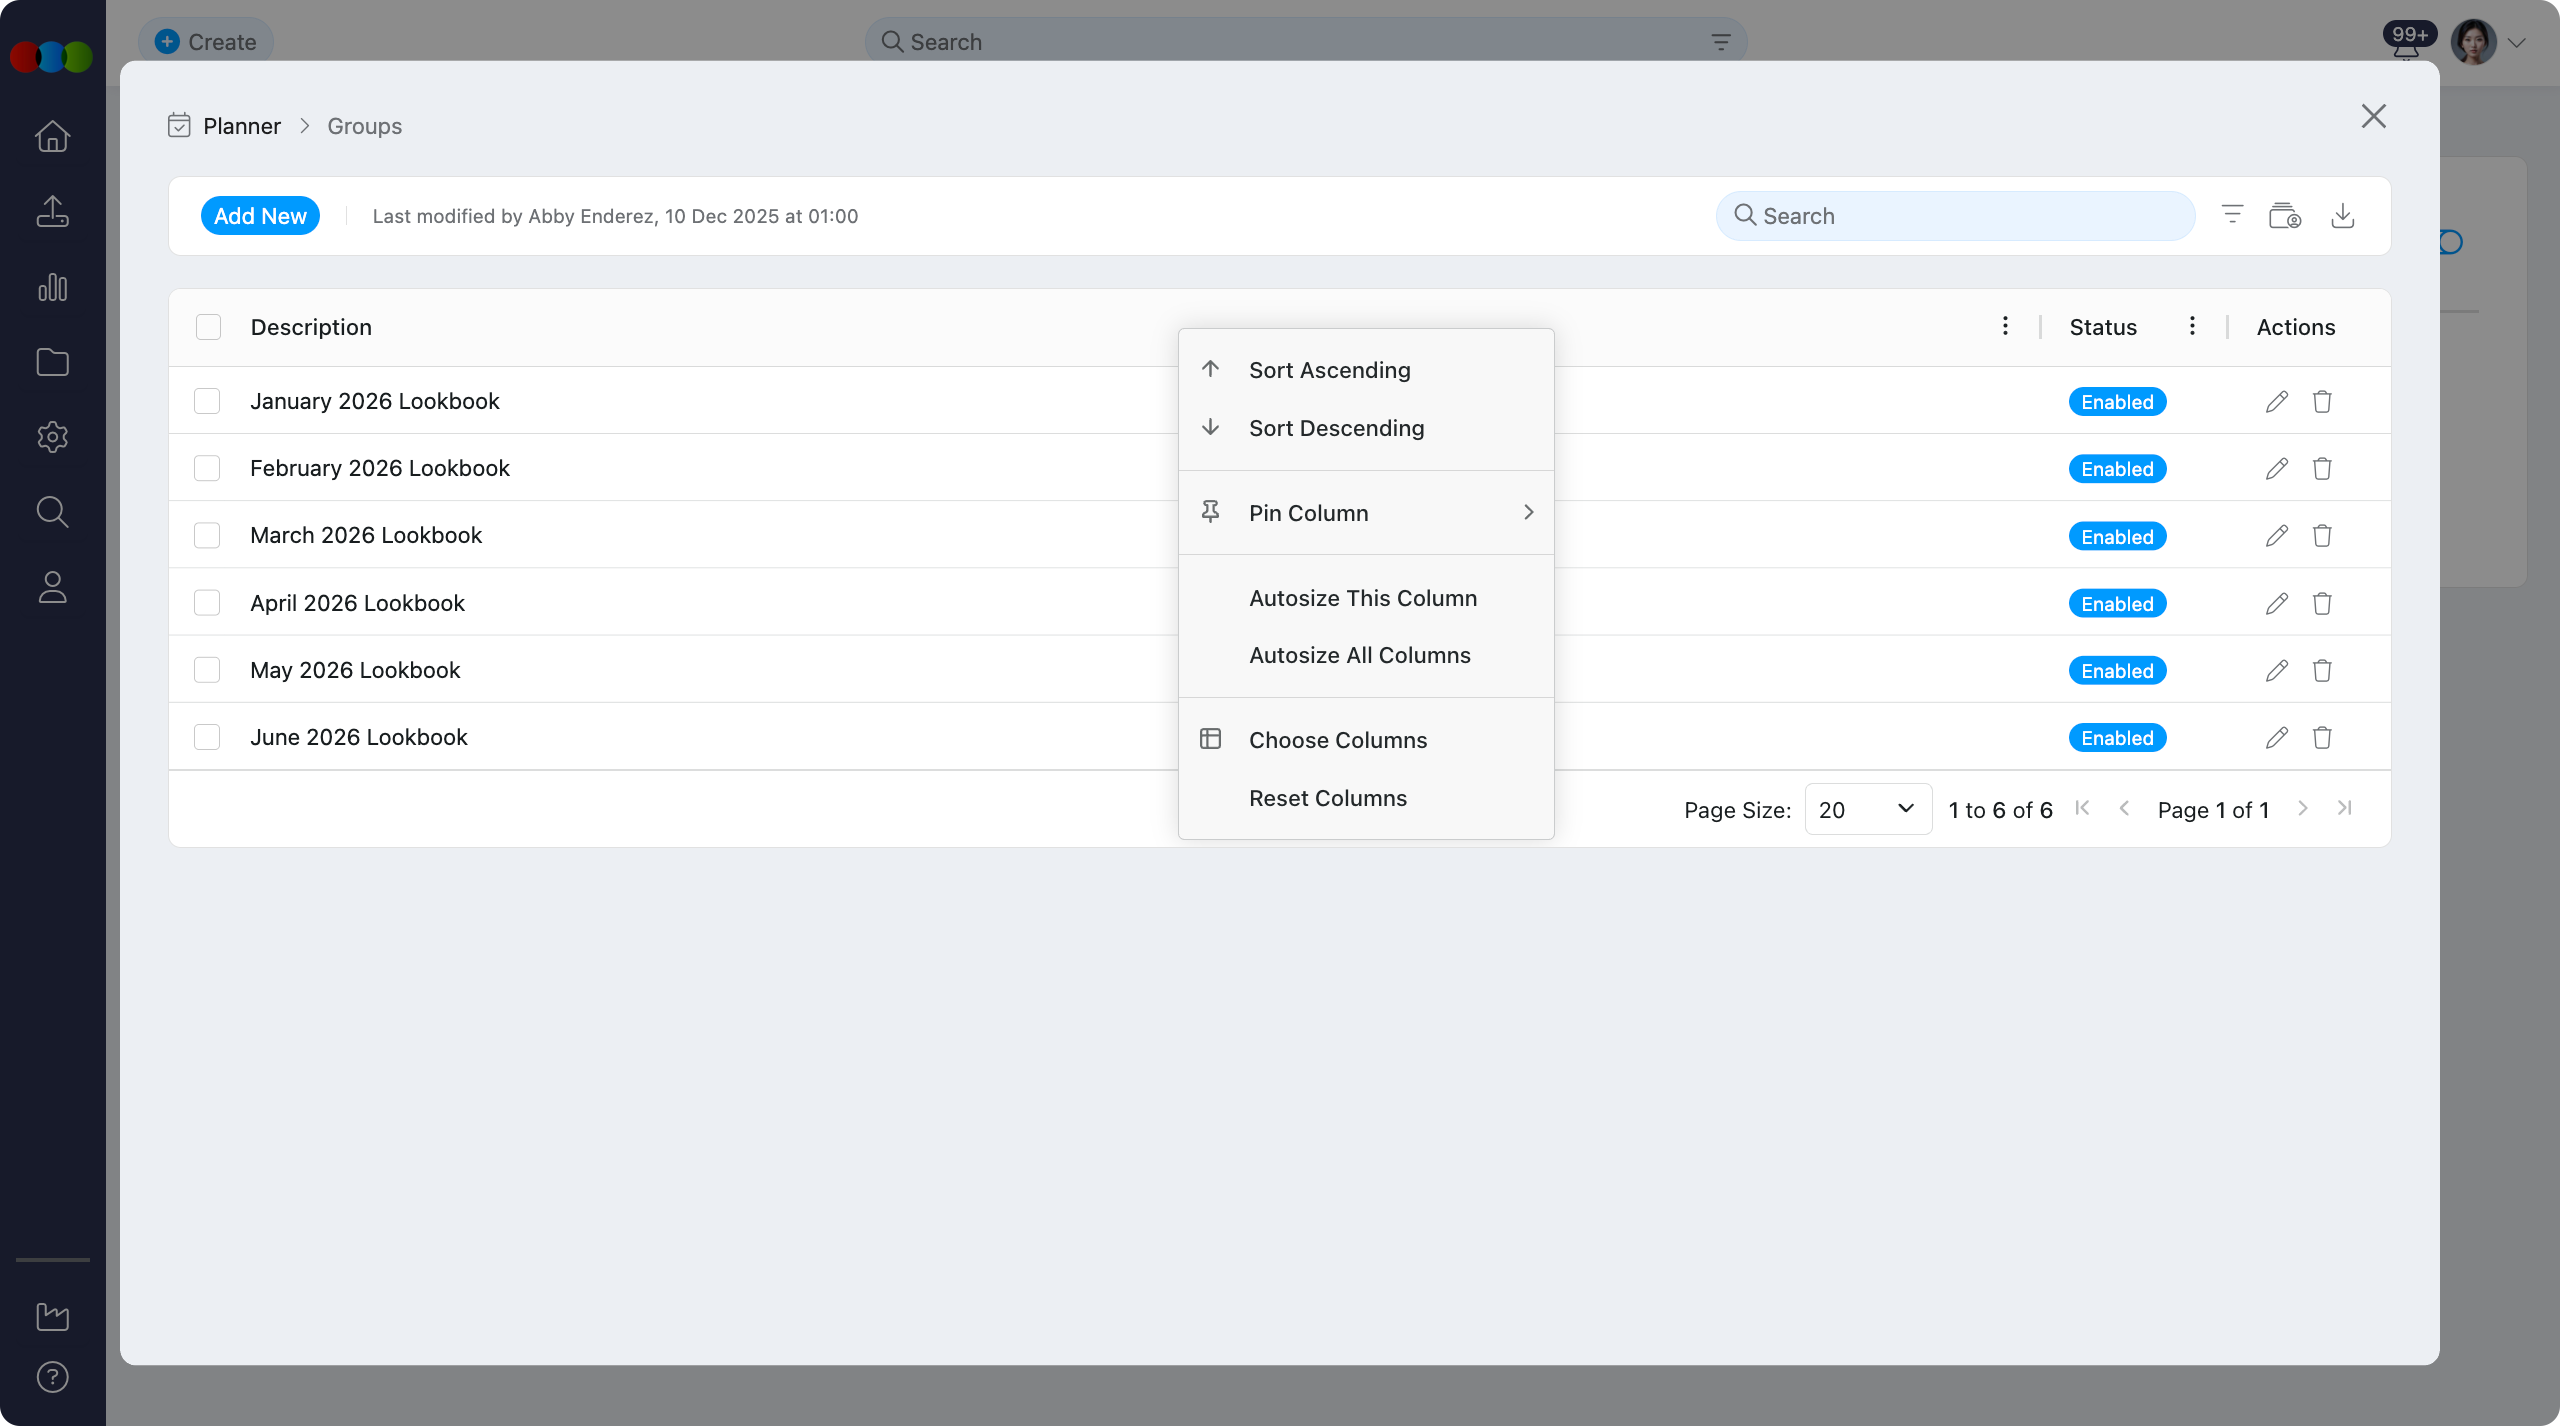
Users can customise the target budget table layout with the following options:
| Feature | Description |
|---|---|
| Sort by | Reorder by name, margin, or last modified. |
| Pin Column | Lock essential columns for persistent visibility. |
| Autosize Column | Auto-adjust columns to fit content. |
| Choose Columns to Display | Show or hide columns as needed. |
| Reset Columns | Return the table to the default layout. |
Tips
- Start with broad filters (e.g., Brand) before adding narrower filters (Category or Type) to avoid duplicate or conflicting group definitions.
- Name groups with a clear convention (e.g., Brand – Category – Type) so planners quickly understand what each option will filter.
- After adding a new group, switch to Planner > View > Groups and confirm it returns the expected styles before sharing with the team.
Troubleshooting
Why didn't my Site Settings change update an existing planner?
Groups already copied into a planner keep their captured base filters. Admin template changes apply to newly created plans only.
Steps to resolve:
- Create a new plan if you need the updated Admin base filter
- If the existing base filter is already broad enough, use plan-level additional filters in Planner > Styles to narrow the current plan
Why does my group return zero styles?
Filters may be too narrow or style Definition data is incomplete.
Steps to resolve:
- Edit the group and remove filters one at a time to see which constraint fails
- Fix missing Brand, Category, Collection, or Department values on styles
Where can I prove who edited a group?
Steps to resolve:
- Use the history download referenced in History Logging on this page
- Pair the export with your change-control ticket